Categories
Residential Painting

When and Why Use Oil based Paint Over Water Based Paint?

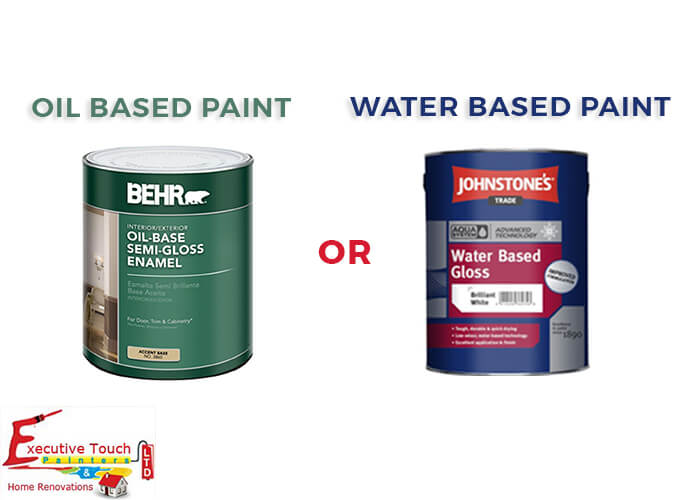
Painting your house is a project that is taken most seriously by every homeowner. While selecting paints for the home they often get confused about the paint choice to be made. Choosing between Oil based and Water based colors is a big task for the owners. Both types of paint have their advantages and disadvantages.

Water-Based Paints :

Majority of the paints sold or used today are water-based. Latex paints do not use solvents, and the primary carrier of the pigment is water. The paint requires 48 hours to dry and has a minimal odor. Acrylic paints also release fewer VOCs during the drying process.

Advantages of Water-Based Paints
  • Low VOCs
  • Easy cleanup
  • Quick drying
  • Resistant to cracking

Oil-Based Paints :

Unlike water-based paints, oil paints do not dry by evaporation. Drying process completed by oxidation, converting oil into a polymer chain. This layer is long-lasting and resistant to the degenerative effects of water and air.

Advantages of Oil-Based Paints :
  • Attractive Gloss
  • Durable and lasts longer
  • Good Leveling finish is possible
Why Use Oil Based Paints?

There are many advantages of oil-based paintings. They take much time to dry and so give a glossy look to the surfaces. Oil paint forms a hard enamel on the surface and is more resistant to scratches, fingerprints and other stains. We can coat with new oil paints on existing oil-based colors as they quickly adhere to each other. Oil-based paints are most effective on rooms or surfaces that receive more traffic. Painting with oil-based paints looks much better, simple, and beautiful than the surfaces painted by the water-based paints.

When Should You use Oil Based paints?

Oil paint can be used in any situation of painting but needs some extra time to work. In a house, there are some areas where oil-based paints are preferable.

  • Interior and exterior trim
  • Doors
  • Cabinets in the kitchen and other places
  • High moisture rooms in the home like kitchen, bathrooms, etc.
  • Places where you like to have glossy finishing

How to Use Oil Based Paints?

  • Painting with oil paints is different from painting with water-based paints. Follow these tips while going for oil-based painting.
  • Always use high-quality brush recommended for Oil painting only.
  • We cannot use the brushes after painting with oil paint, so try to use disposable ones.
  • While selecting paint, be careful and always take the help of a professional.
  • Go for environmentally friendly paints, like those which emit less VOCs.
  • Make sure you give enough time for the first coating to dry, usually takes from 24 hours to 48 hours.
  • Before the final coating, sand the surfaces, to see the imperfections.

Conclusion

Oil-based paints are more efficient than Water-based paints. Oil paints give a glossy and beautiful finish to the surfaces. Painting with Oil-based is a hard job, but it pays off for the work you have done. Confused about choosing between the paints? Our experts at Executive Touch Painters in Toronto are always there to help you. Contact or Call us Now! at 416-410-0164 for more assistance.

Categories
Interior Painting

Why is My Bathroom Ceiling Paint Peeling, Cracking or Bubbling

Why is My Bathroom Ceiling Paint Peeling, Cracking or Bubbling

Peeling of paint is a common problem, particularly in areas where there is a lot of moisture, such as a Bathroom or Kitchen. Peeling is unsightly, but more importantly, it allows the decay of the surface. Over time, moisture can destroy walls and ceilings, so it is essential to address the problem as quickly and thoroughly as possible. The problem can occur at any time after painting, maybe after some days or years.

Peeling occurs when moisture enters between the paint layer and the surface underneath. To stop the process, you have to seal the surface and prevent the moisture from coming.

Main Reasons for Paint Peeling

Water :

Water causes the paint to get detached from the surface, resulting in bulging, cracking and peeling. The water can enter the surfaces through roof leakages and also be the result of permeable walls allowing water to penetrate into the walls.

High Humidity and Excessive Condensation Conditions :

High moisture causes a build-up of moisture on walls which heads to the blistering and bulging of the coatings. The result is cracking and splitting of the layers. On the other hand, condensation causes dampness which favors the increase of mold and fungus.

Poor Surface Preparation Before Paint :

For paint to stick properly, the surfaces are to be coated with primer adequately. If applied on uneven or non-primed walls, the color gets blistered and peels off. So the preparation of the surface is most important.

High Temperature and Effect of Direct Sunlight :

High temperatures make the paint to dry quickly and does not allow it to form a bond with the surface. On the other hand, intense sunlight makes oil paints fragile and vulnerable to cracking. Both latex and elastic paints expand and contract when exposed to the sunlight, weakening their adhesive bonds.

Incompatible surfaces :

Some paints do not go well with some types of surfaces. Oil paints do not go well with concrete and galvanized steel, resulting in damages. New or poorly cured wood also prevent adhesion. Flat or shining surfaces also have compatibility problems with some paints. Mechanical adhesion is hard to form on these surfaces, and any color applied to them flake off immediately. Special care is to be taken while preparing the popcorn ceiling for painting.

Different Coatings on the Same Surface :

Some paints do not bond with each other. Oil-based paints do not bond with latex based, and alkyd paints cannot bond with latex paints as well. Blistering occurs by applying both the colors on the same surface.

Too many Layers :

If too many layers are attached to a surface, the paint becomes heavy and can end up falling off. If there are no firm adhesive bonds to support the weight of the layers, the coating falls off immediately.

Low-Quality Paints :

Poor quality paints do not have the right adhesion property. The poor adhesion does not allow for bonding with the surfaces and peeling occurs. Low sticking property is also the main reason for blistering.

Wrong Paint on the Wrong Surface :

Some paints are designed for a particular surface only like there are different paints for wooden surfaces, metallic, concrete and plastic surfaces. The primer is also essential for the paint to stick to the surface. There are specific primers for specific surfaces also. Therefore, using a wrong primer and wrong paint can also lead to the peeling problem.

Use of Expired Paint :

While purchasing paint for your house, be sure to see the expiry date. If you use expired tint on the surfaces, then there are fewer chances that the paint sticks to the walls, leading to peeling.

Corrosive Substances :

There is a most chance that the paint gets peeled off when a corrosive metal or substances get in contact. The corrosive materials form blisters and bubbles on the paint surface. Good examples of these substances are acids used for cleaning bathrooms.

Poor Application Methods :

Applying thin layers of paint on the surfaces also leads to peeling of the paint. Use of wrong brushes fails to create a strong between tint and the surface. Lack of reliable bond creates cracks, blisters and peeling on the surfaces.

Extreme Dryness :

Extreme dry conditions also cause the paint to peel off from the surfaces. Dry situations do not allow the paint to form a stable adhesive bond with the surfaces.

A Coating that is Too Old :

With time, the cohesive bonds of a coat become stronger than the adhesive bonds and cause the layers to detach from the surface. Old paints lose bond strength and become brittle with time and subject them to cracking and chipping.

Conclusion

Kitchen or Bathroom ceiling paint peeling is a common problem in every house. Now that you have known all the reasons that are causing your paint to peel, crack and bubble, you learned the importance of avoiding this in your home or property.

Let our experts at Executive Touch Painters take the risk of you and make your bathroom or kitchen ceiling in Toronto to stop peeling. Contact us via online for a free estimate now! Or call us at 416-410-0164 for more assistance.

Categories
Exterior Painting

What is Caulking Windows

Window caulking is the process of sealing off cracks around a window with a waterproof sealant. Well-Done caulking protects your home from moisture intrusion, heat leakage and entry of insects and ants.

Benefits of Caulking are :

  • Reduces energy wastage
  • Cleaner home
  • Protection from water damages
  • Protection from outside insects and ants

A professional painter knows the fact that painting and caulking go hand in hand. Be sure to start the painting work after filling all the cracks and gaps.

Where can the Caulking be used?

Mostly used at door frames and windows, caulking can be used to seal the other parts in the exterior of your house. The most common areas are

When to Caulk :

Most of the homeowners do caulking in the winter season to avoid the loss of heat energy generated from the heaters. Caulking is also ideal for fall temperature conditions. If you are working on saving energy in winter, start the process before winter commences.

Types of Caulk :

Caulks are available in different varieties. The most preferred is the latex or silicone caulk. Latex is easy to remove, and silicon withstands extreme temperatures. If the homeowners tend to remove the caulk frequently, then latex is the best choice.

Apply Caulk :

Apply new caulk after removing the existing caulk. Another option is just filling the gaps that are present and leaving the present caulk as it is. Always use a caulk gun to apply the caulk. Caulk is applied in the gaps by holding the gun at 45-degree angle. You should be sure to cover all the gaps and areas where air can seep through.

Simple, Common Mistakes to Avoid in Caulking :

1. Not Selecting the right Caulk:

When it comes to selecting the caulk always go for the best one, you get the caulk quality for the amount of the money you invest. Right caulk is essential to keep your house safe for many months or years. Silicon caulk is one of the options, and when mixed with latex, will last over 20 years and are waterproof, flexible, shrink-proof. But the main drawback is that silicon caulk cannot be painted and releases strong odor after drying. Polyurethane caulk will last long, can be painted over and adheres well and is a standard option for exterior window caulking.

2. Not Removing the Old Caulk :

Caulk tends to harden as it ages, usually breaking away from its surface allowing moisture to accumulate beneath. Without removing old caulk, you have the risk of leaving damp on the surface of the window. Use a putty knife or sharp tool to remove it. To remove the extra caulk apply the caulk removing the gel, wait for two hours and remove the caulk easily.

3. Not Using the Right Applicator :

You’ll need a good quality caulking gun to apply caulk accurately. When shopping or a caulk gun, look for a model that has a comfortable grip and a smooth plunger rod. Inexpensive caulk guns tend to apply caulk unevenly and make the job messy.

4. Applying too much of Caulk :

Don’t be tempted to add more caulk on small and thin gaps. More caulk in the gaps will look odd and also effects the painting job.

5. Skipping Smoothing Process :

This critical step ensures your job looks neat and professional. Your hand is the best tool to use for smoothing. After applying a bead of caulk, run your finger along the bead to ensure it fills the gap. Dip your finger in soapy water to ensure that caulk does not stick to your skin. We can also use an ice cube to do the smoothing process.

Conclusion

Window Caulking is one of the simplistic and most candid ways to improve the energy efficiency of your home. To get the most efficient caulking for your home and windows contact our experts at Executive Touch Painters on 416-410-0164 or via online.

Categories
Exterior Painting

Painting Brick vs. Staining Brick

Updating the color of your brick boosts your home’s curb appeal. Not to mention, it can potentially increase resale value. When it comes time for your block revamp, you have the option of either brick painting or staining brick.

Painting of bricks is the most common task performed, and it’s effortless and can be done by yourself and also requires maintenance to keep up with the look and feel of the room. Expect to repaint it every 3-5 years due to the paint peeling from the surface of the brick. If the painting is not for the vast area, then brick painting is the best option.

If you would like to change the whole look of the room or area then staining is the best choice. In staining the brick absorbs the liquid and color is formed on the surface. The technique allows the blocks to breathe and also get protection from harmful chemicals and pollution from outside.

Main Differences Between Painting and Staining are

Painting requires maintenance, Staining is permanent :

Painting needs to be done for every three to five years; this is mainly due to the painting failures like efflorescence. The paint on brick also peels off after some years, giving the signs of re-painting. In staining, the stain is absorbed by the brick giving it a permanent color transformation and does not require any maintenance.

Painting traps moisture, Staining does not :

Paint forms a layer on the pores and does not allow moisture to come out, resulting in the formation of cracks and chipping. More water enters through these cracks and damages the bricks. Staining is done by silicate materials, intended to retain the physical properties of the blocks. The pores can release the moisture and prevent cracking of bricks. By releasing the humidity, the life of bricks increases.

Painting forms a thin film, staining is a chemical reaction :

As said above, painting creates a thin layer on the bricks, not allowing moisture to come out and damages them. In staining, a chemical reaction occurs between brick and stain solution, giving a permanent color to the brick, and allows for moisture release.

Paint is a flat finish, Staining creates the new look :

Paint creates a flat finish and causes the brick to lose its natural beauty. Paint just sits on the block by creating a thin layer. Staining, on the other hand, penetrates into the masonry and forms a permanent color. If you touch a brick after staining, you can feel the brick, but in painting, you cannot.

Why and why not to paint :

Painting allows to protect the surface of the brick and we can give you colors that are not available naturally. After applying paint to a block, you have to repaint it after three years. In the meantime, the paint may peel off, losing the beauty of the brick. Furthermore, because of the thickness, moisture may be present internally that could prevent the color from sticking. Also, after painting the humidity does not get released, making cracks to appear on the surface.

Why and Why not to stain :

Staining, on the other hand, is the best option. Staining forms a new and natural look to the surface of the brick. But some blocks cannot be stained; if no stain works on them, then painting is the only option available.

Cost of paint and staining :

Compared to color, the stain is costlier. But coming to maintenance, paint requires much more than stain. No experience is needed to paint the surface of bricks, but for staining professional is needed. The color range in staining is less than compared to the painting colors. This the main drawback of staining and positive in painting.

Staining your brick house will significantly boost the curb appeal of your property, but it requires extensive planning and preparation. Painting is a simple process and also increases the curb appeal, but only to some extent. The painting is lost after some years, but staining remains on the brick permanently. More colors are present in the paint, but in stain, there are color restrictions and cannot be used on all types of bricks.

Conclusion

Obviously, there are both negatives and positives in both painting and staining brick. If you are not able to decide the one to choose, our experts at Executive Touch Painters are ready to help you. Contact us online or Call us at 416-410-0164 for more details.

Categories
Interior Painting

Can Popcorn Ceiling be Painted

Yes! Popcorn or stucco ceilings can be painted.

Painting popcorn ceilings seem to be difficult because of their unusual texture, but it’s a simple method once you know what to do.

Steps for a Better Popcorn Ceiling Painting Experience.

Room Preparation :

Prepare the room with popcorn ceiling carefully, since the surface of a popcorn ceiling is bound to create a good deal of splatter when you roll on paint. Tape plastic sheeting around the walls and cover the floors with drop cloths. Also, cover and mask any ceiling fixtures with plastic and painter’s tape. Also, prepare the ceiling edges to ensure that you will be able to achieve a beautiful corner where the ceiling meets the wall.

Wall Preparation :

If you are thinking to repaint the walls after ceiling painting, then there is no need for special preparation. If there is no painting for the walls, then spread some plastic over windows and doors. Cut out a square of plastic that extends over the window/door at least foot in every region. Take the tape and run a strip of tape along the top of the plastic over the window, and this won’t allow paint drops to access the window. In the same way, cover the floor with cloth or sheets to avoid paint stains on the floor.

Preparing Ceiling for Painting :

Popcorn Ceiling Patch is ready mixed ceiling texture you can brush or knife on to fix any small blemishes, and you should cover light fittings on the ceiling. Use your masking tape to cover the light that is attached to the ceiling, so that no paint sneaks in and gets on your light.

Choose the Right Color :

If you have some leftover paint from the previous paint job, you may need to color-match the paint to ensure a seamless appearance. Since popcorn ceiling texture tends to absorb water-based colors, it’s advisable to use an oil-based or acrylic latex paint.

Painting a popcorn ceiling can be done in two ways. The two methods are Hand Painting and Spray Painting.

Hand Painting :

In Hand Painting method rollers are used for painting. To complete the work quickly and neatly do not use a 15 mm roller sleeve, use a 20mm or 28mm one. Now add paint to the tray and begin painting the ceiling. Try to use complete movements of the roller in one direction instead of rolling back and forth using short strokes. Even coating prevents the paint from saturating into the ceiling and reduces the risk of peeling.

Spray Painting :

Fill the sprayer with paint. Apply color in two separate coats. Complete the first coat by spraying in one direction until the entire length of the roof is complete. Be sure to slightly overlap every individual line of sprayed paint to prevent dry edges from forming.

Second Coating :

After completion of the first coating, allow it to dry before starting the second coating. When rolling or spraying out for the second coating, do it in the opposite direction of the first coating. The second coat should be sprayed or rolled in the opposite direction to the first for having maximum coverage and a consistent finish.

Check out for Imperfects and Touch Ups :

If you find any flaws, now is the time to fix them since you still have everything set up. If you clean everything up and see any issue, you won’t want to get your tools out again and do the work again.

Conclusion

Painting a Popcorn Ceiling is a risky job. You definitely need an expert. Our Professionals at Executive Touch Painters have years of experience in painting popcorn or stucco ceiling. For any other painting projects contact us or visit our website. Get a Free Estimate Now via online or call us at 416-410-0164.

Categories
Interior Painting

What Color should I Paint my Stairs

The stairs are a prominent part of your house. The central stairway in your home may be located in the foyer, off the entryway, or in another prominent area of your house and you want the stairs to be good looking and reflect your style. Some decorate the staircase with carpets or altogether make the staircases with wood. Both the alternatives are good, but if you wish to add more decoration and fancy look to the staircases, just go for painting them. It is rather easy to remove paint on wooden stairs and repaint them when needed.

Why Paint the Staircases?

There are two parts in any staircase; the place usually refers to as tread, where our foot lands and the riser that is just beneath. The tread is the part where all the action is done, and the riser is the visible portion for all who look at the staircase. For this reason, most of the people try to decorate with carpets or tiles to get a beautiful look. The carpets are best but are torn after some time and tiles go out of date very quickly. Paint is easy to use and can be modified easily.

Paint can also be in different colors for the stairs, and we can change the color of the staircase when needed with less effort. But in the case of tiles, the removal and installation are very time taking and too risky.

Patterns and Ideas for Stair Risers :

As said above, stair risers are the most viewed by any person. So keep the paint of the riser simple but effective and attractive. It’s fairly customary to paint stair risers a bright, glossy white while the stair tread gets a coat of protective stain, but this is not same for all the stair risers.

  • Change the color patterns for the stair risers according to the location of the stairs.
  • Playroom stairs: If stairs are leading to the kid’s room, give the risers a fun, bright pattern to lead the way.  or
  • Paint with bold colors like yellow or blue. or
  • Paint each riser a different color to create a rainbow going up the stairs
  • Rustic Stairs: If your home is more rustic or rural, then a glossy white paint is probably not in keeping with the rest of your decor. Consider looks such as dry brushing or sanding away some of the paint in places to give it a more rustic appeal.
  • Decorative Stairs: If your home is highly decorative with lots of color, pattern, and movement, let your stairs reflect this with a patterned or faux-painted riser.
Painting Stair Risers in Dark Colour :

When you have decided to get your stairways to get painted, the common question arises, what color should I paint my stairs? A lot of stairways and risers get painted in white or off-white, cloud white being the default choice. Lately, darker colors even black are being used with some excellent results. The look is so dramatic that the staircase itself becomes the center of attraction of the house.

Other cool ideas for Staircase painting :

If you don’t like dark colors and white glossy paint is also not your choice, then go for other painting ideas.

  • Paint them a soft color like gray, cream, or taupe to soften their appearance.
  • Use matte or eggshell paint rather than the high gloss paint.
  • Try to match the wall color next to the stairs to blend the risers in with the wall.

Conclusion

Stairways are always a significant part of your home. Decorating them should be done carefully and with the help of an expert. Contact or Call our professionals at Executive Touch Painters to guide you on painting and renovation of your stairways. or Get Started with our Free Estimate.

Categories
Home Renovations

How to Drywall a Basement Ceiling

When working to complete and finish the house basement, the ceiling commonly proves to be the most tedious task. Installing basement drywall ceiling is the most cost-effective techniques to cover the floor joists and beams, and finishing your basement ceiling properly.

Basement Drywall Installation Process requires precise measurements and enough strength to undertake.

Steps to Prepare a Dry Basement Ceiling

Measure the area :

Before starting the process, make sure you have the correct measurements of the ceiling. Have the exact dimensions and then decide on the number of drywall sheets that are required.

Clean and repair the walls :

For basement drywall installation process you must have a surface which is free of oils and other substances. Choose a cleanser that is pH-neutral. Use a light-bristled scrub brush to scrub the walls. Rinse the walls with clean water and allow them to dry. Make sure that are no cracks and holes in the walls. Clean and repair all of the cracks and fixtures you located. Fill the cracks and small holes using joint sealant.

Hang full sheets of drywall to the basement ceiling :

Start from a corner of the basement and mark the position of the joists on the sheet. Have someone help you secure the drywall up to the basement ceiling, while you install it. Keep the drywall sheet in the desired place of the basement ceiling with one hand, and then drill with the other hand. Now drill into the joist. Move to the opposite corner and drill in another screw. When you have 3 or 4 bolts drilled, bring your hand down and drill in the other pins.

Make cuts in Drywall and hang the cut pieces :

Some parts of the basement ceiling need small pieces of drywall. Estimate the dimensions and label them on drywall. While hanging the pieces start with the smaller pieces and then go for the larger pieces.

Make cuts for the fixtures in the ceiling :

Do not forget there will be some lighting fixtures in the ceiling. Before fixing the drywall make sure that you make cuts for all the fixtures in the ceiling. Also, look out for any obstacles that are present and make cuts accordingly.

Taping and covering with mud :

After the drywall is hung onto the ceiling, see that ceiling joists are available for support. In addition to these joists, drywall screws are also used to have the drywall in their correct places. After fixing the bolts with a screw gun, cover all seams with drywall tape and mud. By coating with mud, we can get the finished product to be more smooth and ready for the primer application.

Conclusion

Basement Drywall Installation Process is a complicated task which can make things messed up in a way that cannot be undone. You need a Professional for a perfect drywall basement ceiling installation. Our experts at Executive Touch Painters have years of experience in basement renovations. So, Contact or Call us Now at (416)-410-0164 for a Free Estimate to know the cost of Drywall basement ceiling for your home.