Categories
Exterior Painting

How to Paint a Garage Door in Toronto?

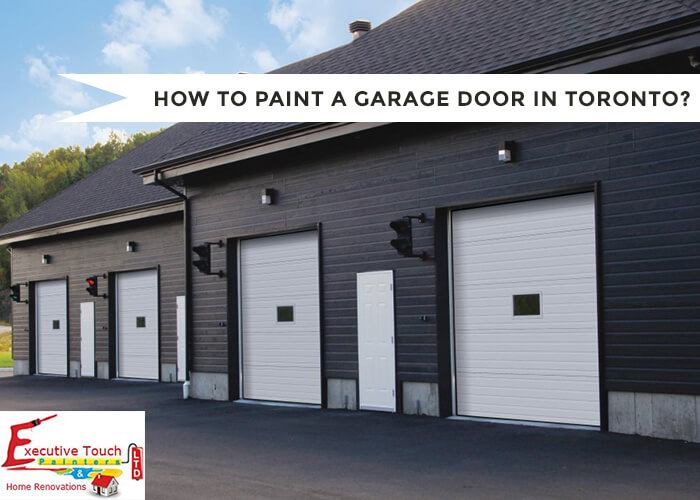
The garage is not only the place that protects your vehicles and other things from the harsh environmental elements, but it is also a prominent exterior for your house. Just as you take care of your interiors and exteriors, you should take care of the garage door and protect it from rusting and fading out. Garage door needs to be painted from time to time.

Materials Required for Painting :

  • Primer
  • Paint
  • Paint Roller
  • Paint Tray
  • Rags
  • Cleaning Solution
  • Painter’s Tape
  • Sandpaper for Cleaning
  • Cleaning Cloth

Steps For Painting Garage Door

1. Pick Up the Right Color :

The paint on the garage door should match exterior of your house. If you have an attached garage, blending the color of the garage door with the majority of your house color, would work correctly. Choose the color that blends well with the other exterior objects present outside the house like mail-box, porch floor or the shutters around the window. The paint should be selected based on the type of material the door is made of. The doors of the garage are generally made of wood, steel, fiberglass, and vinyl.

2. Cleaning and Preparation :

Before painting, be sure that there is no dirt or debris present on the surface of the garage door. If the door is metal, then it’s advisable to use abrasive scouring sponge for the cleaning. After the cleaning process is completed, seal the borders of the door by using painter’s tape, you can also seal the area of the door that you would not like to paint. To protect the driveways from the paint spill, put down tarp or damp cloth on the surface.

3. Apply the Primer :

Before applying the paint, coat the surface of the door with a primer. You can use the paint roller or brush for applying. It acts as an adhesive between the surface of the door and the paint color. If you avoid primer, then there is a chance that the paint gets peeled off in a matter of a few days. So select the primer based on the paint.

4. Applying the Paint :

Let the primer dry before the paint is applied. Get the paint ready in a paint tray and using a roller, apply the paint onto the surface of the garage door. You might not be able to paint the whole surface with the roller. The small patches that are left out can be filled by using a paintbrush. If you are in an idea of having a second coating, then apply the first coat vertically and the second coat should be applied horizontally. This creates a professional look to the surface.

5. Finishing :

Once the painting is completed, leave it to dry. Remove the painter’s tape attached to the surface of the door. You should remove it well before the paint is dried up, else the paint will peel off with the tape.

Some Tips Before Painting the Garage Door :
  • Be sure that the weather is clear before the process is started.
  • You can use a paint gun to paint the metal doors of a garage.
  • Start the paint job early in the morning, so that you have time in the evening.
  • Be sure that the surfaces are clean before and after applying the paint.

Painting Fiberglass Garage Door

Before painting the Fiberglass door, clean the door with a deck cleaner. Using sandpaper for cleaning may release fiber particles into the air. After the cleanup is completed, apply the primer and paint using roller and paint brush. Use at least two coatings of paint to get a smooth finish.

Painting Wooden Garage Door

The painting of a wooden garage door can be done quickly using a paint sprayer. Before painting, remove flaking, paint peelings, and bad wooden parts using a scraper. Apply caulk to the cracks present on the door. Fill the holes with wood filler where the rotten wood was removed. Sand the patched areas and apply the primer first and then paint using the sprayer. Multiple little coats can be coated on the wooden garage door to get a smooth finish.

Painting the Steel or Aluminium Garage Door

Ensure that the aluminum or steel garage door is clean before painting. The most efficient way to clean a metal door is through pressure washing on both sides. You need to see that all the dust, dirt and cobwebs are cleaned off the surface. Painting of metal door is the same as painting other garage doors. You need to follow a separate process to paint a galvanised steel garage door. Use long strokes to apply a single coat on the surface. Let the surface dry before applying the second coating. If you want an even coating for the door, you can apply the paint using a roller. You can try different patterns on the aluminum or steel garage doors using the paint brush.

Know more about the steps to paint an aluminum siding or garage door.

What Type Of Paint For Vinyl Garage Door?

The three factors to consider while painting a garage door are :
  • Type of Door
  • The Color you would like to paint
  • Size of the Garage Door

Type Of Paint:

Either oil-based or latex paint can paint most of the metal and wooden doors. But for vinyl doors, extra precautions are to be taken. Take the help of a professional to know the exact paint that will adhere to the surfaces of the vinyl doors. The type of primer you use should also comply with the kind of paint used. The color chosen for the garage door should blend with the exterior of the house.

The Cost to Paint Garage Door:

Cost for painting a garage exterior door vary with the size of the door, job quality, and the time of painting. The price is calculated based on the area to be painted. Additional fees are charged for typical designs done on the doors.

Conclusion

A well painted and good-looking garage door can improve your home’s curb appeal in a matter of a few hours. Painting this also protects from external elements like wind, rain, and sunlight thereby making your parking door rust proof. Hire our professional exterior painting services in Toronto to turn your garage door as your neighbor’s envy. Contact or Call (416)-410-0164 to get in touch with Executive Touch Painters in Toronto today.

Categories
Home Renovations

How To Sand Stucco Smooth?

Smooth Stucco Vs. Rough Stucco

Rough stucco was the most used for interior and exterior surface till the late 80’s. But today rough stucco is not a preference to most of the homeowners. Rough stucco is outdated due it’s rough look and touch. So many are opting for the soft stucco. If your home already has rough stucco, then know how to sand stucco smooth with simple steps.

Materials Required

  • High Grit Sanding Paper
  • Primer
  • Smoothing Filler
  • Light Grain Sanding Paper
  • Smoothing Trowel

Steps for Converting Rough Stucco into Smooth Stucco

1. Smooth the Surface:

Using a high grit sanding paper, sand down the rough stucco to as smooth as possible. The smoothing process is to be completed before applying the other products.

2. Wash off the Surface:

Wash off the surface of the stucco wall using a hosepipe. Make sure you remove the entire dirt. Allow the surface to dry.

3. Apply the Primer:

After the surface is dried completely, it’s time to apply the primer. Use a roller to apply the primer on the surface of the stucco wall. Apply a thick coat of the primer to fill up cracks and uneven spots on the surface of the wall. Let the primer dry overnight.

4. Apply the Smoothing Filler :

Now it’s time to apply the smoothing filler to the stucco wall filled with the primer. The application is made with smoothing trowel. Use stokes to create an even and flat appearance. After the first coat is dried up, use the second coating to fill up the gaps and smooth out the inconsistent areas.

5. Sand the Wall:

After smoothing and drying process, Sand the wall using light grain sandpaper. The sanding process is done to get a smooth and polished look on the wall.

6. Finishing:

After all the sanding process is completed, remove the dust and give one final finish to the wall using the smoothing trowel.

Does Smooth Stucco Finish Crack?

Just like the concrete cracks, the stucco also tends to crack. The cracks happen mainly due to the stress on the surface. The stress can be internal or external. The internal stress is caused due to the poor drying process of the stucco and external stress is due to the external forces applied on the surface of the wall.

How can we Reduce the Cracks?

Reduce the cracks on the stucco by allowing it to dry for some time. Use the fiberglass mesh finish coating before the installation.

Can the Cracks be Repaired?

Professionals can repair the cracks on your smooth stucco wall. If you want to do it yourself check our previous article on how to repair stucco.

Conclusion

Stucco leaves a good impression and smooth texture to the interiors and exteriors of your house. If you find any cracks on the surface of the stucco wall or if you need a professional to sand your rough covering. Contact our experts at Executive Touch Painters in Toronto. Call us at (416)-410-0164 to get a Free Estimate Now!

Categories
Home Renovations

Wood Fence Repair Mississauga

There is a saying that good fences make good neighbors. Install a fence to your house to increase its value. Many materials can be used for fencing. These materials have made the fence installation inexpensive and also readily available. The fences define the demographic border of your home or office premises. The introduction of other materials like vinyl has provided an alternative to the wooden fences. For the decoration of barriers, materials like wrought or ornamental iron are used to remove the dull look of the fence.

If you live in a house that has already a fence, then you should ensure that the fence is well maintained. It is essential that you perform periodic repairs on the fence so that the fence stays long for many years. There are specific measures to be taken for the wood fence maintenance in Mississauga.

Choosing the Best Material for Fence :

There are many materials with which the fence for your home can be designed. You should consider the climate of your area before selecting the material for your fence. If your area is prone to harsh climates like winds or tornados or hurricanes, then your material must be a position to withstand the climatic conditions. It is essential that the material also withstands the long winter seasons.

Here are Some of the Most Well-Known Materials used for Fences

Wood: With numerous varieties of wood available, you can use wood as a material for the fence. Little interest and research can do wonders on the wood of your fencing.

Metal: Metal fencing also comes in a different selection of materials. Varieties of metal fencing include chain links and wrought iron decorations. Wrought iron brings a look of classic fashion and elegance to your fence.

Why Choose Wood Instead of Other Materials?

Fencing protects your yard from various things and also defines the border of your property. So the fence and the material used should be strong and durable. Wood is the standard material choice for fencing. Pressure treated wood is best for your house as it can withstand all climatic conditions.

Best Wood for Fences in Mississauga

Pine, Fir or Spruce :

Pine, Fir, and Spruce are the most used wood for fencing due to the best durability and affordability. Spruce is generally used for stockade, prefabricated or picket style fences.

Redwood :

The most expensive material that can be used for fences, but uneconomical when used for long fences. Higher grade redwood is the most durable and resistant to insects and rot.

Cedar and Cypress :

Cedar contains natural oils, and Cypress has natural chemicals present in them. This property of Cedar and Cypress makes them most resistant to rot and insects. Due to the resistant property, the fences made of cedar and cypress have more lifespan than the other wooden fences.

New Fence Installation :

A new fence adds safety, privacy, and style to the exterior of your home. The fencing to your home must be done carefully with the use of durable and stylish materials. Characteristics like lattice panels will give you the appropriate amount of privacy and style so you can enjoy your beautiful yard in peace.

Factors To Be Considered Before Laying a Fence :

The function of the fence: A well-designed fence protects your yard from harsh winds and acts as security for your home. The fence also prevents your pets from escaping.

Style of the Fence: The design of the fence should compliment the architecture and landscape of your house.

Privacy: If you are seeing for more privacy in your yard, then use fencing materials like wood or vinyl.

Know the Exact Boundaries: You need to know the exact boundaries of your property to install a fence in the area.

Termites and Fire issues: In an area that is more prone to termites and fire accidents, ensure that your fence is termite and fire resistant.

Types of Fencing :

Timber paling: These types of fencing are versatile and easy to work and install.

Screen Fencing and Privacy Screens: These type offenses are becoming popular these days and give an excellent look to the yard.

Steel Fencing: These fences are termite resistant, so can be used where there is a scope of having more termites.

Classic Picket Fencing: These are eco-friendly fences made of timber and can be very special to your home.

Conclusion

A well-maintained fence adds unique beauty and protection to your home. The maintenance pattern depends on the type and material used for the fencing. If you are looking to install a fence or thinking of repairing it? Then contact Executive Touch Painters for wood fence repair in Mississauga or Call us at (416)-410-0164 to get a Free Estimate Now.

Categories
Commercial Painting Residential Painting

Differences between Residential and Commercial Painting

Most of the people think residential and commercial painting work is the same. But there are lots of distinctions between them. Residential painters provide personal home painting services, whereas the commercial painters step in when the task is too big for the residential painters. Know the main differences between residential and commercial painting and painters.

What is Commercial Painting?

Not only the painting of industrial buildings and offices, multi-family residences and apartments also come under Commercial Painting. The painters are equipped with more tools and required to paint large areas at a time.

What is Residential Painting?

Residential painting is just used for the painting of exteriors and interiors of a simple house. Residential painters are experienced in conducting painting work for small houses and know all color combination that will be best for your house.

Commercial Painting vs. Residential Painting

Based on the following factors the type of painting contractor can be chosen for your property.

Number of Painters:

In Commercial Painting large works are conducted compared to residential painting. So it requires more workforce for this kind of projects. The commercial painters mostly work in big apartments, restaurants, and other commercial buildings. Commercial painting companies employ more people so that the work can be completed at the scheduled time.

A Residential Painting Company is confined to paint only small houses. So there is no need to have many employees. In some cases, the whole house need not be painted, so only a few residential painters are sent to complete the small work.

The quantity of Paint:

When compared to residential painting, the amount of paint to be used is very high for commercial painting. As more paint is used, the time taken for completion of the work is also more. Whereas in home painting, the paint needed is very less and the work is also completed in very less time.

Experience:

A Commercial painter is more experienced than a residential painter. Even a homeowner can do the painting of his house, but it is not the case in commercial painting. For commercial buildings, the look is essential, and only an experience commercial painter can bring the look.

Residential Painters are well experienced in talking with the homeowners and know exactly what type of work or paint is required. The painters are also experienced to protect your furniture and flooring while the painting work is carried out.

Time Scheduling:

Commercial painting is done according to the schedule of business owners. Some commercial building owners appreciate the painters for not interfering with the working hours. Most of the industrial painting work is scheduled after the working hours and even night shifts are done to complete the job. But in the case of residential painting, the painters typically work from Monday to Friday and do not work on weekends, even if the work is pending.

Range Of Services :

A company offering only residential painting, will not have many services to offer. But Commercial Painting companies have other services like flooring installation, faux finishing, electrostatic painting services, and sandblasting.

Conclusion

Whether it is a simple painting job for your home or a large scale painting project for your business, you need a professional painting contractor in Toronto. Because these companies will have the right tools, machinery, and workforce to handle any size of a job. Executive Touch Painters offers expert residential and commercial painting services in Toronto since 1989. Contact or Call us at (416) 410-0164 for a Free Painting Estimate or to know more details.

Categories
Exterior Painting

How To Paint Vinyl Siding?

What is Vinyl Siding?

Vinyl Siding is a plastic siding that can be installed on the exterior of any house. Long strips of PVC are combined to form an outer shield for the house, and the cladding can be used for decoration purposes also. Vinyl Siding the most opts for exterior selections as it’s very economical and requires less maintenance.

Can You Paint Vinyl Siding?

In due time, the siding fades out or becomes worn out. When the siding fades out, the often concern of the homeowners is that “Can I paint the vinyl siding?“. Most of the people come to the conclusion that vinyl siding cannot be painted and thus go for changing the faded vinyl siding. However, Vinyl Sidings can be painted and can be repaired. Vinyl has the property of contracting and expanding depending on the temperature. So all types of paint will not go well with the vinyl siding. But Painting vinyl has its benefits and beautifies the exterior of your home.

Best Paint for Vinyl Siding

Vinyl expands and contracts when there are climatic changes, and this might create gaps at the seams. So the Paint to be used for vinyl siding is to be selected very carefully. Every type of vinyl is designed to absorb a certain amount of heat from the surroundings. So the light paint colors should be chosen for the sidings. If dark colors are selected, the heat absorbed would be more as dark colors would absorb more heat. This overheating causes the vinyl to warp or buckle.

Type of Paint to be Used

Now in the market, a wide range of vinyl-safe colors are also present to reduce the heat absorption of sidings. Many of these types of paints are a mix of urethane and acrylic resins. The combination of these paints gives more flexibility and excellent adhesion.

Painting Vinyl Siding

Applying paint to the vinyl siding improves the durability of the siding and also adds beauty to the exterior of your house. It is easy to paint the siding as it is effortless to clean and paint dries quickly. The other advantage is that the siding does not retain moisture.

4 Simple Steps to Paint your Vinyl Siding

Cleaning :

Before starting the actual painting process, you have to remove all the debris and dust present on the surface of the siding. Using a scrub or by power wash, you could clean the surface and remove all the dirt, mildew, chalking and other residues.

Priming :

The vinyl surface does not need priming but if the surface is degraded, pitted, porus and the original color is worn away, then you should use a primer. The primer makes the surface ready for the paint.

Paint Selection :

As said above, Use special exterior paints like latex for the vinyl sidings. The specific compounds in the paint have elastic property, and this helps the color to remain on the surface and withstand the contrast and expanding property of the vinyl siding. Other paints do not have this property and get cracks in no time.

Applying the Paint:

  • Use a roller or sprayer to apply the paint on the surface of the siding.
  • Apply the paint evenly on the surface. Be sure that the paint layer is not too thick.
  • The corners of the siding can be painted with a paintbrush.
  • After the first coating completely gets dried, apply the second coat.

Benefits of Painting Vinyl Siding

Conclusion

Painting vinyl siding is not a complicated task; you don’t need to be fear of doing it. But it requires few days, some professional tools and some labor to get the job done right.

If you think you don’t have much time and skills and want to take the help of professional exterior painters to paint your Toronto home, Contact Executive Touch Painters or Call at (416) 410-0164 to get a Free Estimate.

Categories
Interior Painting

Painting Baseboards Like a Professional

It’s challenging to paint up your room and baseboards if you are having carpet spread over the place. There are many chances that the paint will fall on the mat and paint is not that easy to clean up from the surface of the carpet. It’s very tricky to paint the baseboards without getting the paint on the carpets.

Materials Required to Paint Baseboards:

  • Sandpaper for Cleaning
  • Tack Cloth
  • Putty Knife
  • Paint Brush
  • Paint Thinner
  • Required Paint
  • Clear Varnish
  • Wood Fillers for Filling Gaps

What Type of Paint Should You Use for Baseboards?

Baseboards are often subjected to most dirt and dust, so the paint should be easy to clean. You can use semi-gloss paint for the baseboards. Semigloss paints offer a bit of sheen and also easy to clean.

What Color Should You Paint Your Baseboards?

There are different approaches to choose colors after installing your baseboards. The color of the baseboard trim must compliment the wall color. Use light or dark shades to that of the wall color. It is also advisable to choose the same color as that of the wall.

Steps to Follow for Painting Baseboards

1. Protect the carpet with Drop Sheet :
  • Before starting the painting work, cover the main areas of carpet with a drop sheet.
  • Tuck Painters tape under the baseboard.
  • Make sure not to damage the baseboard or gouge while attaching the drop sheet of the painter’s tape.
2. Clean the Surface before Painting :

Dust always accumulates at the bottom of the walls. It’s essential to clean the surfaces well before starting the painting process. Use trisodium phosphate(TSP) to remove all dirt and grease from the walls. TSP is a non-toxic powder that can be used in your households for cleaning. Mixing the powder with water forms an effective cleaning solution.

3. Fill the Gouges and Nail holes :

Before starting the paintwork, be sure that there are no gaps on the baseboards formed by the nails. Fill up the big holes and dings with spackle and allow it to dry. Now using the sandpaper clean up the areas, you have repaired.

4. Painting the Baseboards :
  • As the gaps and holes are filled up, use a vacuum cleaner to remove the dirt and clean up with a damp cloth.
  • Now since drop sheet and paint tape protect the carpet, it’s time to start the painting.
  • Using a paintbrush paint all the baseboards with the color you like.
  • Dip the paintbrush into the bucket and see that there is no excess paint on the brush. It’s essential that the paintbrush does not drip.
  • While painting on the bottom of the baseboard see that you apply only small strokes and avoid dripping of paint onto the carpet.
  • Immediately wipe off any mistakes use a small cloth.
  • Apply a few more coats if necessary.

Conclusion

Painting of Baseboards is a very tedious job, and you should be very careful in trimming and painting all the surfaces at a time. The painting work is also time taking and it needs a lot of patience to handle the job. If you do not have that much time, then contact our Professionals at Executive Touch Painters for having your baseboards and walls painted without any hurdles. Call us at (416) 410-0164 for a Free Estimate!

Categories
Home Renovations

Painting Oak Cabinets

Painting an oak cabinet is not as simple as painting other types of wood. You can change the look of the oak cabinets, and a whole kitchen renovation may not be needed. A fresh coat of right paint at the right time would bring a new life to your kitchen once again. Oak is that type of wood whose grains are visible even after painting. You cannot hide all the grain of oak cabinet, but with some careful steps followed you could cover the visible grain.

Steps to be Followed for Oak Cabinet Painting

Preparation of the Oak Cabinets for Painting :
  • With the help of the screwdriver, carefully remove all the cabinet doors. Make markings to identify for which cabinet is fitted with which door.
  • To remove all the impurities and dirt, clean the cabinet doors with trisodium phosphate. This chemical is found in all the hardware stores.
  • Allow the wood to dry from the chemicals applied for cleaning.
Cleaning the Oak Cabinets :
  • Now it’s time to clean the Oak Cabinets.

Using a sandpaper clean the surfaces of the cabinets. After completing the sanding, clean off the dirt using a soft cloth.

  • The cabinet should be clean before primer is added to the surface.
Applying the Primer :
  • Prime the surface of the cabinet with the selected primer.
  • Apply one coat of Primer and allow it to dry.
  • Lightly apply the sandpaper to remove the grains and go for a second coating of Primer.

If a Professional painter advises you to apply thick primer for proper filling of the oak surface, then use a thick primer for the surface.

  • Do the same process for the doors of the cabinet.
Applying the Paint for the Doors and Cabinet :
  • Apply a coat of latex paint for the cabinet doors and drawers of the cabinet.
  • You can use roller or sprayer for applying the paint for the cabinets and doors.
  • After the first coating is completed, allow the paint to dry for at least one day.
  • You can apply further coats of paint if necessary, but a second coating is a must.
  • Let the coat to dry for at least one week before the doors are installed on to the cabinets.

How to Hide or Minimize the Visible Grain on Oak Cabinets

Spackling is the best process to eliminate or minimize the grain of the cabinets.

  • Using a knife apply a thin layer of sparkle to the surface of the cabinets.
  • After a few minutes of drying, using the sandpaper, sand the surface of the cabinet to leave a smooth finish to the cabinet surface.
  • After the sanding is completed, wipe away the dust using a smooth cloth.
  • After removing the dirt, only spackle will be left on the little crevices of the wood grain.
  • This process makes the surface smoother allowing the primer and paints application easier.

Conclusion

Painting oak cabinets seem simple at first, but to hide all the visible grains, your kitchen cabinets need professional hands. We at Executive Touch Painters in Toronto offer expert kitchen renovation services in which cabinet painting tops our list. Contact or Call us at (416)-410-0164 to get a Free Estimate to paint your oak cabinets today.