Categories
Interior Painting

Painting Pressure Treated Wood

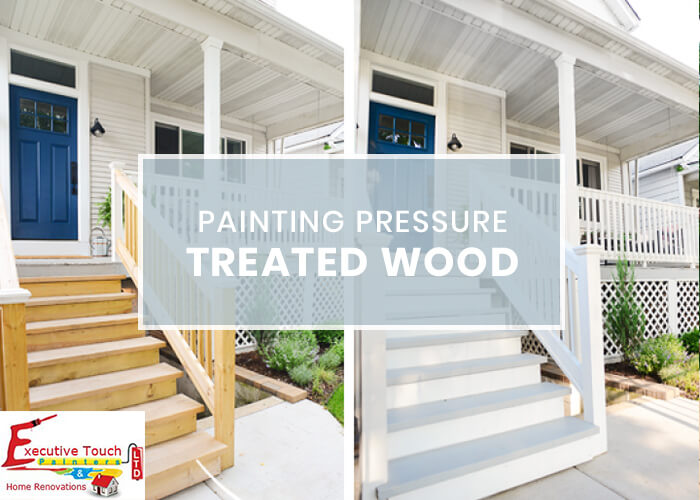
What is Pressure Treated Wood?

Pressure treated wood is the type of wood that has been treated with chemicals to protect the wood from harsh environmental changes. So, it is resistant to rain, wind, bugs, and mildew and good for outdoors. Pressure treated wood is the best material for fences and it is also comfortable to repair the wooden fences than the fences made of other materials like steel, iron etc.

Can you Paint Pressure Treated Wood?

Yes, It is completely paintable, but the painting job must be done properly, otherwise, your coat of paint will eventually start peeling. Also, More time and a large quantity of paint are needed to complete the work.

Steps for Painting Pressure Treated Wood

For ultimate results, there are some necessary steps to be followed while painting pressure treated wood which is discussed below.

1. Clean the Surface of the Wood :

Maybe you think cleaning the pressure treated wood is not necessary, but what if the wood has accumulated dust and debris. So, Clean the surface with soapy water and a brush to scrub off the dirt present on the surface. Scrubbing is to be done in the direction of the grain and wash it with water.

2. Wait for the Wood to Dry :

Regular pressure treated lumber dries within few days, but some might take more time depending on the type of chemicals that are used for the treatment. Painting on a wet surface is waste as the paint quickly peels off from the wet surfaces. Sprinkle water on the wood to test if the surface is dry or not. If the water is soaked into the layers of the wood, then the surface is dry. If the water rests on the surface as needed drops, then the surface is not dry, and you have to wait for some more time for the wood to dry.

3. Apply the Primer First :

As per the regular painting projects, here also the primer is applied before the actual painting. The primer takes time to dry than the regular surfaces. Make sure to use a primer that is suitable for the pressure treated wooden surfaces. Remember that for primer or paint, thin coats dry quickly. Pressure treated wood has resistance to liquids, so always follow the instructions on the primer container for a better finish.

4. Let the Primer to Dry :

After applying the primer, allow it to dry for some time. Luckily, the drying process may not take more than a day or two depending on the type of primer used. Do not go for painting until the primer is thoroughly dried. For the treated wood the time may be little more, allow the primer to dry for a day or two for better results.

5. Painting the Surfaces :

The final step in the process. Paint the surface of the pressure treated wood after the primer is thoroughly dried up. Latex paints are the best paints for the wood surfaces. Oil-based paints have a resistance to the surface of the pressure treated wooden surfaces. The proper painting on the surface of the wood will last for few years without damages. If you see any damages, then repaint the surfaces. If you are not in a situation for repainting the surface regularly, then you can go for staining process. Other than paint and stain, a protective sealant can also be used to apply on the surface of the pressure treated lumber.

Conclusion

The pressure treated wood is a special type of material that is to be maintained with more care. As its surface is resistant to elements like dust, heat, and water, the proper application of paint allows it to last for longer times. So, taking the help of a professional is a wise decision to paint treated wood. Executive Touch Painters in Toronto offers expert interior and exterior home painting services since 1989. Contact or Call 416-410-0164 at to Get a Free Painting Estimate Now!

Categories
Floors

What are the Different Types of Flooring Trends in Toronto?

Flooring is the most critical decoration that is done for a house. The type of floor you choose forms an indispensable element of your interior design. The difficulty of the installation depends on the material you have selected. Each material has its unique features, qualities, benefits, and advantages. You may choose the flooring variety based on your usage, level of finishing, and budget. In this article, we are presenting the various types of flooring trends in Toronto.

Different Types of Flooring Materials Used in Toronto

Ceramic Tile Flooring :

Ceramic Tile Flooring Trends in Toronto

One of the oldest types of flooring available for the homeowners. The tiles come in a wide range of colors and shapes also. Tiles are easy to install and give a glazed look to the house. Some of the types of tiles available are vitrified tiles, ceramic tiles, etc.

Hardwood Flooring :

Hardwood Flooring Flooring Trends in Toronto

Wood is a particular item that never goes out of style. Hardwood material is known for its warmth and beautiful look. Proper maintenance can have the hardwood floor to last up to 20 years. Increase the value of your property by using hardwood for flooring.

Engineered Hardwood :

Engineered Hardwood Flooring Trends in Toronto

Engineered hardwood is a more reliable and cost-effective solution to that of traditional wood. At the same time, it provides the same look and appearance as the hardwood. Its moisture-resistant nature makes it install over concrete basements.

Laminate Flooring :

Laminate Flooring Flooring Trends in Toronto

Laminate flooring is formed as layers by combining various materials. These type of floors are heat resistant and perfect for homes with heavy traffic and pets. Easy to clean and install.

Carpet Flooring :

Carpet Flooring Trends in Toronto

Carpets made of wool, synthetic fibers are used as flooring materials. These are available in different textures, colors, sizes and also different materials. The mats are easy to clean and can be removed for cleaning. Carpet floors are mostly moisture resistant.

Vinyl Flooring :

Vinyl Flooring Trends in Toronto

Vinyl is available in different patterns and colors. The surface of Vinyl flooring is so smooth and imitates ceramic tiles floors. The advantage is that they are easy to clean and have more durability.

Stone Flooring :

Stone Flooring Trends in Toronto

Stone flooring is also a traditional flooring technique which has its beauty and natural look. The type of stone to use will depend on the climatic conditions of the place. There are various stones to choose from like the limestone; granite, marble etc. Their hard surfaces increase their longevity.

Cork Flooring :

Cork Flooring Trends in Toronto

This type of flooring is the best for play areas or commercial spaces. Cork flooring is costly flooring material but provides a comfortable space for walking and standing.

Choose Your Flooring Type Room by Room

Each room in your home needs a different floor type because every area has its requirements and usage. Find out which flooring material suits a particular place.

1. Bedrooms :

Bedrooms are exceptional for any house. So flooring should also be unique. Carpet is the traditional choice for most of the decorators. These are very comfortable in any bedroom. But in the latest fashion, hardwood and engineered wood are also becoming popular among the bedroom flooring. Laminate is also another better choice for this private room.

2. Living Rooms :

The living room is the area where you spend most of the time, and it receives most of the traffic in the house. Hardwood flooring is the best option for flooring in the living rooms. Take Laminate and Engineered wood as options for having a chic look in these welcoming places.

3. Kitchen :

Another room in your house that has more traffic and food spills. Tile, Vinyl and hardwood flooring would be the best, as the floors are very easy to clean. Vinyl and tiles also come in different styles and colors, and you have a wide range to choose from.

4. Dining Rooms :

You use dining rooms for having food, and your floor may witness accidental food spills. Here the floor should be in such a way that it could be resistant to spills and comfortable to wash or clean. Carpet is the option available but does not go for light colors as food spills are visible and do not look nice. Wood and laminate floorings also create a warm atmosphere in the dining halls.

5. Bathrooms :

Bathrooms are always filled with water and humidity. So floorings that can withstand moisture are to be chosen for this private room. Vinyl and Ceramic Tiles floorings can resist them, and these have been the alternatives for many years. But today improved laminates are also enduring excessive moisture conditions, so laminate flooring is also the best choice available.

6. Family rooms :

Family rooms are always filled with relatives or friends having a chit-chat and having lots of fun. The flooring also should be comfortable to handle the footsteps. Here also the carpet could be the better option. Use Hardwood and Engineered wood for everlasting appearance.

7. Basement Areas:

Basement area is mostly cold and filled with moisture. So the flooring should be well insulated. Carpet makes the floor softer and more comfortable. Vinyl, Hardwood, and Engineered wooden flooring are also other options available for the basement flooring.

If you are thinking for floors that have a varied appearance and structure, consider flooring types like Chips, Glass, Mosaic, Brick, Concrete, Linoleum, Acid Resistant, and Rubber etc.,

Conclusion

Flooring materials choices in Toronto are forever growing, and the broadest range of materials are available. Depending upon the budget, Styles, and colors you can pick your stuff for the floor. Contact Executive Touch Painters, a professional painting, and home renovation company in Toronto since 1989 for more assistance in choosing the right material, expert floor installations, Refinishing and Renovations or Call at (416) 410-0164 to book your Flooring Estimate for Free.

Categories
Floors

How to Fix Warped Hardwood Floor?

Hardwood flooring is most common in the homes of US and Canada. But homeowners face the problem of dampness in the house that leads to damage to the floor. Prolonged water flow can cause severe problems like warp, buckle and cup the hardwood flooring. The issues caused can lead to the expensive and time-taking restoration process. Not all the damages require repair works; some can be done by merely dehumidifying the floors. The key is to identify and rectify the water leakage problem as soon as possible.

Causes for Hardwood Floor to Warp or Buckle

Wood warp causes when it gets wet and swells and dries out and contracts. The warp does not happen in fully finished wood flooring because there is no chance for the moisture to get on the floor. The hardwood floorings are protected against humidity by installing vapor barriers. If the barriers are not installed correctly, then vapor might enter the wood and cause warping. Not even wetness, excessive dryness can also cause the wood to shrink and create gaps between the boards on the flooring.

What is Cupping and Wood Floor Cupping Causes?

Cupping is a milder form of damage caused to the wooden floor. In cupping the edges of the wooden plank get curled up, and the middle of the plank shrinks. This is mainly caused due to the moisture imbalance in the room. The cupped floor does not look good in the room, but the cupping is reversible. Cupped floors can be repaired by just restoring the normal humidity conditions in the place. You need to take regular steps to restore the exterior wooden items of your house.

How to Repair Your Buckled Hardwood Floor

1. Find the Water Source Causing the Problems

The primary cause of cupping and warping is water leakages that might be present in the room of the hardwood flooring. Look for the leakages or any other reasons like spilling of the water or standing water that never got cleaned up. All these reasons can be the cause of cupping or warping of the wood in the hardwood flooring.

2. Fix Minor Warping and Cupping in the Rooms :

For fixing the minor warping problems in the wood, you need to control the moisture conditions in the place. Excessive dryness or dampness can cause the wood to warp and cause serious problems. Set up a dehumidifier in the basement where there is dampness to pull out the moisture out off the planks.

3. Sanding the Planks:

If the warping of your wood floor is due to some drastic humidity changes or a simple water spill, then sand the solid hardwood up to 1/4 inches of its current thickness.

4. Replacement of the Planks :

If the warp of the wood is medium or large, then it is better to replace the plank with a new one. If not removed, the dampness will spread to the other planks and cause them damage too. Replace the plank with the same type of wood species, color, and size. Nail down the new plank with the same installation technique used for other planks. To avoid warps in the wooden planks choose a laminate or engineered wood.

Read on this article to know more about Refinishing or Replacing of your Hardwood Floor.

Conclusion

Warping and cupping are severe problems for hardwood floors. Damage to a single plank could be a grave risk to all the other planks. So it’s essential to see that there are no warps on the floor. If there are any, necessary steps have to be taken to repair them. The homeowners can fix minor cups, but severe and significant warps can be corrected with the help of a Professional Contractor. If you are unable to find the cause of your buckled floor, Contact us for a Professional Floor Inspection for Free! If you are looking for expert floor renovation, refinishing, replacement or installations in Toronto and all over Canada Call Executive Touch Painters at (416) 410-0164 for a Free Estimate Today.

Categories
Home Renovations

How to Stain a Deck like a Professional?

Decks are exposed to the harsh climatic conditions like heavy rains, winds, and sunlight. UV rays penetrate through the wood and damage the inner layers. So to protect the wood from damaging staining process is conducted. By staining the original beauty of the deck can be restored.

Follow These 7 Simple Steps for Staining a Deck in your House.

1. Examine the Current Condition of the Wood:

Before you start the process, check if the wood can absorb the stain or not. Conduct a simple water testing. Sprinkle water on the deck; if the wood absorbs the liquid, then the deck can be stained. If the deck does not absorb the water, then there is no need for staining at present.

2. Prepare the Deck :

After the testing process, now make sure that the deck is clean and dry. Stain applied to the wet surfaces does not go well, and cracks can form in the future. The surface of the deck should be free of dirt and debris. Clean and rinse the wood surface with water and let it dry for 2-3 days.

3. Choose the Right Stain for the Deck :

There is a full range of stains with different colors available. Choose the best from the available stains. Types of stains available for your decks

  • Wood Toned and Clear Stain
  • Semi-Transparent
  • Semi-Solid
  • Solid Stain

If you need clear and transparent view use Clear or Semi-Transparent Stains. If you need a rich and vibrant finish, then you can go for the Solid stain colors. In transparent and semi-transparent stains the grains and texture can be seen. In solid stains, the stain completely hides the wood grain while allowing very little of the wood texture to show through.

4. Have a Plan for Staining :

Always determine the starting and ending points of the staining process. Be sure that you can quickly enter and exit from the deck during the staining process. Be sure that you are not stuck in a corner while the other parts of the deck are drying.

5. Protect the walls :

Decks are attached to the exterior walls. So staining process can be complicated without touching the edges of the walls. To ensure that walls do not get stained, protect the walls with painters tape. Attach the tape to the places where the decks and walls meet.

6. Add Stain to the Tray :

Stir the stain in the container using a paint stirrer. Ensure that the stain is mixed well before the stain is applied to the deck. Pour the stain into the paint tray for starting the staining process.

7. Apply the Stain to the Deck using the Paint Pad :

Apply a solid coat of stain to the deck surface using the paint pad. If the paint pad does not cover the inside spaces, then use a paintbrush to complete the staining. Leave the stain to completely dry for 24 hours before placing your furniture on the deck.

Tips for Staining
  • Apply the stain when the temperatures are average and avoid the process in direct sunlight.
  • Do not go for staining if there is rain in the forecast.
  • Before applying the stain, test it on a small area and see if you are satisfied with the color or not.
  • If you are using different colors, ensure that they are mixed well before applying.
Conclusion

Decks are often subjected to lots of pressure and traffic from people. So it’s necessary that they are maintained correctly from time to time. Staining process should be done regularly for the exterior decks. For inspirations, ideas and Professional Painting & Home Improvement Works contact Executive Touch Painters in Toronto or Call at (416) 410-0164 Today.

Categories
Home Renovations

5 Simple Steps for Exterior Wood Siding Restoration

Wood performs an essential role in the construction of exterior and interior of house elements. The wooden items are to be taken care of regularly otherwise there is a chance that the wood begins to deteriorate. Even the best wood types can become prey to the exterior dust, humidity, and heat from the sun. Can you restore the wood structure if it is in the right shape? Yes! Follow the below 5 Simple Steps for Wood Siding Restoration like a pro.

5 Important Steps to Follow

1. Remove the Old Paint on the Wood :

Before the actual restoration process has begun, the paint on the wood has to be removed. The paint removal is done to see what are the damages in the wood. To have the paint removed, use tools like heat gun and putty knife. Do not use gunfire that emits fire as it can damage the wood. Use an electric gun that emits heat only. The heat emitted from the gun cracks the paint on the wood, then using the putty knife have the paint removed. It’s not easy to remove all the paint at once. Remove part by part by using the heat gun and putty knife. Continue the process unless all the damages can be seen clearly and you are sure that the paint from the wood is completely removed.

2. Sand and Fill the Exterior Wood :

Once the scraping of paint is completed, check for the areas where the wood got damaged and repair them. In the process use a wood filler to fill all the gaps you meet, cover the loose gaps using caulk. After the gaps are filled up, wait for sometime for the fillings to be dried out completely. The sandpaper can be used to remove any unwanted materials formed during the filling and caulking process. After the completion of the sanding wash the wood materials by using the garden hose.

3. Repair and Restore the Wooden Structures :

The decorative wooden items have many joints and connections. Exposed joints can be broken and lead to the whole damage of the structure. So use procedures like re-gluing, clamping, tightening, replacing on loose screws, nails, and wood strips. Using galvanized fasteners inhibits rusting. Refinishing is another option available for repairing the old wooden flooring or items of your house.

4. Apply Primer :

After the complete washing of the wood items, it’s time to get it painted. Even before painting, the primer is to be applied to the surface. Before the application of Primer, the surface should be dry and free from impurities. Select a high-quality primer and also the color of the primer should be matching with the paint color that you wish to paint on the wooden surface. Apply the primer evenly on the wooden surface. Go for another coating if the first coat of the primer does not help in saturation of the wood.

5. Protect and Beautify with Paint :

The paint helps in protecting the surface of the wood. So be careful in selecting the paint. Gloss paint protects from moisture and humidity. The paint should be applied to the primer for getting a smooth and desired finish. If you are painting for wood items outside the house, then its better to go for UV protection paints, so that the paint protects the wooden items from the harsh UV rays. But make a note that even the most expensive paint cannot protect the structure for a lifetime, so repainting is to be done every 3-5 years.

Conclusion

Maybe it is a wood siding, a deck, a fence or any other type of wooden structure the restoration can be done easily by following the above wood siding restoration process if it is in a decent shape. But the restoration of some moderately damaged wooden structures definitely requires expert hands. If you came to know that you require a professional contact Executive Touch Painters in Toronto for customized carpentry and trim works or call us at (416)-410-0164 now to book a free estimate.

Categories
Home Renovations

How to Install Crown Molding?

One of the excellent ways to add beauty to a room is to use crown moldings on the walls. The installation process is however complicated for the homeowners to do by themselves. With proper research and right tools, homeowners can do the work on their own. The appropriate molding selection plays the vital role in the cutting and installation of the molding on the walls. The color of the molding should match with the color of the walls. Wrong moldings and contrast colors can affect the beauty of the wall and room.

Tools Required for the Installation :

  • Crown Moldings
  • Miter Saw(Electrical)
  • Measuring Tape
  • Drill, Hammer, and Nails
  • Caulk and Wood Filler
  • Pencil for Marking
  • Stud Finder
  • Fine Grit Sandpaper

Instructions for Installing Crown Molding :

1. Choosing the Molding for the Room

First, you need to choose the correct molding for the room. The moldings are available in different colors and shapes in the market. You should select the molding according to the requirement of the room. Most of the people tend to choose moldings with more carving details in them. If the work is done by a professional, then you can select the molding with detailed carvings. If you have chosen to do the work by yourself, then be careful in choosing the molding. The molding must also be matching to the colors and decorations of the room.

2. Take the Measurements of the Wall

Using the measuring tape, take the exact measurements of the wall. Make a note of all the measures on a paper. With the help of stud finder, find all the studs and a pencil marking on the stud. The marking is to make as you should nail the moldings to the studs. If possible try to select the moldings precisely as the measurements of the wall.

3. Cutting the molding

The most critical job in the installation of the molding. Most of the cases the angle between the moldings would be 45 degrees, and the cutting would not be a tough task. (Read our previous article on How to Cut Crown Molding)

4. Installation of the Moldings

Nail the crown moldings to the walls. Be sure that you hammer the nails precisely to the studs that you have marked. For the installation at the corners blocks, see that the cut moldings are fitting correctly with the ones on the adjacent side.

5. Filling the Nail Holes and Caulking

After attaching the moldings to the wall, fill the holes formed by the nails with the wood filler and use the sandpaper to make a smooth finish. If there are any gaps between the moldings, fill them with the caulk. Make a smooth finish using the fine grit sandpaper.

Kitchen Cabinet Crown Molding :

Installation of moldings in a kitchen room is a good idea, and also it updates the appearance of the cabinets of the kitchen. Crown moldings in the kitchen too add value to our home at the time of selling.

Here are the Steps for Installation of the Crown Moldings on the Kitchen cabinets

1. Measure: Take the length of the cabinets where you wish to install the crown moldings. Take the precise measurements, and you can always purchase a little extra length of molding than the required.

2. Cutting: As per instructed in the above procedure make the cuttings required, with the miter saw. The crown molding angles are mostly 45 degrees for the edges. Make sure that the cut pieces are fitting into each other exactly.

3. Installation: Place the molding on the top of the cabinets and with the help of hammer and nails, nail the molding into the place. Make sure the nails are nailed correctly so that the molding does not come out of the wall. Be careful at the edges of the walls and cabinets. The cut moldings should fit into one another perfectly for a smooth finish.

4. Caulking: After completing the installation, use the caulk to fill up the gaps. You can also use wood glue to seal the holes. Use the sandpaper to remove the excess caulk and wooden glue present after application.

Conclusion

Installing Crown moldings on the walls and cabinets of the kitchen is the very tough job that cannot be completed by the homeowners themselves. So, you need to hire an expert for the job. Our Professionals at Executive Touch Painters are always there to help you in crown moldings and all other types of home renovations in Toronto. Call us at 416-410-0164 or Contact us for more details like the cost etc., and get a Free Estimate Now!

Categories
Home Renovations

How To Cut Crown Molding

Crown molding is the piece of wood that sits in between the corners of the wall and ceiling at about 45-degree angle. The moldings can be at the bottom or the top of the corners. Cutting the moldings is not tricky, but could be if the walls are not exactly square in shape.

Tools you need for Cutting the Crown Molding

  • Miter Box
  • Pencil
  • Coping and Handsaw
  • Dowel
  • Combination Square
Steps for Cutting the Crown Mold
  • Insert the crown molding in the miter box with bottom edge facing upwards. Hold it at an angle, to fit against the corners of the base and ceiling. Now cut the side at an angle of 45-degrees. The edge that is on the bottom of the box is the longer edge.
  • Now remove the saw from the pair of the notches and insert into another pair so that it’s played in the opposite direction.
  • Miter the edges in the same way for a smooth finish.
  • Use a coping saw to fit crown moulding in inside corners that aren’t square. Begin by cutting the edge of one section of molding at a 90-degree angle and securing it in position with that end flush against the wall.

Tip: If you wish to paint the edges, use acrylic latex caulk to fill up the imperfect gaps.

How to Cut Inside Corner of Crown Molding?

1. Measure the Angle of the Corner between the Walls :

Use a Protractor to measure the exact angle of the edge. Most precisely the angle would be 90-degree, must measure the correct angle. Make sure that the protractor is placed parallel to the bottom and ceiling, to get the right angle. Cut each of the two crown molding pieces at half of the measured angle to make them fit precisely in the corner.

2. Cut the Right Side Corner :

Set the compound miter saw to the required angle. Place the piece to be cut on the bed of the saw and cut while you held the mold with your left hand. Be sure that the bottom of the molding should be up when you make the cutting. Do not turn the saw while cutting, as it might change the angle.

3. Cut the Left Side Corner :

Now set the angle again on the miter and make the cutting of the left corner. Place the molding on the bed of the saw and while you held the mold with the right hand, make the cut. Here also the bottom of the molding should be kept up while cutting and also the saw should not be turned while cutting.

Warning: Take precautionary measures when working on the miter and saw.

How to do Crown Molding Outside Corner Cuts?

1. Mark the Length Required :

Marking is the crucial step to be done carefully. Measure the length of the crown needed for the outside corners of the walls. Using a tape, measure the dimensions of the outer edge where the molding is to be fitted. Mark the lengths clearly with a pencil.

2. Determine the Angles :

Using a large protractor measure the angle between the outside corners. Note down both outer angles from each corner of the wall.

3. Cut the Molding using a Miter Saw :

A miter saw is a device needed now. The miter saw is used to cut the crown mouldings at the particular angle that is required. Set the required angle in the miter saw and cut one of the moldings. Pick up the second molding piece and perform the cutting by placing it upside down on the saw. Pick up the two pieces and check if they fit on the outside corner perfectly. Usually, the angle for cutting the moldings is 45 degrees.

Now that you came to know about how to cut crown molding, follow the next step of installing crown molding here.

Conclusion

The above-mentioned instructions on how to cut crown molding will be helpful if you had some previous experience in using the sharp tools, else it is a wise decision to get your job done by a professional because a single mistake made in the process can create a whole mess and will result in the loss of material, money and of course your valuable time. Our Professionals at Executive Touch Painters and Home Renovations Ltd has got years of experience in various custom carpentry and trim work for residential and commercial spaces in Toronto. Contact or Call us at 416-410-0164 for a Free Estimate Now!