Categories
Interior Painting

How To Paint Interior Doors?

Painting an interior door of your house is a do-it-yourself project that can be completed quickly. As most of the interior doors are heavy and hard to move, most people attempt to paint the door in place, instead of taking it off its hinges. The best way to correctly paint a door is to place it flat on the sawhorses. Always seek the help of a professional or paint store to determine the amount of colour that is required to paint a door.

Steps to Achieve a Perfect Finish to the Door

1. Preparing the Work Area

Before sanding the surface, all the hardware on the door is to be removed. Place the hardware like knobs, plates, and lock mechanism in a bag, so that it is easy to replace them after completing the paintwork. If it is not possible to remove the hardware, then you could use painter’s tape or two coats of rubber cement, which can be removed easily.

If there are holes in the door, then cover them with putty. Clean the dirt and grease on the door using sponge saturated in tri-sodium phosphate.

2. Sanding the Surface

After cleaning the interior door, it is time to sand the surface. If the door already has oil-based paint with latex, then you need to sand it very lightly.

3. Adding Primer

Apply a coat of good quality primer on the surface of the door. Generally, a water-based gloss primer is suitable for all types of wooden doors. A good primer will help the paint to glide on the surface more smoothly. Check for instructions and see how many hours it will take for the primer to dry.

4. Start Painting

Use broad and even strokes to paint on the surface of the door. To create a smooth finish, avoid going back onto the areas that are already painted. It is recommended to apply two coats of paint and allow the first coat to dry before going for the second coating.

5. Put Back the Hardware

After the paint is thoroughly dried up, put back the hardware on the door and fix them. If you have removed the door from hinges, place the door back into its place after the paint has fully dried.

Painting an Unattached Interior Door

Steps to follow for painting an unattached door

1. Removing the Door

Remove all the hardware present on the door. Pull the lower hinge pin out using a screwdriver and hammer. Ask your helper to hold the door in place as you drive out the pin. Now for painting on the surface of the door, place the door on sawhorses.

2. Painting the Door

Always use the recommended paint types for the wooden surfaces. Use good brushes to paint on the panelled doors by following a particular order. First, paint the recessed panels, next horizontal rails and lastly, paint the vertical stiles. By following this order, there is no chance of leaving unnecessary brush trails.

3. Let the Door Dry

If a second coating is needed, wait for the first coat to dry. Before the second coat, make sure to sand the surface lightly and wipe with a cloth.

4. Seal the Bottom with Wood Sealer

To prevent moisture from entering into the surface of the door, use a clear wood sealer to seal bottom edges. If there is no sealing, water will cause the wood to warp and swell, making it difficult for closing the door.

Painting an Attached Interior Door

It is easy to paint an attached door. Follow these steps for painting.

1. Apply Paint to Inside Top Panels

At first, apply colour to the inside of the top panels. Paint by working with the grain of the surface. Paint the recessed areas first and then move to the faces of the panels.

2. Paint the Vertical Center Stile

If the door has vertical center stile, then paint this part and blend in the brush marks from the center stile while painting the horizontal rails.

3. Paint the Vertical rails and vertical stiles

Now starting from the top, paint the rails to the bottom. After completing rails, paint the vertical stiles beginning from the left side. Keep the line as straight as possible while painting the surfaces. You could use a brush or roll to paint the door.

Painting Flat Door

Remove all the hardware on the door, and it is not necessary to remove a flat door from the hinges. Removing the doorknob and others will make your work easier and faster. You could use a roll or brush for interior door painting. For painting the edges around the hinges, use a small thin brush to get a smooth finish.

Conclusion

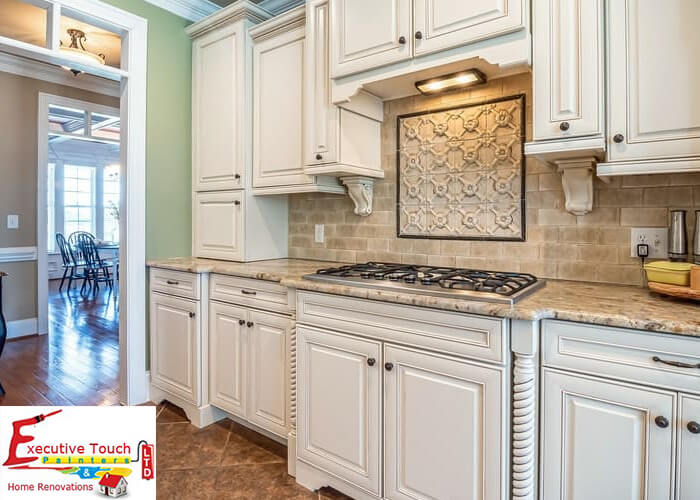
At Executive Touch Painters, we provide Interior painting services and also help you in selecting the best colours that are perfect for your house interior. Our services include wallpaper installation, cabinet painting, crown mouldings, family rooms painting, and kitchen renovations. For a free consultation, call us at 416-410-0164 today.

Categories
Exterior Painting

Exterior Stucco Painting Toronto

Stucco is an exterior covering that is made by blending sand with powdered lime or cement. Water is added to the mixture until it reaches mortar-like consistency. After finishing, you get a rough-textured appearance on the surface. Popcorn surface is hard, flexible, waterproof, and gives a stylish architectural look to your house.

In Toronto, Stucco is most commonly used as an exterior covering for the past 15 years. Stucco is generally applied by hand over metal wire or lath, which helps it to stick to the surface firmly. Typically, popcorn surface lasts for years, but might get dirty and cracked easily when not maintained.

Stucco repair and painting are necessary for not only maintaining the masonry but also refresh the exterior look of your house. These two things can shield your exterior from water damages also. Our team of professional painters ensure that your home has the best exterior stucco look for years.

How To Paint Exterior Stucco?

By selecting the right painting products, it is far easy to paint popcorn or stucco. Here are some simple tricks put together to make the work easier.

1. Choose the Right Colours and Paint

Exteriors of most houses have stucco, and it is recommended that you use flat paint. Always ensure that you use high-quality paints for painting the surfaces. High-quality paints are durable and are fade resistant.

2. Prepare the Surface Before Painting

Before applying the paint, the surface of the stucco should be clean and dry without any dirt. For cleaning, it is recommended to use pressure wash and get rid of any mould or mildew present on the surface.

3. Painting

After cleaning, let the surface get dried up before applying paint. Check the instructions on the paint can before starting to paint. Some paints are to be used at certain temperatures. It is suggested that you use a large-nap roller to apply paint, which helps in getting into the spaces and holes quickly.

Benefits of Hiring an Experienced Stucco Painter

  • Knows exactly which paint is suitable for a particular surface
  • Assist you in the selection of colour and sheen of paint that is applied
  • Stucco is a great way to change the look of your house
  • Stucco contractors not only paint the surfaces but also clean or repair before the actual painting work.
What makes us Different from other exterior stucco painters in Toronto?
  • We have expertise in colour selection and help you to choose the perfect paint for your stucco exterior
  • Pull shrubs and other plants and cover them with plastic bags before painting
  • Cover all the areas not painted with damp cloths
  • Our painters are cautious to avoid trampling flower beds
  • After the painting is completed, a thorough inspection is conducted, and final touch-ups are done.

Need a Professional Stucco Contractor?

At Executive Touch Painters, we work on exterior stucco regularly, and our team has over 10 years of experience in transforming the look of your home exterior. Our professional painters will freshen the look of your exterior stucco by giving a fresh coat of paint. Are you looking to change the colour or the whole look of your exterior? Then contact us or call us at 416-410-0164, for a free estimate.

Categories
Interior Painting Kitchen

Can you Paint Foil Cabinets?

Yes, thermo-foil cabinets in your house can be painted. Thermofoil cabinets are used in modern kitchens and known for being affordable, easy maintenance, and versatile. The material of thermofoil does not contain metal but is made from the Vinyl Onto Medium-density fibreboard(MDF). The cabinets are created by vacuum pressuring the thin layer of the material, which results in a smooth and seamless finish that lasts for years.

Despite being beautiful, there are some disadvantages of thermofoil cabinets. Exposure to sunlight, heat from appliances, residue from the food, and regular wear and tear causes peeling and chipping of the cabinets. To overcome these problems, the cabinets need to be painted.

Supplies Needed for Painting Thermofoil Cabinets

There are limited supplies required for painting foil cabinets of your home. Here are some of the items needed to get the best durable and beautiful look on your cabinets.

  • Primer
  • Paint
  • Painter’s Tape
  • Plastic paint tray
  • Foam Roller
  • Foam Brush
  • Sanding Block

Procedure for Painting Foil Cabinets

Thermofoil material is porus, and it is hard to spread paint on the surface evenly. A coat of paint applied on the surface will easily peel off after drying. So you need to follow some steps to paint kitchen cabinets in your house. Even though the process is time-consuming, the results are worth it if done correctly.

1. Preparing the Surface

Before starting to paint the surface, you need to prepare the surface of the cabinets. Kitchen cabinets are usually covered with cooking oil and other food materials. So you need to remove the hardware of cabinets and use an ammonia-based cleaner to clean the surfaces. After cleaning, let the surface get dried up. Now use sanding paper to rough up the surface, focus on creating texture on the surface and be careful not to remove finishing of the cabinet. You could use an electric sander to complete the work faster. After sanding, remove all the dust using a damp rag. Use painter’s tape to cover the areas that you would not like to paint.

2. Applying the Primer

Apply at least three coatings of a thick and good primer on the surfaces. While applying the primer, check whether there are spots where the primer is not absorbed. If there are any spots like that, you need to sand the area again and apply primer after cleaning the sand. Allow each coating of the primer to dry before the application of the other coat. Allow the final coating to dry for 12-24 hours.

3. Applying Paint

You will probably need two coatings of paint as much of paint will soak into the primer that was applied to the surface of cabinets. The number of coats required will also depend on the quality of paint chosen for the foil cabinets. Use Enamel paint, if you want a glossy finish. But if you are not interested in a glossy finish, then you can go for satin finish latex paint. Using a foam roller will help in giving a smooth finish. Between coats, you could lightly sand the surface with a fine-grit sandpaper.

Allow each coat to dry completely before going for the next sanding and coat.

4. Sealing the Cabinets

After the cabinets have dried up completely, for extra protection, you could add a coat of water-based polyurethane, which comes in matte, satin, and gloss finishes. All the finishes are good for your cabinets and make sure to use good quality brushes for applying the paint and finish. Allow the cabinets to cure for about 10 days.

5. Reattach the Cabinets

After the cabinets have dried completely, replace the hardware and attach the foil cabinets to their original places. Drill new holes if needed in place of old holes.

Conclusion

It is tough to paint the thermofoil kitchen cabinets. It would help if you took the advice of local professional painters to know the correct primer and paint that is suitable for your home. Most of the times, the semi-gloss sheen is used for cabinets, to give a new look to your kitchen. We at Executive Touch Painters are experienced in renovation and painting of all types of kitchen cabinets. Contact us or Call us at 416-410-0164 for a free estimate of your painting project.