Categories
Exterior Painting Home Renovations Interior Painting

6 Painting Projects To Make Your Home Look Luxurious

Most of the people believe that small things make a significant change, and painting is also not an exception. Painting projects can transform the look of your home, with less investment. Just a small change in the paint of the front door can bring a considerable change and create a good impression for the guests.

Small Projects that Change Look of Living Space.

1. Paint Your Archways

The archways of the house are the most neglected ones and often scuffed by wear and tear. Most of the homeowners do not paint the arches because they do not have the idea of how to paint them.

How should the archways be painted, and what is the color to be used? Is it the color of the room you are entering or the room the arch connects to? There are some options to paint the archways of your home.

  • Paint either side of the arch with the same color to create a seamless look.
  • Choose different shades for the rooms connected by the arch and paint the archway with the color of the room that you would like to be more dominant.
  • Paint the archway with a color of the rooms to create a dramatic look.
2. Bold Paint to the Doors

An entry door that is perfectly painted, vibrant, and unapologetically bold creates envy for the guests who enter the house. A painted door not only adds to the beauty but also increases the curb appeal of the home. An updated door makes the house to come alive.

Painting interiors can be a lot of fun. Choose bright colors for the children room, but the doors should have light colors to have the impact and make the difference. Using black color is not only trendy but makes a statement to the persons entering the rooms. The solid black color can be used to hide some of the unflattering characteristics that some of the doors carry.

3. Painting the Shutters

To create a real curb appeal for your interiors, painting shutters are the best option. Shutter painting is not a major project, and with few tricks, you can give a smooth and professional finish to the shutters.

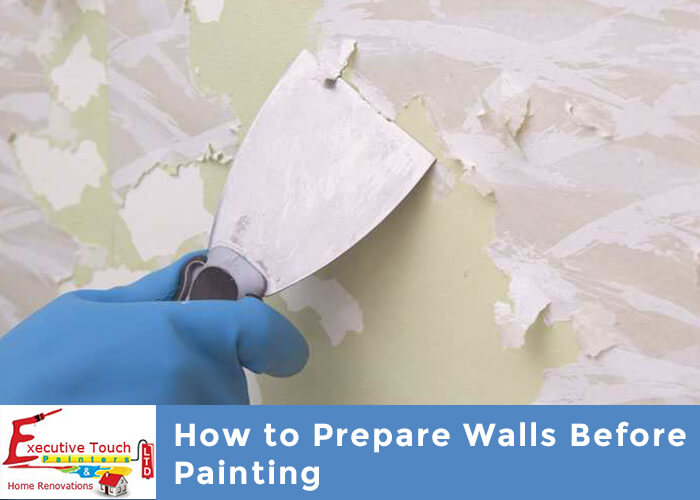
  • First, remove all the dirt and deposits on the shutters. After cleaning, give an excellent scrub and let it dry to have a smooth paint application.
  • Ensure that the edges are rough for the use of a primer. It helps the paint to last longer on the surfaces.
  • High-quality paint is recommended for the exterior shutters to have a long life. The paint should also be selected based on the material.
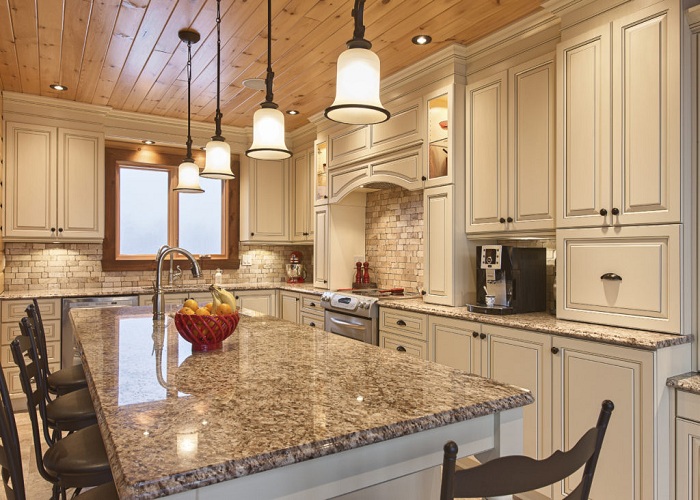
4. Refresh the Walls of the House

Using light colors to the interior walls gives an illusion of a large room and space is opened up. Warm and dark colors are to be avoided, as the rooms tend to be smaller in dark colors.

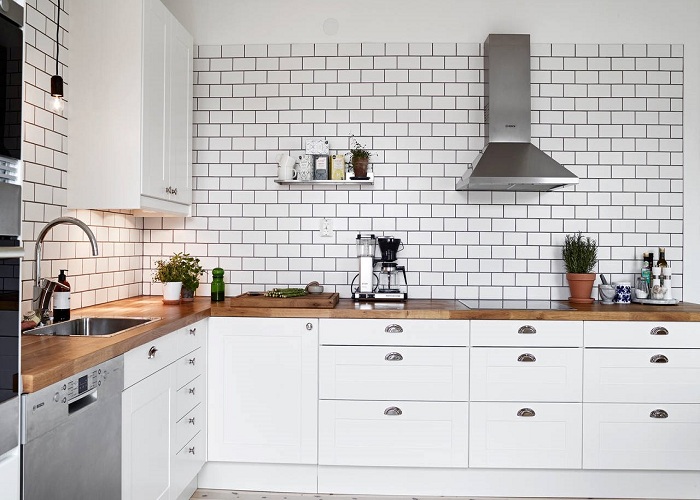
Here are some of the professional tips to make your living spaces brightened up

  • Create an accent wall to give the room an anchor point
  • To get a polished and trim look, paint the interior trim
  • To get depth and texture, provide faux paint finish
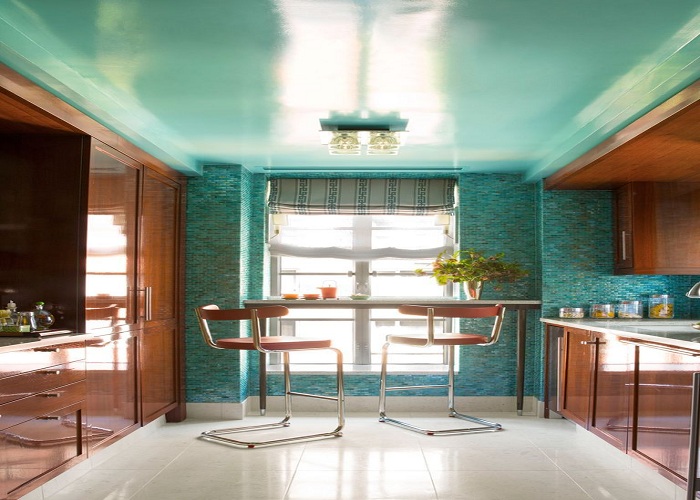
  • Repainting the ceilings with bright white color gives your room a unique look.
5. Hallway Painting

The tough task in painting the hallways is choosing the right color for the hallways and stairs. If you are confused in selecting the colors, use the good thumb rule and opt for the color that compliments the connecting rooms. Try to keep the same color or lighter shades.

Conclusion

Bringing a space in your house back to life is not a big project. Updating a small area in the home can bring significant changes and make a huge difference. Our professionals at Executive Touch Painters in Toronto are always there to help you to make the closed places to look bigger and make the dark spots look brighter with the help of painting. If you want to transform your home and make it look more luxurious than usual? Contact us to discuss your painting project now.

Categories
Interior Painting

Wallpaper Installation and Removal

Executive Touch Painters is a professional Home renovation and painting contractor operating in Toronto specialized in installing various types of wallpapers for both residential and commercial buildings. Our work is 100% guaranteed and performed with great attention to detail. Now it’s time for you to get associated with our professionals having over two decades of expert knowledge in wallpapers and installation techniques.

Wallpaper Removal

Most of the homeowners ask about why the wallpaper should be removed? Yes, wallpaper removal is a slow, messy, and tedious process. But once the process is completed, you can see changes in your house.

  • The rooms begin to open up and brighten
  • The resale value of the house increases, and this is the main reason why most real estate agents insist on changing the wallpaper, to be more appealing to most of the customers.
  • The rooms get a modern look after the old wallpaper is removed.
  • By seeing the patterns of wallpaper, a person can estimate when the house was last renovated.
  • Suitable wallpaper adds vibrant energy to your room and makes your room simpler, sleek, and calming
  • Simple wallpapers can be easily coordinated with your decor and furniture.

Wall Preparation

Wall preparation is a very crucial step before the installation of the paper on the walls. This step ensures to get long-lasting and perfect results. The wall should be free from imperfections to eliminate air pockets that might get underneath the wallpaper after installation.

Wallpaper Installation

So why should you install wallpapers for your residential to commercial spaces?

Wallpapers are gaining importance and are the new way of decorating your accent walls in a trendy way. Accent walls can anchor a room and give the area a focus and theme. Many offices, business, and commercial properties in the GTA also need our wallpaper installation services. Our company is known to install wallpapers to various commercial, retail stores, restaurants, and other properties in Toronto.

At Executive Touch Painters, our experts are well versed with various equipment for the removal and installation of wallpapers. We offer to do this time-consuming job for reasonable pricing.

We Install all types of wallpapers that include

  • Vinyl Wallpapers
  • Acoustic Wallpapers
  • Film and Decals
  • Commercial and Residential
  • Wall Coverings
Why Hire Us?

The wallpaper installation process is time taking and requires a lot of patience, and one should understand the process to ensure that the paper sits correctly on the wall without any errors. Only a trained professional can do this work perfectly.

Reasons to Hire Us
  • We have the latest equipment and techniques for removal and installation of wallpapers.
  • Professional Installer has less wastage of paper and saves your money
  • Completion of work on time with high quality
  • Help in the selection of high-quality wallpapers at low price
  • The Installation is perfect with no visible seams, pleats and looks smooth with sharp trims and corners at any time.

If Wallpaper installation is on your mind, do not hesitate to call Executive Touch Painters for a free wallpaper removal quote. We are fast, clean, efficient, and always take pride in doing our work. Contact us at (416) 410-0164 for more details.

Categories
Home Renovations

Best Kitchen Renovation Ideas for 2019 on a Budget

Our latest kitchen designs and decorations will give you inspiration for a quick kitchen makeover. Take a look at these kitchen renovation ideas to remodel the decor and features in style. Let’s check out the best kitchen makeovers on a budget that makes your kitchen more beautiful in the home.

Kitchen Renovation Ideas

1. Reinvent the New Cabinets

Changing the cabinets of your kitchen guarantee a significant impact on the look of your kitchen space. The transformation of cabinets not only improves the look but also increases the value of a home. Consult a professional to get the most simple, cost-effective cabinets that are easy to assemble. You can find the latest designs and loads of varieties in the stores or online.

2. Create Style and Substance in the Countertops

Depending on the budget, you have to decide between the laminates or the solid countertops. While the laminates are more budget-friendly, you could also choose the hard surfaces as long term investment.

Hard surface counter-tops are made from natural stone and add a stunning look to your kitchen. These slabs boost the value of your house and serve as a cooking surface. These hard surfaces are resistant to heat, bacteria, and stains. You have the option to make the sinks with granite or quartz.

3. Use Powerful Appliances to Save Energy and Time

Do not wait until the old appliances wear out and become useless. There are shops which have exchange offers, and you can replace these old ones with the new energy-efficient and environmental-friendly appliances. New appliances offer annual savings on your electricity bill.

4. Make a Splash

Update your cooking and food-prep area with a tile back-splash which is a visually appealing, functional, and long-lasting design. This choice allows plenty of room for your creativity to shine through. Choose neutral tones or bright shades of white to have a clean and sophisticated look.

5. Polished and Smooth Flooring

Idea of Concrete Kitchen Floor Cost Kitchen Design And Isnpiration That Awesome – Festivalsalsacali

Considering the pros and cons of various flooring types, choose the water-resistant one. Choose between flooring types hardwood, vinyl, laminate, or stone tile based on your budget. Most of the people prefer stone flooring due to the low maintenance and durability. On the other hand hardwood flooring also withstands the spills and stands the test of time.

Laminate is easy to install and simulate the look of hardwood or stone. Vinyl also offers a softer feel for long periods of standing.

6. Well Organized Kitchen Storage

Never mess up with the storage of the kitchen. It should be easy for you to grab the things you need. You can assemble pull out organizers in the lower cabinets to help you quickly reach for the items. You can install or insert recycling and wastebaskets in the corners concealed from view.

7. Add an Island in the Kitchen

Installing an island in the kitchen can be more useful than for just making the food. The island can be used for dining, storage, and comfy seating. Design a beautiful island for your kitchen based on the space available.

8. Let You Kitchen Shine with Layer Lighting

The experts recommend layering different lighting types in the same space. Four types of lighting serve your purpose in the kitchen.

  • Track light: To get a warm, pleasant glow
  • Task Light: Used under the cabinets where more light is required
  • Decorative Lights: Add Visual interest to space
  • Accent Lighting: Bring attention to little detailing
9. Appliance Garage

Many small appliances are used in the kitchen. If you are going to entertain your guests in the kitchen, then make the countertops look cleaner by arranging all the small appliances in one place. Store all the frequently used devices at one place and convert it into a coffee station or baking area.

10. Use Pulls or Nobs to Refresh the Cabinets

The cabinets are used daily, and they should be durable for everyday use. Use only updated pulls and knobs, which are trendy and rust-free. If there is a particular design in your mind, then consider the texture and material of cabinets before designing the knobs and pulls. These little things help to keep your kitchen look beautiful and modern.

Small Kitchen Renovation Ideas

Below are some kitchen renovation ideas for small spaces that you can try in your own house and make the place beautiful.

1. Use Every Inch of the Wall

It’s easy to overlook making the most of every area when considering a small kitchen remodel ideas, expand your reach from the ground up. If you have high ceilings, making them a key factor for maximizing the space in the kitchen. While renovating small kitchen prepare floor-to-ceiling cabinets and shelves. Use these shelves for storing items used less frequently.

2. Paint the Cabinets same as the Walls

One of the effective small kitchen renovations ideas is to paint the cabinets the same colour as the walls. Doing this erases visual boundaries that could otherwise stop the eye while enveloping the room with uniformity. The best colours for a small kitchen are pale shades that are capable of reflecting light, which makes the space look and feel larger. Chocolate and black colours create an impression that the walls are farther than they are.

3. Add Some WallPaper

You may not have a ton of counter/floor space to play with décor, make a statement with paper on walls. If you do not want to make it more overpowering, do not cover the entire wall with paper.

4. Lacquered Ceiling

Not all homes can have high ceilings, but we can fake them. Lacquer is a colour that complements the walls, and it’ll look like the walls extend much higher than they do.

5. Lots of Windows

Having lots of windows is one of the best small kitchen renovation ideas that can be implemented. Glossy finish on the cabinets also helps to bounce the lights in the kitchen.

Conclusion

You could try out the above best kitchen renovation ideas to make your kitchen the most beautiful place in your home. The small kitchen renovation tricks could also help you to make the most of your space. Are you having a renovation in your mind? Then Contact Executive Touch Painters the best kitchen renovation contractor in Toronto to build your dream kitchen today.

Categories
Home Renovations

Tips to Make Your Bathroom Renovation Project Successful

Renovation of any room is challenging, but bathroom gives more challenges than the other rooms in the house. There are lots of aspects like tiles, fixtures, plumbing, and other things that need to be taken care in case of bathroom renovation.

Expert Advice for Transforming Your Bathroom

1. Prepare a Reasonable Budget for Renovation

The first and foremost step in the renovation is to set up a budget for the work. Contact a local contractor to get details of labour, supplies, and permits that need to be taken. When you have decided on the budget, take 10% of the total amount, and keep it aside. This money will be useful in case of unexpected costs that might occur during the project.

2. Plan The Layout Before Starting The Project

Try to make fewer alterations in the existing sanitary ware. If you make more alterations in the sanitary ware, then you need to make more changes in the plumbing, and the cost of renovation will go up. Before finalizing a design, make sure to show the plan to electrician, tiler, and plumber and make sure that there are no issues in the design. Once the design is finalized, do not try to change it at any cost.

3. Reuse Old Sanitary Ware And Choose Sanitary Before Tiling

To ensure that all the pipe fixtures are in the correct position, you need to choose all the sanitary ware before plastering, and tiling work is completed. You also have the option of using the old sanitary ware removed from the bathroom. Always make decisions on time about fixing sanitary, as late in critical decisions can cost you expensive alterations.

4. Always Water Proof Space

There are waterproof tiles available which can be used to line walls of bathroom and enclosures of the showers. The tile can also act as insulation and limit the risk of leakages and damages that are costly to repair.

5. Include Technology and Use Mirrors

Numerous technology options can be used for your bathrooms. Waterproof televisions, built-in hi-fi systems, smart lighting controls, and automation of bath fillers can be used to bring technology to your bathroom. You need to talk to your electrician well before so that the wiring can be done. Mirrors are essential for any bathroom, and you could use these mirrors to make the bathroom look bigger.

6. Have a Look at the Ventilation

Every bathroom is steamy and damp by nature, so you need to have proper ventilation to keep the moisture out. You need to install exhaust fan to keep the humidity to a minimum. You need to take extra care about the moisture if your bathroom has wooden window frames.

7. Conceal the Pipelines

To have a good and clean look, always ask your plumber to conceal the pipes where ever possible. Concealing of the pipes makes the work of tiling and flooring much more comfortable. Make sure that after concealing, the vital components are accessible for checking in the event of any leakage.

8. Have Fun With Lights

Avoid heavy lights in the bathroom, and make sure that the lights are functional and reflect your design concept. You can opt for incorporate layers of light, decorative pendants, and flush mounts to set the tone of the bathroom.

9. Keep an Eye on the Building Restrictions

Depending on the place you live, you could have restrictions on the amount of water you use for the household. There could also be restrictions from the leaseholder. You cannot use modifications like double shower heads if there are water restrictions. Always check with your building paperwork and look for restrictions that might apply.

10. Include Plenty of Space

A beautiful bathroom can be spoiled by clutter. So take care of the bathroom storage and use storage baskets to keep everything out of sight. If you are going for fitted furniture, then you need to plan, to achieve a coordinated finish. There is an option to have modular and freestanding furniture for your bathroom, which can be added after fixing the sanitary. Use wall-mounted furniture to use the space effectively. Always use materials that suit the environment of the bathroom.

11. Set Time Frame for Starting and Completing the Project

Have a clear idea on when bathroom renovation is to be started and the time needed to complete the project. Discuss the time frame with the experts you have hired. Do not rush the process and let the experts take their time in completing the work. Hire reliable experts to get the job done in a shorter period.

12. Hire an Expert

Bathroom renovation has many challenges, and if not done correctly, you could land up in doing more damage to your costly fixtures. Remember that using some of the equipment in renovations can be dangerous, and further you might have to spend more on repairing the damages done. To get out this risk, you need to hire a professional to renovate your bathroom. A professional designer will ensure that all the fixtures, tiles, and flooring are blended to make a beautiful bathroom. Hiring an expert at the initial stage of renovation can make the work more appealing.

Conclusion :

In the process of bathroom renovation, you have the option of creating more space, place attractive fixtures, and place antique features in the bathroom. The possibilities are endless and also requires proper planning. There are challenges in every renovation, and you need to follow the above tips to make the renovation smooth and enjoyable. Planning for a bathroom renovation? Talk to our experts at Executive Touch Painters to get more details. Contact us at (416) 410-0164.

Categories
Residential Painting

Why Prepare the Walls or Area before Painting?

Painting your house is an easy and straightforward way to change the complete look of your home. Before painting, you need to prepare the area to be painted. The preparation of the area should be done carefully to avoid the painting job to become a nightmare for you.

How to Prepare The Walls Or Area Before Painting?

For any painting professional, the preparation of walls is more important than choosing the paint colour for the walls and interiors. Any paint cannot adhere to the walls that are poorly prepared before painting. Painting on the walls that are not prepared well can make your room look sloppy.

So How Should The Walls Be Prepared Before Painting? Here Are Some Of The Tips To Follow For Preparing The Walls For Painting.

1. Have Plenty Of Room For Working

Painting walls of a room require some space for moving. Remove all the clutter from the room and remove the furniture to the center of the room or another place. Moving things from the room will make you feel free and also you could stop worrying about spilling the paint on the furniture and other stuff in the room.

2. Scrub All The Walls

Even a superior quality paint cannot adhere to the walls that are full of dirt and dust. First, use a dry cloth to remove all the dust on the walls. Afterward use a wet cloth to remove the dirt on the floorboards, crown mouldings, doorways, and windows. You can start painting after the area becomes dry and free of dust and dirt.

3. Remove The Old Imperfections

Noticed any imperfections like cracks, scratches, holes, or peeling paint? Then fix them before starting the painting. Even small damage can be seen when the new paint is applied. Make sure that all the repair is done before starting the actual job of painting.

4. Applying the Primer

The use of primer in painting job should not be overlooked because, without primer, the paint will not adhere properly to the walls causing premature peeling of the paint. When the drywall is painted for the first time, it is recommended to use a water-based primer to help the colour to adhere to the walls. Walls having smoke stains or panels, then use an oil-based primer. You can use paint along with primer to the walls that already painted.

5. Use Tape To Avoid Stains

When the walls are painted, there is a chance that the paint gets spilled on the surface of the rooms. Taping around the doorways, windows, crown mouldings ensures that you would not have touch up work at the end of the day.

Conclusion

Painting your house is an inexpensive way of creating a new look for your home. Some paint jobs may seem to easy, you may feel that you can do it on your own, but with the help of professionals, you can make the painting job more effective. Want to paint your house, then talk to our professionals at Executive Touch Painters in Toronto and have your home painted without any hassles.

Categories
Interior Painting Painting Ideas

How to Choose Paint Colors for Your Home Interior

Painting is a simple and easy way to make a significant impact on the look of your house. A right picked a color for interior painting will refresh the inside look of your home. You can also revitalize and freshen up the look of any room in the house, with a fresh coat of interior paint.

Get Inspired from the Paint Color

You can find inspiration from different shades of colors used for various rooms in the home. Some finishes have the quality of easy cleaning and better durability so that the paint looks colorful for the years to come.

Selecting the Perfect Sheen

There are various sheens available based on the room. Each room can have different sheens available to make your rooms beautiful and colorful.

  • Flat or Matte: Provides low lust appearance and is best for living rooms, bedrooms, and ceilings.
  • Egg Shell: Gives soft and velvety appearance and is suitable for children bedrooms, family rooms, and halls.
  • Satin: Choose satin if you want pearl-like finish. This Sheen is perfect for kitchen, bath, and laundry rooms.
  • Semi-gloss: is a radian sheen with superior scrubbability and moisture resistant. This shade is perfect for kitchen, bath, windows, and high traffic areas in the house.
  • High Gloss: gives a glass-like finish to the surfaces. It is used for old furniture modifications. This Sheen is perfect for high used surfaces, cabinets, and old furniture.
  • Use Primer: Primer is to be used for all the areas to ensure that the better adhesion of paint to the walls of your interior.

How to Choose Color?

Picking up the right color is not an easy task. Various factors that influence the color selection for a room are lighting, furniture, flooring, and personal taste for colors.

Do ask yourself these questions before actually selecting the color for the interior of your home.

  • What color does your family need?
  • What is the best shade for the house?
  • Should the color be bright or soft or any other shade?
  • What should be the color for the accent wall?

Choosing the Right Paint for Your Interior Space

Getting your painting project done starts with choosing the right paint for your interior space. Here are some of the paint types that you can choose from

1.  Zero or Low VOC Paints

Low and zero VOC paints are the best paints for the interiors. These paints provide the lowest indoor air impact and are also odorless.

2.  Painting for Your Ceiling

The paint for the ceiling is different from the wall paint. The ceiling paints are formulated to reduce the glaze and give an ultra flat finish to the ceilings. Use different sheens to provide a beautiful look.

Conclusion :

Painting the interiors of a house is very important for the house to look beautiful. You need to select the perfect colors for the rooms, depending on the choices of your family members. Our professionals at Executive Touch Painters help you in choosing the colors and also give excellent finishing to your painting projects. For more details, Contact Us at (416) 410-0164.