Categories
Home Renovations

How to Diagnose Common Plumbing Problems in Your Home?

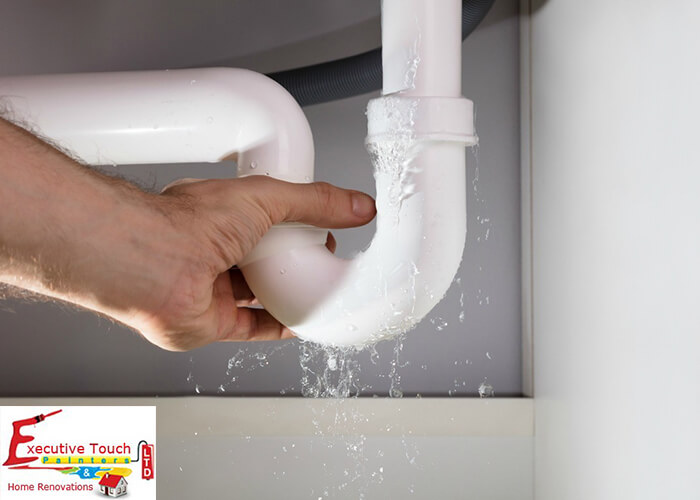
When something in your house is wrong, then you get signs or indications of the problems. For any home, it is challenging to detect plumbing issues. The easy way to find out problems is to pay attention to the water that comes out of the pipes. The flow of the water determines the common plumbing issues of your house.

Some of the Common Plumbing Problems

1. Low Water Pressure

When you need to take a refreshing shower, low water pressure creates problems and can be annoying. Low pressure indicates that something is clogging in the pipes and needs to be removed immediately. You should call a plumber to check for the blocks in pipes and clear clogs quickly.

2. Spots on the Ceiling

Brown spots are very ugly on the ceiling, and it indicates that water is leaking from the pipes. In this case, the pipes and roof both are to be repaired. Before fixing your ceiling, find out the source of leakage and fix them.

3. Bad or Foul Smell from Drainage

Water in drainage should move out smoothly and fast. There are a lot of bacteria present in the kitchen and bathrooms, and the smell could be coming from them also. If the smell is more, then you should check for any clogs or breakage in the sewage pipes. Call a plumber and review for the clogs.

4. Discolored Pipes

When you in the process of checking all the pipes of the kitchen and bathroom, see if the pipes are discolored. Discoloring is a sign of leakage from the sink or drain line. The discoloring may also cause pressure to build up and create a potential big mess for the entire plumbing. It is time to act fast and replace or repair the discolored pipes.

5. Slow Draining of Water

The most common plumbing problem for most of the houses is the slow drain of water. The slow drain could be due to clogs or other significant issues like tree roots in the pipes. With a little bit of detection, it is easy to find the clogs and remove them. You need to take the help of a plumber to remove blocks like tree roots and other major issues in the sewage line.

6. Increase in Water Bills

When you are using the same amount of water each month, but receive a higher bill for the present month, then you must understand that there are plumbing issues in your house. An increase in bills is a sign of water leakage. It is time to call a plumber to rectify the problem.

7. Problems in Water Heater

In the present scenario, hot water is a must for every family. If the water heaters in your bathrooms are not providing the required hot water, then it is an indication that there are some kinds of problems in the plumbing and pipes of your home. It is time to act quickly and consult a plumber to rectify the problem.

8. Water Problems in Winter

If the water pressure suddenly drops in winter, then it is an indication that pipes are frozen. Frozen pipes are a major issue that needs to be dealt with immediately. Especially in homes where the pipes run through an attic or other unheated space, frozen pipes hold the biggest danger once they thaw. If you are lucky enough that the pipes thaw without creating any issue, it is better to consult a plumber to fix the problem immediately.

9. Peeling Paint in Bathrooms or Home

It is evidence of leakage when you observe peeling or cracked or bubbles or blistering paint in your bathroom or other rooms. Before removing the paint and patching it up, have a plumber to look at the problem and make necessary repairs.

10. A Gurgling Toilet

Unless you have flushed your toilet, it should be pretty quiet. But if you hear gurgling noises before even flushing, then it is evident that there are problems below the bathroom. Blocked vent stack or also block in sewage line could be cause for the sounds. Now it is time to call your plumber to fix the issue.

Preventing Common Plumbing Problems

  • Hair, food, and other items cause clogs in the sewage pipes. So always keep an eye on what is going into the pipes.
  • Use drain screens to prevent unnecessary materials from entering pipes. Dispose of hair and other materials into dustbins.
  • To avoid over-pressure on old pipes, keep the water pressure at 50 psi.
  • Use water softeners to reduce mineral content and stop hard water from affecting the pipes.
  • Water pipes need to be insulated to prevent them from freezing in the winter season.

Conclusion

Plumbing issues might be small and insignificant, but when neglected, structural problems might be caused to your building and also affect the strength of your house. At Executive Touch Painters, we offer all plumbing services that include installation and emergency repairs. Our team serves in Toronto and the GTA, 24/7 and 365 days for all residential and commercial buildings. Call us at 416-410-0164 for an initial consultation.

Categories
COVID-19

COVID-19 Precautionary Measures

In the present situation of coronavirus (COVID-19) evolution, we would like to keep our customers informed and updated regarding the availability of our painting and renovation services in your area.

For us, the health and safety of our clients is always the top priority.

Our goal is to continue helping our customers during this uncertain time by following the necessary preventive safety measures set forth by the Canadian health authorities.

Steps we take to Keep our Team Safe.

  • Good hygiene practices include frequent hand washing and using hand sanitizers before and after job completion.
  • We were limiting our crew sizes for maintaining social distancing.
  • Use of disinfecting wipes in our trucks to clean all high touch surfaces.
  • Continuous monitoring of the health of every team member from time to time. 
  • Each Team member is provided with gloves.
  • Following government guidelines for self-quarantine, if a team member comes into close contact with anyone with COVID-19 or if they contract it themselves.
  • If you prefer a no-contact service, we can arrange this. For exterior painting, we can get started and complete our work without any contact.
  • All the estimates and payments are completed electronically or over the phone.   

Make Yourself Safe with these Simple Steps

  • Do not schedule any painting services if you are feeling ill.
  • If any person of your household is infected with COVID-19, then immediately tell us or inform the local authorities.
  • Greet us with a smile instead of a handshake

At Executive Touch Painters in Toronto, we are closely monitoring the health authorities of Canada and always following their instructions in controlling COVID-19 Virus. As a part of essential works, we will be working in Toronto with all the precautions to keep you and your household safe. We know the seriousness of the situation and taking every measure to protect you and our team. If you have any questions regarding appointments or rescheduling your works, contact us online or at (416) 410-0164.

Categories
Home Renovations

5 Common Window Caulking Mistakes To Be Avoided

Caulking is a simple process that makes your home secure against moisture interference, controls the heat leakage for many years. Completion of the task makes your home more beautiful for years to come. There are some common mistakes committed by most people during the process. Read on to know the common caulking mistakes and how to avoid them.

Common Caulking Mistakes

1. Applying too Much Caulk

When there are cracks on the window, most people are tempted to add more caulk. Even if there are cracks exceeding half-inch depth and wide, do not use caulk. It is better to fill the gap with foam rope.

2.Skipping Tooling

After applying caulk, the tooling process is used for smoothing out the caulk. This significant step does not give an excellent finish but also makes the work look professional. Fingers are the best tools, so move them along the bead to make sure you fill the gaps.

3. Not Selecting the Right Caulk

We have to choose a high-quality window caulk that was manufactured from polyurethane or silicon because they are many varieties of caulks present in the market. Polyurethane caulk adheres well and can long last up to 20 years.

100% Silicone caulk comes with a mixture of both latex and silicone, is waterproof, flexible, shrink-proof, and is commonly found in hardware stores.

Other caulks like resin, oil and butyl rubber are cheap but will not adhere to the surfaces for a long time. Don’t save money on caulk, you will regret later.

4. Not Using The Right Applicator

We need a good caulking gun to dispense correctly. Some make mistakes by using the vessel of caulk from the store, which does not apply to double the tool for direct application.

5. Leaving Old Caulk

Without removal of old caulk sufficiently will leave moisture accumulated over the years on the surface of your window. Buy a putty knife and use a sharp tool to obliterate old caulk.

We should apply a caulk remover gel to remove extra-hard caulk; It takes around 2 to 3 hours to loosen caulk before scraping. After that, clean the surface by using a household cleaner or rubbing alcohol to ensure the surface clean and dry.

Conclusion:

Protecting windows is one of the most elegant ways to ensure your house stays in the highest condition throughout the seasons. If you’re having Home Renovation or Window Caulking issues, then do contact Executive Touch Painters at 416.410.0164 for a Free Estimate! You can also contact us online here.

Categories
Home Renovations

Exterior Wood Repair Toronto

We Executive Touch Painters undertake both interior and exterior paintings and Home renovations since 1989. We’ll do all kinds of painting and repair jobs that improve your homes’ curb appeal. When the Exterior of your house requires a bit woodworking, wood renovation and painting services, then feel free to get in touch with our professionals.

Toronto is various combinations of architectural styles. Many of our customers are glad to discover that they don’t need to hire multiple contractors to do different painting or renovation jobs. 

We use our decades of experience to undertake exterior paintings, woodworks, wood renovation, and other small to large jobs. Our skilled handyman will make sure that every project completes within the time and budget.

Most of the houses in Toronto are made of wood, and dry rot disease is one of the severe problems faced by house owners. The disease is caused by a fungus, which steadily destroys the timber and causing costly replacements. If the problem is not too big, then the replacement of wood is a good idea. In case the damage is more, then there is no alternative than removing all the infected wood and fill with new ones.

In older homes, replacement may not be the option available. Preserving original architecture is much more essential and also there might be no wood that could match the setting. In this case, remove all the rot and stabilize the infected wood with fillers. Epoxy fillers are the best and should be applied with the help of plastic spreaders. After filling, curing is done to match the wood.

The above process cannot rectify the problem of rot but strengthens and stabilized the wood from inside before painting.

Here are some Exterior wood repair services we provide in Toronto
  • Staircases, steps, and stairs window and Doors
  • Decks
  • Fences
  • Railings
  • Wooden doors
  • Porches
  • Hardwood floors refinishing
  • Posts and Pillars
  • Wood siding
  • Tudor
  • Bay box windows
  • Storage sheds
  • Many more

Conclusion

Looking for Professional Exterior wood repairs and painters in Toronto? Then contact Executive Touch Painters at 416.410.0164. You can also visit our website for a Free Estimate!

Categories
Painting Ideas

Toronto’s Best Home Office Paint Colors in 2020

What Color Should I Paint My Home Office in Toronto?

The right paint on your home office has a positive impact on your productivity and also an easy way to refresh an outdated space. Some paint colours are believed to have positive psychological effects. Many studies suggest that certain shades of paint have the power to stimulate your brain, and some can bring down your stress levels. Your workspace is all about productivity, and you need to choose paints that help to keep your energy focused and also have a calming effect.

For this reason, it is essential to pick the right colour for your home office. A home office is a place that you spend most of the time, and you must choose colours that make you happy. Soothing colours like green and blue evoke a calm feeling, while light colours create an atmosphere free from distractions. Read on to know about the best paint colours for increasing home office productivity.

Some Home Office Paint Ideas

1. Black

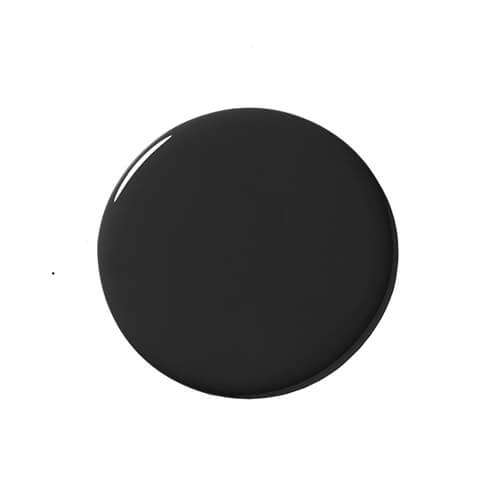
Black may not come to mind while thinking of office home paint. But a vibrant black colour casts a moody tone for your office. The moody tone helps you to shut down from the outside environment and concentrate on your work. Neutral black colour can go with any colour palette and is also an excellent choice for the modern and artsy space of your office home.

2. Yellow Color

Yellow colour sets a happy and positive tone in any workspace. Stimulating yellow paint inspires you in the office and brightens up your workspace. Yellow colour infuses positive energy into your room and enhances your creativity.

3. Green Color

Green is calming and boosts your energy and makes the place playful. This energetic colour helps in achieving your deadlines in projects. The green colour keeps your accents neutral and makes your office home to stay uncluttered. The green colour is also earthly bold and choice for most persons having boss aspirations.

4. Peachy Pink and Corals

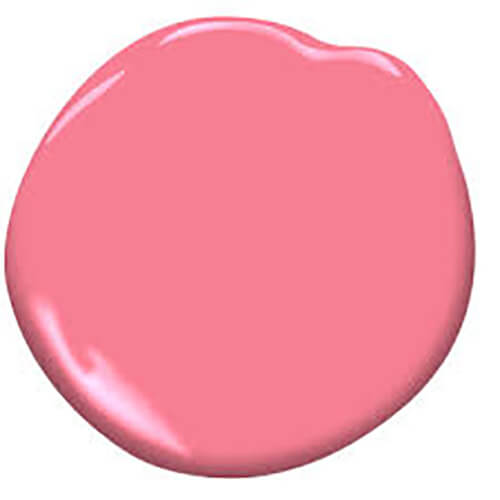
Experts suggest that shades of pink are more than just pretty and also the best paint colour for the home office. Warmer hues like peach and soft corals are known to help improve focus, boost consistency and creativity, which is perfect for a home office area. A soft pink hue like Pop can provide an inspiring atmosphere for a home office setting.

5. Brown Color

Most people think that brown is annoying, but it is considered one of the good paint colours for the home office. Experts say that brown painted office can help you stay calm and focused while you work. Mid-brown tones are calming and can focus the mind on the essential tasks at hand.

6. Navy Blue

Navy blue is versatile, refreshing, and creates a meditative atmosphere for maximum productiveness. Blue helps you to be a little more creative. This shade has a bold blue that is enough to feel regal and vital in your office.

7. Warm White

A little warm white paint helps you stay focused in your home office. When you want the limited visual distraction and clean space, try a warm white colour. The colour brings a hint of warmth to a room and works exceptionally well if your home office is north facing.

8. Teal Color

Teal is an actual colour that adds energy to your space. This exceptional colour is relaxing and is simultaneously motivating and inspiring.

9. Purple

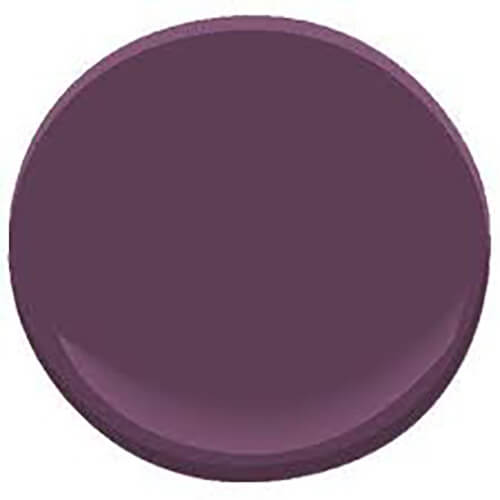
One of the favourite choices for office home is a purple colour. Purple is reminiscent of a freshly picked berry and lends a soothing, yet-confident, tone to your space. Purple colour not only gives you energy but also helps you to be calm.

10. Blue Gray

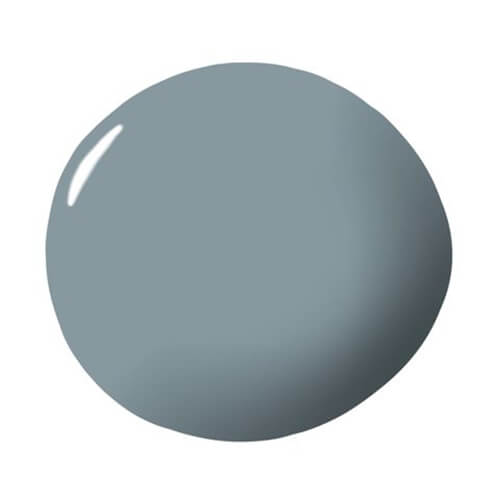
Blue-gray is one of the most popular home office paint colours. A soft blueish gray colour is a daily reminder to breathe and focus on your work and pairs beautifully with stark white or darker navy shades.

Conclusion

Picking the best colours to paint the home office could be tricky and confusing. With little inspiration, you can create a great workspace that motivates you to be energetic throughout the workday. Not sure of what colour to paint the home office? Contact our professionals at Executive Touch Painters in Toronto for FREE Color Consultation on home office paint schemes. Call us at (416) 410-0164

Categories
Home Renovations

Wainscoting Toronto

Wainscoting is a process of attaching wood to the walls of your house as a decorative or protective accent. Wainscoting is often overlooked in the process of home renovation, but it will have an impact on the house after finishing. The process of Wainscoting in Toronto is followed to protect the walls from dents or gouges. A practical decorative touch will make your home look much beautiful. Tongue and groove wood or a simple wooden decorative piece can be used to cover the bottom of a wall up to 5 feet. Depending on your taste and budget, you can install pre-made or create your designs.

Types of Wainscoting

Wainscoting is a design feature that adds depth to your room walls. Here are some of the major types used by most of the house owners

1. Custom Wainscoting Toronto

Custom wainscoting is the most requested design as it is suitable for all types of walls. There is an endless number of wainscoting styles that can be prepared even from a larger selection of small trims. Wainscoting installations are mostly custom made and are prepared on-site. You need to sit down with a design consultant to describe all the pictures that you might have seen, and it can become a reality in your house.

2. Raised Panel Wainscoting

The first-ever wainscoting style was developed in Georgian periods. This styling is prepared by pushing a wooden panel slightly into the room so that it is on the front of all styles and rails. This form of Wainscoting is famous in England, and the bevelled edge created by the moulding looks beautiful and noticeable. Till today raised panel wainscoting is the most formal style used.

3. Flat Panel or Recessed or Shaker Wainscoting

Recessed Wainscoting was developed in North America during the 19th century. The panels are placed a little deeper than rails and styles to give a recessed appearance. There are no mouldings used, so there is a natural look for your house. This type of styling is mostly used in Mission buildings and also in Craftsman houses. Shaker wainscoting is installed on drywalls, and you can also use panel moulding inside the shaker panels to add more depth and character to your design.

4. Beadboard Wainscoting

It is the perfect choice when you want to protect your walls from damages and also give decoration. Beadboard type is installed for walls in bathrooms, kitchens, laundry rooms, mudrooms, nurseries, and kid’s rooms. Quite popular in the Victorian period and installed with beaded lines running vertically, while the rails were quite narrow. Today most of the people prefer beadboard wainscoting as it creates casual and country mood in the house.

5. Applique or Traditional Wainscoting

Appliques are seen mostly in grand castles of Europe embossed in gold. This type of Wainscoting will add an elegant touch to any room of your house. There are endless combinations and can also be part of a contemporary look when properly installed and painted. In traditional Wainscoting, chair rail and panel mouldings are installed on the walls.

6. Wall Panel Wainscoting

A flexible wainscoting style that can be used for contemporary or formal rooms. With this style, you could make a beautiful statement for your home. Panel wainscoting is used for a standard wall of height 38″, but can also be extended or customized regardless of ceiling height. The main advantage of this style is that you need not pay for extra material as the walls itself are used as panels.

7. Accent Wall Panel Wainscoting

When anyone enters your house, the first thing they notice is the accent walls. Accent walls are incredibly versatile and play a big part in all aspects of home decoration and design. With the correct layout and design, accent wall panels can transform your home into a haven of creativity and intelligence. From high-end to more serene look, these walls can help you to achieve any style and bring a new feel. Family homes often require a kind of secure or comforting feeling, and accent wall panels do especially well to embrace this idea. They apply that kind of tranquil and relieving factor to a lifestyle that is already hectic enough.

Installation of Wainscoting

There are some series of steps followed in the installation of Wainscoting.

1. Preparation of Area

Before starting, you need to identify the panels used. Based on the instructions manual, decide if you need to prime the walls or not. Prepare the walls and remove the baseboard and outlet covers. If you can carefully pry the baseboard, you can reuse it in the future.

2. Draw lines to locate the Stud

The top and bottom of the Wainscoting are held in place by a cap rail, and a baseboard nailed into the studs. Locate the stud with a nail or stud finder and mark them both at floor level and just above the level line. Be sure to keep an eye on light switches and power outlets. You might need to cut the panels to cover these things.

3. Glue the Wainscoting in Place and Nail the Boards

Spread the glue over the panels and slip the boards into the desired place. Leave about 1/16-inch space between the edges, to allow for expansion in humid weather. Align the top edges with the low-level panels. When the board is placed over the stud, nail it in place.

4. Install the Cap Rail and Baseboard

Now nail the cap in place using #6 or #8 finishing nails. You need to cope inside corners if the rail is complex. Use caulk to fill the nail holes. You could also paint the Wainscoting to look beautiful.

Benefits of Wainscoting

  • Wainscoting helps in enhancing and protecting all the walls of your house.
  • It can be used to cover the existing damages on walls in an appealing way.
  • Wainscoting can prevent damages from chairs or people or doorknobs.
  • It provides insulation and improves the energy efficiency of homes.
  • Easy to install, clean, and maintain.

Cost of Wainscoting Installation

Most of the contractors charge between $1000 to $ 5000. The rates also change based on the room size and style of panels used. Among the styles in Wainscoting, Beadboard is much costlier than other types.

Cost of the job depends on
  • Choice of materials
  • Your Location and size of the area
  • Time frame
  • Design features and complications involved.

Conclusion

Our team of professionals at Executive Touch Painters is ready to install Wainscoting in your house. Looking for Wainscoting installing contractor in Toronto, then call us at (416) 410-0164 or contact us for more details.

Categories
Interior Painting

How To Paint Interior Doors?

Painting an interior door of your house is a do-it-yourself project that can be completed quickly. As most of the interior doors are heavy and hard to move, most people attempt to paint the door in place, instead of taking it off its hinges. The best way to correctly paint a door is to place it flat on the sawhorses. Always seek the help of a professional or paint store to determine the amount of colour that is required to paint a door.

Steps to Achieve a Perfect Finish to the Door

1. Preparing the Work Area

Before sanding the surface, all the hardware on the door is to be removed. Place the hardware like knobs, plates, and lock mechanism in a bag, so that it is easy to replace them after completing the paintwork. If it is not possible to remove the hardware, then you could use painter’s tape or two coats of rubber cement, which can be removed easily.

If there are holes in the door, then cover them with putty. Clean the dirt and grease on the door using sponge saturated in tri-sodium phosphate.

2. Sanding the Surface

After cleaning the interior door, it is time to sand the surface. If the door already has oil-based paint with latex, then you need to sand it very lightly.

3. Adding Primer

Apply a coat of good quality primer on the surface of the door. Generally, a water-based gloss primer is suitable for all types of wooden doors. A good primer will help the paint to glide on the surface more smoothly. Check for instructions and see how many hours it will take for the primer to dry.

4. Start Painting

Use broad and even strokes to paint on the surface of the door. To create a smooth finish, avoid going back onto the areas that are already painted. It is recommended to apply two coats of paint and allow the first coat to dry before going for the second coating.

5. Put Back the Hardware

After the paint is thoroughly dried up, put back the hardware on the door and fix them. If you have removed the door from hinges, place the door back into its place after the paint has fully dried.

Painting an Unattached Interior Door

Steps to follow for painting an unattached door

1. Removing the Door

Remove all the hardware present on the door. Pull the lower hinge pin out using a screwdriver and hammer. Ask your helper to hold the door in place as you drive out the pin. Now for painting on the surface of the door, place the door on sawhorses.

2. Painting the Door

Always use the recommended paint types for the wooden surfaces. Use good brushes to paint on the panelled doors by following a particular order. First, paint the recessed panels, next horizontal rails and lastly, paint the vertical stiles. By following this order, there is no chance of leaving unnecessary brush trails.

3. Let the Door Dry

If a second coating is needed, wait for the first coat to dry. Before the second coat, make sure to sand the surface lightly and wipe with a cloth.

4. Seal the Bottom with Wood Sealer

To prevent moisture from entering into the surface of the door, use a clear wood sealer to seal bottom edges. If there is no sealing, water will cause the wood to warp and swell, making it difficult for closing the door.

Painting an Attached Interior Door

It is easy to paint an attached door. Follow these steps for painting.

1. Apply Paint to Inside Top Panels

At first, apply colour to the inside of the top panels. Paint by working with the grain of the surface. Paint the recessed areas first and then move to the faces of the panels.

2. Paint the Vertical Center Stile

If the door has vertical center stile, then paint this part and blend in the brush marks from the center stile while painting the horizontal rails.

3. Paint the Vertical rails and vertical stiles

Now starting from the top, paint the rails to the bottom. After completing rails, paint the vertical stiles beginning from the left side. Keep the line as straight as possible while painting the surfaces. You could use a brush or roll to paint the door.

Painting Flat Door

Remove all the hardware on the door, and it is not necessary to remove a flat door from the hinges. Removing the doorknob and others will make your work easier and faster. You could use a roll or brush for interior door painting. For painting the edges around the hinges, use a small thin brush to get a smooth finish.

Conclusion

At Executive Touch Painters, we provide Interior painting services and also help you in selecting the best colours that are perfect for your house interior. Our services include wallpaper installation, cabinet painting, crown mouldings, family rooms painting, and kitchen renovations. For a free consultation, call us at 416-410-0164 today.

Categories
Exterior Painting

Exterior Stucco Painting Toronto

Stucco is an exterior covering that is made by blending sand with powdered lime or cement. Water is added to the mixture until it reaches mortar-like consistency. After finishing, you get a rough-textured appearance on the surface. Popcorn surface is hard, flexible, waterproof, and gives a stylish architectural look to your house.

In Toronto, Stucco is most commonly used as an exterior covering for the past 15 years. Stucco is generally applied by hand over metal wire or lath, which helps it to stick to the surface firmly. Typically, popcorn surface lasts for years, but might get dirty and cracked easily when not maintained.

Stucco repair and painting are necessary for not only maintaining the masonry but also refresh the exterior look of your house. These two things can shield your exterior from water damages also. Our team of professional painters ensure that your home has the best exterior stucco look for years.

How To Paint Exterior Stucco?

By selecting the right painting products, it is far easy to paint popcorn or stucco. Here are some simple tricks put together to make the work easier.

1. Choose the Right Colours and Paint

Exteriors of most houses have stucco, and it is recommended that you use flat paint. Always ensure that you use high-quality paints for painting the surfaces. High-quality paints are durable and are fade resistant.

2. Prepare the Surface Before Painting

Before applying the paint, the surface of the stucco should be clean and dry without any dirt. For cleaning, it is recommended to use pressure wash and get rid of any mould or mildew present on the surface.

3. Painting

After cleaning, let the surface get dried up before applying paint. Check the instructions on the paint can before starting to paint. Some paints are to be used at certain temperatures. It is suggested that you use a large-nap roller to apply paint, which helps in getting into the spaces and holes quickly.

Benefits of Hiring an Experienced Stucco Painter

  • Knows exactly which paint is suitable for a particular surface
  • Assist you in the selection of colour and sheen of paint that is applied
  • Stucco is a great way to change the look of your house
  • Stucco contractors not only paint the surfaces but also clean or repair before the actual painting work.
What makes us Different from other exterior stucco painters in Toronto?
  • We have expertise in colour selection and help you to choose the perfect paint for your stucco exterior
  • Pull shrubs and other plants and cover them with plastic bags before painting
  • Cover all the areas not painted with damp cloths
  • Our painters are cautious to avoid trampling flower beds
  • After the painting is completed, a thorough inspection is conducted, and final touch-ups are done.

Need a Professional Stucco Contractor?

At Executive Touch Painters, we work on exterior stucco regularly, and our team has over 10 years of experience in transforming the look of your home exterior. Our professional painters will freshen the look of your exterior stucco by giving a fresh coat of paint. Are you looking to change the colour or the whole look of your exterior? Then contact us or call us at 416-410-0164, for a free estimate.

Categories
Interior Painting Kitchen

Can you Paint Foil Cabinets?

Yes, thermo-foil cabinets in your house can be painted. Thermofoil cabinets are used in modern kitchens and known for being affordable, easy maintenance, and versatile. The material of thermofoil does not contain metal but is made from the Vinyl Onto Medium-density fibreboard(MDF). The cabinets are created by vacuum pressuring the thin layer of the material, which results in a smooth and seamless finish that lasts for years.

Despite being beautiful, there are some disadvantages of thermofoil cabinets. Exposure to sunlight, heat from appliances, residue from the food, and regular wear and tear causes peeling and chipping of the cabinets. To overcome these problems, the cabinets need to be painted.

Supplies Needed for Painting Thermofoil Cabinets

There are limited supplies required for painting foil cabinets of your home. Here are some of the items needed to get the best durable and beautiful look on your cabinets.

  • Primer
  • Paint
  • Painter’s Tape
  • Plastic paint tray
  • Foam Roller
  • Foam Brush
  • Sanding Block

Procedure for Painting Foil Cabinets

Thermofoil material is porus, and it is hard to spread paint on the surface evenly. A coat of paint applied on the surface will easily peel off after drying. So you need to follow some steps to paint kitchen cabinets in your house. Even though the process is time-consuming, the results are worth it if done correctly.

1. Preparing the Surface

Before starting to paint the surface, you need to prepare the surface of the cabinets. Kitchen cabinets are usually covered with cooking oil and other food materials. So you need to remove the hardware of cabinets and use an ammonia-based cleaner to clean the surfaces. After cleaning, let the surface get dried up. Now use sanding paper to rough up the surface, focus on creating texture on the surface and be careful not to remove finishing of the cabinet. You could use an electric sander to complete the work faster. After sanding, remove all the dust using a damp rag. Use painter’s tape to cover the areas that you would not like to paint.

2. Applying the Primer

Apply at least three coatings of a thick and good primer on the surfaces. While applying the primer, check whether there are spots where the primer is not absorbed. If there are any spots like that, you need to sand the area again and apply primer after cleaning the sand. Allow each coating of the primer to dry before the application of the other coat. Allow the final coating to dry for 12-24 hours.

3. Applying Paint

You will probably need two coatings of paint as much of paint will soak into the primer that was applied to the surface of cabinets. The number of coats required will also depend on the quality of paint chosen for the foil cabinets. Use Enamel paint, if you want a glossy finish. But if you are not interested in a glossy finish, then you can go for satin finish latex paint. Using a foam roller will help in giving a smooth finish. Between coats, you could lightly sand the surface with a fine-grit sandpaper.

Allow each coat to dry completely before going for the next sanding and coat.

4. Sealing the Cabinets

After the cabinets have dried up completely, for extra protection, you could add a coat of water-based polyurethane, which comes in matte, satin, and gloss finishes. All the finishes are good for your cabinets and make sure to use good quality brushes for applying the paint and finish. Allow the cabinets to cure for about 10 days.

5. Reattach the Cabinets

After the cabinets have dried completely, replace the hardware and attach the foil cabinets to their original places. Drill new holes if needed in place of old holes.

Conclusion

It is tough to paint the thermofoil kitchen cabinets. It would help if you took the advice of local professional painters to know the correct primer and paint that is suitable for your home. Most of the times, the semi-gloss sheen is used for cabinets, to give a new look to your kitchen. We at Executive Touch Painters are experienced in renovation and painting of all types of kitchen cabinets. Contact us or Call us at 416-410-0164 for a free estimate of your painting project.