Categories
Commercial Painting

FAQ’s on Commercial Painting

Painting a commercial space is entirely different from a residential area painting. While
some homeowners try their home painted on their own, most of them prefer to hire a
local painting team to get the desired results. But a DIY painting job is not recommended because a simple mess up can cost some serious dollars and physical or material damage. Whereas, in the case of painting a commercial area, it is mandatory to hire some professional painters to bring new life and value to your business.

Our expert team at Executive Touch Painters in Toronto compiled a list of frequently asked questions obtained from different business owners. Below you can find the
relevant answers to the questions if you have any further queries feel free to Contact
Us.

List of FAQ’s

What is Commercial Painting?

When there is a business with a physical location and needs paintwork to be done, then the professional carrying out the work is called as the commercial painter, and the process is called Commercial Painting. Larger space, then many painters are required,
and they have to take care of all the aesthetics of the company to create a good impression on the client visiting the company premises. As time is a significant factor,
more painters are also used to complete the project in stipulated time. Commercial painting task is a little bit tough and risky as the whole business affects the look of the building.

How Does Commercial and Industrial Painting Differ?

Commercial and Industrial painting involves painting a building used for commercial or
business purposes, but both the process are done with different goals in mind.

  • Commercial painting involves painting of building where clients or customers are present. But in the case of industrial painting, paint is done for machines or
    a building that needs to withstand the harsh conditions of the manufacturing
    environment.
  • Commercial painting jobs are conducted using latex-paints, as the latex paint dries out quickly and the building can be used for your business. For industrial painting, the buildings are not used by most of the public but need to withstand the harsh machine conditions. So oil-based paints are used, as they tend to be
    more durable and last longer.
  • Commercial Painting offers painting for the building interior and exteriors.
    Industrial painting offers painting for machinery, boats, aircraft, and structures
    such as bridges.
What are the different types of Commercial Painting Services?
  • Warehouse Ceiling Painting
  • Electrostatic Painting
  • Corporate Office Painting
  • Parking Garage Painting and Flooring
  • Painting and Flooring for Retail Spaces
  • Painting and Flooring for Schools and Universities
  • Painting and Flooring Services for Country Clubs and Golf Courses
  • Painting and Floor Coatings for Places of Worship
  • Painting for Health Care Services
  • Painting and Floor Coating for Commercial Properties
Best Commercial Painting Contractor of Canada

For the last 30 years, Executive Touch Painters has been building up its reputation and
has become the leading service provider for commercial and interior painting. Our team is specialized in transforming residential and commercial projects into ones that
make your guests or customers jazzed up the moment they notice the property from
the outside. Our team will always be ready to decorate the way you like. To discuss
your commercial or residential painting projects get in touch with us today. You can also call us at 416-410-0164 to book a free estimate.
Categories
Commercial Painting

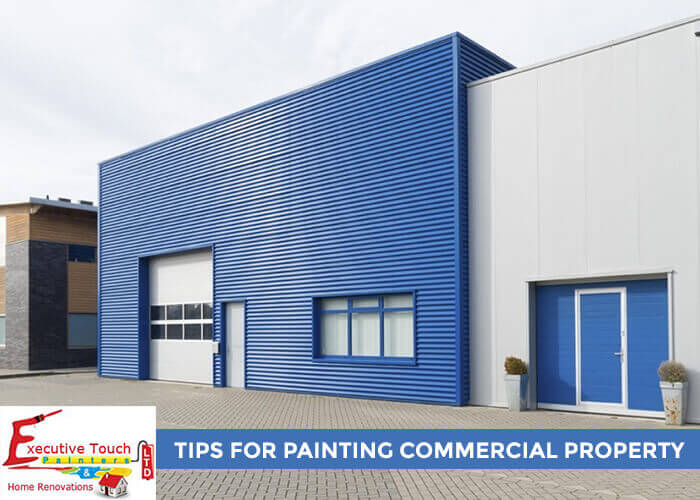
4 Helpful Commercial Painting Tips You Need to Know

One of the keen-witted parts of improving your business is to get a perfect look for your commercial building. If the building look is maintained well, it helps in attracting more customers to the business. So, What you need to do? It’s damn simple! You need to paint your commercial property taking the right steps to enhance the look of your building and your business. Our commercial painting tips in this article will help you make your industrial painting project a success.

Why is it Essential to Paint a Commercial Building?

1. First Impression is the Best Impression

Nobody likes to enter into an office which is filled with dirt and looks very shabby. A customer often judges the capacity of the company by looking at the office premises. If your office looks ugly, there are many chances that you might lose the potential customer. So it is essential to take care of your commercial property and keep it neat and clean all-round the year.

2. A Clean Environment Creates Trust

Think like a customer, “If he cannot take care of his office, how can we believe that he can take care of us.” So whether you are a store selling products or a restaurant serving food or an agency providing services to clients, a clean environment creates trust, safety, and security for everyone involved in your business.

3. Act Early, Save More

When there are small peels or patches on the walls, do not neglect them or you have to spend more dollars if the damage increases. So as the saying goes “A Stich in Time Saves Nine,” act early to repair the peeling paint and other damages.

Tips for Painting Commercial Properties :

#Tip 1. Pick a Paint Pro

So, why choose a professional commercial painter?

For a layperson, painting is just taking some paint and roller brush and get the job done. But there are various ways that professionals follow to give a perfect painting touch on your interior and exterior commercial walls.

An experienced contractor follows the below steps in painting.

  • Prepare
  • Prime
  • Paint
Preparation

Before starting the painting process, the floors and fixtures need to be prepared for the paint job.

  • Covering the floor edges with tape avoids the paint to bleed.
  • Laying drop clothes absorbs the paint easily from the surfaces.
  • Applying tape to the fixtures avoids paint stains.

A professional painting company like Executive Touch will prepare your property before initiating the painting work.

Priming
  • Priming is a process conducted to create a bond between the paint and the wall.
  • Sanding: Sanding is done to smoothen the hard surfaces. This also helps to apply the paint smoothly.
  • Check Dents and Cracks: If there are gaps or cracks, they need to get filled with the painter putty.
Painting

Make your painting project a success. A professional paint contractor follows a dedicated painting process using the right tools and techniques to get the job done on time with better results.

#Tip 2. Create Your Painting Plan

Interruption of business hours can lead to negative results. So you need to have a detailed plan for the painting project. You should provide all the details regarding the occupancy of the building. Small properties like doctor’s office, stores, restaurants can be completed on weekends or during the summer breaks. Hotels get closed on non-seasonal days, so these can be completed at that time. Weather conditions should also be considered while painting the exteriors.

#Tip 3. Choose the Right Materials for the Painting Project

The materials selected for the job have a direct impact on the cost and timeline of the project. Top quality materials have better finishes and dry quickly. Also, paint failure is minimal. Quality of the materials also reduces maintenance and repair costs. The high-quality paint also forms an excellent base coat for all your future paint jobs.

#Tip 4. Conduct a Final Work Through

You and your commercial painter must review each area of your commercial painting project. Mark them if there are any changes needed. Clear all your doubts and obtain the project completion documents. Know the maintenance activities to be done in the future.

Conclusion

A well-planned painting schedule, material selection combined with highly professional commercial painting contractors, can yield better results. Hope the above tips will help. If you are looking for a painting crew that can complete your painting project according to your views and ideas contact Executive Touch Painters in Toronto today to get the work done on your budget and time. Call us at (416) 410 – 0164 to get a Free Estimate Now!

Categories
Home Renovations

How To Remove Paint From Wood?

You might have just discovered an antique piece of wood in your house, and you want to see what is beneath the old paint. You need to get rid of the past and rusty paint on the furniture. Many methods are available to remove the paint on the wooden surface.

What Kind of Wood can be Stripped?

It is not possible to strip all kinds of wood easily. There are some types of wood that you can strip, which are below.

  • Outdoor and Indoor Furniture
  • Doors and its Frames
  • Stair Rails and Banisters
  • Antique and Old Furniture
  • Window Frames and Wooden floor
  • Built-in Furniture

How to Remove Paint from a Wooden Surface?

There are mostly Three methods used for removing paint from the wood.

1. Sanding

Sanding off paint is the best option for small projects, and you can also use an industrial sander to get the work done. But when using an industrial sander, you should be careful and follow the precautions mentioned. You have to apply even pressure at all the surface to remove the paint and do not create any gouges. Power tools can be used to create even pressure on the surface.

2. Electronic Heat Gun

A heat gun can also be the best option and should be used very carefully. A heat gun is the fastest way to remove paint and if not handled correctly, can scorch the wood. Also, bear in mind that hot air gun can be used for removing paint only, do not use on the varnish coated surfaces. When varnish comes in contact with the hot gun, it becomes into a glue-like substance.

3. Chemical Stripping

The best way to eliminate paint from wood is by the use of chemicals. Chemicals combined with mechanical methods are best suitable for removing any color on the carved and surfaces where our hand cannot reach. You can use chemical removers for removing not only paints but also varnish. The finish in the case of chemical removers is far better than that of the sanding and hot gun removal methods. But precautionary measures have to be taken while using the chemicals for the removal of paint on wooden surfaces.

Paint Removal Process

You can successfully remove the paint from wood by following a simple series of steps to have a deck that looks beautiful.

First here is the list of materials you need to have

  • Protective Gloves and Goggles
  • Respirator if needed
  • Solvent-based paint stripper
  • Scraper, paintbrush, and Bucket
  • Sandpaper and Wire brush
  • Rags
Step 1 :

Remove all the hardware from the wood you are working on. If there are any irremovable parts, secure them with a protective tape. Before you start the process, put on the safety precautions like gloves and goggles. Pour the chosen solvent-based paint stripper into the bucket.

Step 2 :

Choose a small area at a time and apply the stripper with the help of a paintbrush. Ensure that the stripper is used liberally on all the surface of the paint. Leave the stripper for about 20 minutes. If there are multiple layers of paint, then you have to leave the stripper for about 1 hour.

Step 3 :

Now after you see that the paint is bubbling up, you can use the paint scraper to remove the peeled off paint. Applying too much pressure can damage the wood surface. If you have any doubt that there is more paint on the surface, then you can repeat the stripper application and remove the paint once again

Step 4 :

After removing the paint, it is time to concentrate on the moldings and depressions on the wooden surface. Apply the stripper once again and wait for 20 minutes. Now use a wire brush to remove the paint at the places hard to reach. Take care not to scrap too much as you can leave scratch marks.

Step 5 :

After you have completed all the process of scraping, it is the time for washing. Use a water-soaked clean rag to wash the surface and also use sandpaper for sanding the entire surface. Wash the dust and debris on the surface to get a clean wooden surface without paint.

How to Remove Paint from wood without chemicals?

Chemicals are the most opted option for paint removal. But some wood reacts with the chemicals and get damaged. So you can use some non-chemical removers for the process. The strippers often referred to as “Safe strippers” are used for paint removal also. These are generally more expensive and slow working. The process is the same as the chemical paint removal.

How to Remove Paint From Wood Without sanding?

If you are not interested in using sandpaper, then you can go for a chemical removal process directly. Just follow the process and leave the step of sanding.

Safety Recommendations While Removing Paint From The Wood

While using chemicals strippers, you get fumes due to the reaction of chemicals and paint. So you need to take safety precautions while using and doing the process of paint removal from wood with chemicals.

  • Wear Old Clothes
  • Conduct the process outdoors, to avoid the fumes to spread in the house
  • Use gloves and facemask to protect from fumes
  • To prevent damages to the floor, cover the place with papers and old cloth

Conclusion

You can follow the same process to remove paint from wooden floors, cabinets, decks, and trims too. But you should be very careful while doing paint removal jobs from the wood surfaces. Precautionary measures have to be taken to protect from the fumes emitting from the strippers. Experts will have the right tools and experience to strip off the paint without damaging the finish. Contact our Professionals at Executive Touch Painters in Toronto to take the risk. We do Painting, Home Renovation, and Trim Works. Call us at (416) 410-0164 to get a Free Estimate.

Categories
Home Renovations

How to Refinish Kitchen Cabinets?

The cabinets play an essential role to bring new life into your kitchen, Changing the cabinetry from time to time is necessary. However, spending on new cabinets is not required every time. Old cabinets can be refinished and put back again as new ones.

Refinishing Old Kitchen Cabinets

The old cabinets can be removed and placed back after the refinishing work is completed. Follow these simple steps to get a new look for the old cabinets in the kitchen.

1. Mark Every Door and Drawer

To avoid the confusion of fixing the doors of the cabinets, you can label the doors with numbers before removing.

2. Remove the Doors and Drawers

To refinish or repaint the cabinets, the doors and drawers are to be removed from their places without damaging them. The screws and other loose pieces used for the doors are stored in a container.

3. Clean

After all the cabinet doors are removed, take a clean sponge and wipe down the area. Remove all the unwanted grease and other marks present on the doors and cabinets.

4. Fill the Gaps

Any gaps and holes present should be closed with a filler. The closed gaps ensure that the cabinets look new after the installation.

5. Sand Down the Cabinets and Doors

Once the filler has dried up, clean the surfaces with sandpaper to get a smooth finish. The sanding also helps to remove unwanted debris and let your cabinets look super finished. Sanding leaves a layer of dust on the surfaces. After the sanding is completed, take a clean cloth and clean the surfaces.

6. Prime the Surfaces

Depending on the paint you are using, choose the primer to be applied. The primer acts as a adhere to the surface and the paint. After the primer is applied, allow it to dry before painting the exterior.

7. Painting the Surfaces

After the primer is dried, you can apply the paint on the surface of the cabinet doors. To get a professional look go for multiple coatings. Take care while painting and ensure that the paint is applied evenly.

8. Sanding Between the Paint Coats

To get a smooth finish, the sanding process can be done after a coat of painting is completed. The cleaning process removes any raised parts or blemishes present after a layer of painting is completed.

9. Reinstall the Cabinets and Doors in the Kitchen

Once the paint on the surfaces is thoroughly dried, you can install the doors and drawers on the cabinets. Take time to reattach the cabinets carefully according to the labels present on the surfaces.

Best Paint for Refinishing Kitchen Cabinets

Colors for the cabinets must be complemented with the kitchen walls and ceiling. As the cabinets take much of beating and traffic, the paint must be a good one to take all the pressure. So what to choose? Oil or Latex paint. When compared with each other, latex paints have more benefits than oil-based paints. Latex paints dry out quickly and are more user-friendly. If you are using latex paint, make sure that it is an acrylic formulation which provides more durability than others.

How To Refinish the Kitchen Cabinets without Stripping?

To repaint the kitchen cabinets all the doors and hardware are to be removed. But there is another way to repaint without even removing the doors and hardware. A simple faux painting called glazing or faux finishing techniques can be applied to complete the repainting without removing the hardware or doors.

Glazing can be explained as simple color washing. The desired color is mixed with a substance called glaze, which is milky white and also dries very quickly. The glaze and the paint are to be combined in equal parts and applied to the doors with the brush. After applying the surface is cleaned with a clean rag. If you want the finish to be brighter, add more paint than the glaze. If you want the finish to be lighter add less paint to the glaze.

How Much Does It Cost to Refinish Kitchen Cabinets?

Not all the cabinet refinishing projects are the same. Some are big and risky, and some may be small.

The cost of the project depends on the following factors:

1. Number of Cabinets

The number of cabinets has a crucial role to play in deciding the cost of the project. The higher the number of cabinets, the more the price will be.

2. Choice of Refinish

There are many options available in the refinishing, and each has its price. Some designers keep the color the same, and some change the color depending on the request of the house owner.

3. Design of the Cabinets

Some cabinets are smooth in touch and comfortable to refinish. Some cabinets have detailed carving and trims. These carvings are to be painted very carefully and take more time and money.

4. DIY or Hire a Pro

The cost depends on who is doing the work. If the homeowner completes the job all by himself, then the cost would be of the paints only. If a professional is hired then the cost increases. But in a DIY project, you have to face the risk of not getting the work done correctly, and you may lose extra dollars than hiring an expert. Hire an expert to avoid kitchen renovation mistakes that cost you more than actual work.

Conclusion

Refinishing kitchen cabinets is an easy way to bring a new look and feel to the home. But doing it on your own will be easy when you are equipped with the right tools, added with some previous experience, spending your valuable time. A little mess in the process can lead you to lose more money than the cost to hire a professional. So, it is a wise decision to hire an expert. Executive Touch Painters has 20+ years of experience in doing Kitchen Cabinet refinishes in Toronto. Contact or Call us at  (416)-410-0164 to get a Free Estimate Now.

Categories
Home Renovations

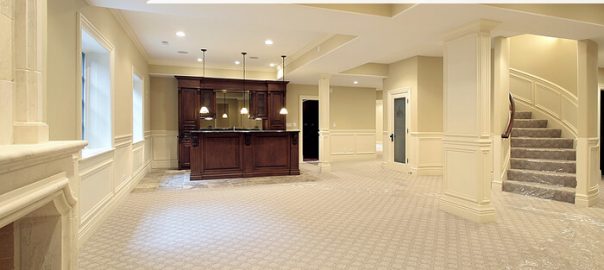
How To Finish a Basement?

Finishing basement is the work that is on the minds of many homeowners, but they do not have the interest or time to do all the work. So the cellars are left as they are and so the area becomes damp and dirty. It is time to finish the basement and give a completely different look for the walls, flooring, and ceiling of the basement.

Steps for Finishing a Basement Wall, Floor, and Ceiling:

As you draw a plan and layout for your basement, stick on to the basic idea of creating a welcoming place for your guests and your family members. Decorated walls, pleasing colors, beautiful flooring, and beautiful ceiling can be made a part of the basement. You have to know the constraints before starting the work. Special care and steps are to be followed to fix the walls, flooring and also decorating the ceiling with appropriate equipment. Space is often limited in the cellars; you have the choice of dividing the rooms according to your will.

How to Finish a Basement Wall?

When the basement walls have a finished look, then the room will also look pleasing and warmth. Steps to be taken to complete a basement wall are below:

STEP 1: Remove the Moisture from the Walls and Basement:

If your area is hit by storms frequently, then is the most chance that the basement is filled with dirt and water most of the time. It is better if you clean the moisture on the walls or all your work will be ruined.

Some quick ways to dry moisture from the walls:

  • Redirect the downspouts away from the basement foundation.
  • Decrease the slope of the lawn to drain all the water away.
  • Apply the waterproofing coating on the interior walls.
  • Add a drain pipe to remove all the stormwater.

STEP 2: Install Insulation and Drywall:

Special materials like Batts, Rigid foam and spray in place foam can be used for insulation of drywall. After the insulation of the wall is completed, it is time to install the drywall. The drywall can be hung vertically or horizontally, and in most of the cases, horizontal is the best way.

STEP 3: Keep in View of the Windows and Outlets:

For windows, the approximate shape is cut from the drywall after the installation is completed. The same process is to be followed for outlets and other electrical points on the walls.

How to Finish a Basement Floor?

After the walls are completed, now it is time to finish the basement flooring. For the basement floor, waterproof materials are to be used to avoid leakages and cracks.

The steps to be followed in finishing basement flooring:

STEP 1: Choose Floor Material:

You must think before choosing a flooring material because moisture and dampness will let you lose more dollars. So, it is good to contact a basement renovation expert to pick you the best flooring material based on the walls and the floor requirement.

The most used floor materials are

  • Laminate
  • Wood
  • Carpet
  • Vinyl Tiles
  • Ceramic Tiles
  • Rubber Tiles

STEP 2: Determine the Way to Install the Material on the Floor:

If you are using a laminate for the flooring, then you can directly install on the concrete floor. Some other materials require installing a barrier to stop moisture accumulating in between.

How to Finish a Basement Ceiling?

There are mainly two ways to finish a basement ceiling.

STEP 1: Drop Ceiling:

This is the cheap and most used for basement ceiling finishing. In the drop ceiling, the installation can be done with minimal tools, and the process can be done just by following the instructions given on the materials purchased for the ceiling. Mostly regular ceiling tiles are used for the finishing, but nowadays new designs are also introduced to make the ceilings more attractive.

STEP 2: Drywall Ceiling:

Hanging drywall on the basement ceiling is the same procedure as hanging the drywall on the walls of any room in the house. You need to have a drywall jack, and other friends help to secure the drywall and screw them in their place.

How Much Does it Cost to Finish a Basement?

The cost to finish your basement depends on the renovations that you are planning. The cost is taken per square foot and varies on the labor and material you are using for the finishing.

Factors Affecting the Cost of Finishing

  • The charge of the labor in your area
  • Professional Cost for Electrical, Plumbing, and Painting works.

Conclusion

Finishing a basement on your own is a good idea. Having the cellar renovated can add extra space to your home, and you can spend a good time with your family. There are many ideas that you can implement in your basement. You need a professional basement renovation contractor to apply your style. Executive Touch Painters offers expert Home Renovation services in Toronto since 1989. Contact us for more details, ideas or a Free Estimate. You can also ring us at (416)-410-0164.

Categories
Commercial Painting Painting Ideas

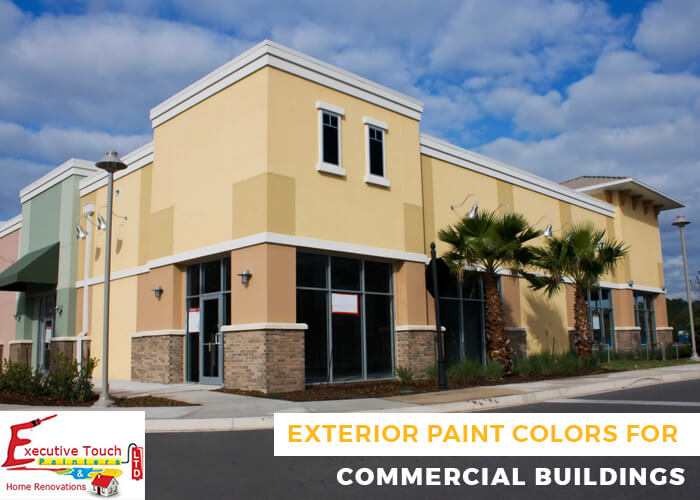
How to Choose Exterior Paint Colors for Commercial Buildings in Toronto?

The look of Commercial buildings is very crucial for any business to get noticed. Customers are likely to get attracted to the store that has good looking exteriors. The right combination of colors for your building will help the company to look separate from competitors and will give a clear indication to the customers that you are innovative.

Critical Points for Choosing Exterior Painting for your Commercial Building in Toronto.

1. Bold:

Most of the commercial buildings have bold colors on the exteriors. Bold colors indicate an invitation to the customers or clients. Bright and bold colors create a sense of interest in the minds of the customers as they enter the building. The impression can further be continued by having the same color combination as the interiors.

2. Create Motion with the Colors:

Wherever possible, try to create motion with the colors you chose to paint the exteriors, especially when you are trying to attract new customers to your company. You can select different warm colors like oranges, reds, and yellows to create patterns, or you can use single bright colors to create an interest for the customers.

3. Modern Techniques:

Whenever you have the option of adding motion to colors, use advanced methods of painting the building. Use of modern techniques can create more elegance to your structure. The commercial painting work has to carry out according to the architecture.

4. Quality of the Paint and Contractors :

Never compromise on the quality of paint that you use. Good quality paint helps your building to be nice and beautiful. There are Professionals available to do the exterior paint works. Make sure that you hire a professional painting contractor to do the painting work for the exteriors.

5. Pick Colors from your Surroundings:

You have the choice of picking the colors from your surroundings itself. If there are commercial buildings around you, then watch out for the color pattern they are following. If you want to blend yourself into the surroundings, then you can choose the same colors, but if you like to stand out from others, then select different colors from your surroundings.

6. Use colors as in the Logo:

Consider using common colors to your building. Public and customers recognize a company by the logo. So if you have the same colors on the building as your logo has, then there is more chance that your company is recognized easily.

7. Use Colors that Evoke Feelings:

Smooth and soothing colors evoke a particular impression on the minds of the customers and have a pleasant atmosphere when they enter your company premises. The same colors in your interiors also have a positive impact on the minds of your workers.

8. Colors Based on Building Materials and Architecture:

The exterior of the building also needs to be considered before selecting the paint. If your exterior is made of stucco, then the colors should be chosen base on the stucco. The colors also have to change when the surface made of wood.

Read this article to know why it is crucial to hire a contractor for painting commercial buildings.

Conclusion

Commercial building is the place where you meet your customers and clients. The colors used for your premises should be able to create a strong bond with your customers and clients.

After choosing the right colors, you should hire the best commercial painters in Toronto that specialized in exterior and interior, industrial painting.

Our professionals at Executive Touch Painters are highly skilled, fully licensed and insured that are behind every beautiful building in Toronto. If you want to bring the look you want and on-time Contact or Call us Now at (416)-410-0164 for a Free Estimate.

Categories
Home Renovations

7 Great Basement Renovation Ideas on a Budget

Thinking of a basement, most of them use it as a storage place and also the most neglected part of the home. Your basement can also be renovated to make a beautiful place to hang out with friends and family members. The basement renovation ideas are endless, and you can try different looks for this special area.

Consider Some Of These Basement Renovation Ideas.

1. Home Theatre or Cinema:


Home theatres and cinema are very famous and provide entertainment for the whole family. You can enjoy movies and live games on screens. You can also create a cinematic atmosphere by having lights and theatre like chairs. You can escape from the routines of daily life by relaxing in the cellar.

2. Bar in the Cellar:


You and your friends can enjoy the atmosphere in your cellar, by designing a bar in the basement of the house. Dinner parties and other parties can be conducted in your basement. Space can be unique for girl’s having parties and also perfect for having a romantic evening dinner.

3. Play Room for the Kids:


Children always scatter the toys and books in their rooms. So make a place in the cellar for them to play. Shine or rain, children can always play in the basement. Make shelves for the toys to be kept.

4. Games Room for Adults :


Basement with a pool table or dartboard can provide entertainment for the adults too. Adults can also have fun with their friends and neighbors by playing games in the cellar. You can have a great time with your friends, neighbors and family members too.

5. Home Gym:


To have more space in the interiors, you can have your gym installed in the cellar. An active and dedicating workout corner can be created in the basement. You can invest simple work out equipment like an exercise ball, treadmill and a simple yoga mat. Complement the gym room by keeping a big mirror, TV screen for seeing fitness videos and other things like towel, etc.

6. Laundry Room:


The other idea is to create a laundry room along with a washing machine in the cellar. You can also have a place for washing your pets. By having a place for cleaning your pets in the basement, you can prevent the splashing and damaging of floors in your bathrooms or main washroom. You can also keep all the grooming accessories of your pet in the cellar only. It is a bit time taking to change the washing machine into the basement, new tiles and flooring have to be made. But after establishing the washing area, you can reduce the noises coming from the old washrooms.

7. Bonus Bedroom:


The space in the cellar can be used to create a bonus bedroom for the guests. Guests coming to your house can be provided with a first bedroom and bed in the basement with down-filled comforters and luxurious pillows. ( Read this article to know about how to frame a basement wall ).

Conclusion

The basement is a bonus area in your home and little innovation can transform it into a great place to rest, play, entertain, exercise and do more. Also By renovating your basement the value of your property also increases. Pick the best one from the above that matches your requirement and simply give us a call now at (416) 410-0164 to get our professional build your dream room. If you are looking for more basement renovation ideas, or for a Free Estimate, Contact Executive Touch Painters in Toronto.

Categories
Exterior Painting

Can Galvanised Steel Be Painted?

Yes, Galvanized steel can be painted. Steel is used for many purposes and is also the most corrosive element. Galvanizing is a metallurgical process which applies zinc metal layer over the steel surface to avoid corrosion. During the process, the zinc layer is used for protecting the underlying substrate.

Determine the Condition of the Coating Before Painting :

The galvanized steel is subjected to harsh climatic conditions, so the zinc components form different organic compounds on the surface. So depending on the state of galvanization, the painting should be done. The galvanized conditions can be New, Partially and Fully Weathered.

1. Newly Galvanized :

This is the steel surface which has been exposed to the atmosphere for just 48 hours, and there are few zinc compounds present on the surface. The surface is shinning, and so the painting process is simple.

2. Partially Weathered :

Here the surface is exposed to the environment for two days to up to 1 year. There are little more zinc compounds present on the surface and are firmly adhered to the surface. These compounds are complicated to clean and so the painting is a bit difficult.

3. Fully Weathered :

Here the surface is exposed to the climate for more than one year. There are relatively more zinc compounds present on the surface. Most common is zinc carbonate that tightly adheres to the surface and does not get washed away when cleaned with water. The zinc compounds are not water soluble. But the zinc compounds should not be removed from the surface as the paint that is painted on the surface forms a strong bond with the zinc compounds.

Materials Required for Painting the Surface of Galvanized Steel :

  • Metal Primer
  • Acrylic Paint
  • Painting Tools
  • Scrub Brush
  • Sandpaper for cleaning
  • Cleaning Agent

Process For Painting Galvanized Steel :

1. Cleaning And Repairing The Surface

The surface of the sheet should be clean before painting, sanded with sandpaper, and the dirt is to be removed. After the sanding is completed, wash the surface with the cleaning agent. If there are rusting spots present on the surface, then remove them with the help of sandpaper.

2. Applying The Primer:

Before applying the paint to the surface, add primer to the surface of the steel panel. The primer will allow the paint to adhere quickly to the surface. Roller can be used to apply the primer, and the remaining places can be painted using a brush. Allow the prime to dry as per the instructions on the primer can.

3. Painting The Surface Of The Sheet:

After the primer is dried up, it’s time to apply the paint. Using the roller, apply the paint evenly on the surface, in the same way, the primer was applied. See that there are no gaps and you have to cover the entire surface with the paint. If there are some places that the roller is not able to paint, use the paint brush to complete the process. After the whole surface is painted, allow the paint to dry overnight.

Precautions Before Painting :

  • Always wear gloves to protect your hands from the harsh chemicals of paint and primer
  • Use a tarp or cloth to protect the surface from the paint.
  • Take the help of another person while painting the garage door.

Conclusion

Galvanized sheets need to be taken care of as there are most chances of getting zinc compounds deposited on the surfaces. The rust and damages have to be eliminated to have a unique looking steel roof. Contact the Professionals of Executive Touch Painters in Toronto, to get the rust removed, and the surface of the sheet painted to match your exteriors. Call us today (416)-410-0164 at to get a Free Estimate Now!

Categories
Exterior Painting

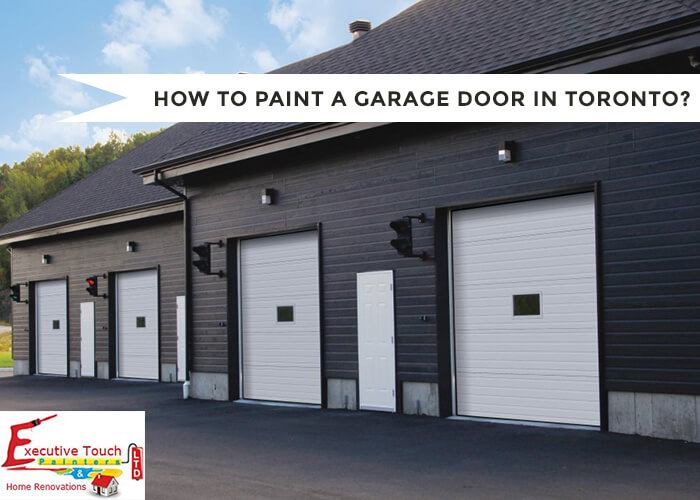
How to Paint a Garage Door in Toronto?

The garage is not only the place that protects your vehicles and other things from the harsh environmental elements, but it is also a prominent exterior for your house. Just as you take care of your interiors and exteriors, you should take care of the garage door and protect it from rusting and fading out. Garage door needs to be painted from time to time.

Materials Required for Painting :

  • Primer
  • Paint
  • Paint Roller
  • Paint Tray
  • Rags
  • Cleaning Solution
  • Painter’s Tape
  • Sandpaper for Cleaning
  • Cleaning Cloth

Steps For Painting Garage Door

1. Pick Up the Right Color :

The paint on the garage door should match exterior of your house. If you have an attached garage, blending the color of the garage door with the majority of your house color, would work correctly. Choose the color that blends well with the other exterior objects present outside the house like mail-box, porch floor or the shutters around the window. The paint should be selected based on the type of material the door is made of. The doors of the garage are generally made of wood, steel, fiberglass, and vinyl.

2. Cleaning and Preparation :

Before painting, be sure that there is no dirt or debris present on the surface of the garage door. If the door is metal, then it’s advisable to use abrasive scouring sponge for the cleaning. After the cleaning process is completed, seal the borders of the door by using painter’s tape, you can also seal the area of the door that you would not like to paint. To protect the driveways from the paint spill, put down tarp or damp cloth on the surface.

3. Apply the Primer :

Before applying the paint, coat the surface of the door with a primer. You can use the paint roller or brush for applying. It acts as an adhesive between the surface of the door and the paint color. If you avoid primer, then there is a chance that the paint gets peeled off in a matter of a few days. So select the primer based on the paint.

4. Applying the Paint :

Let the primer dry before the paint is applied. Get the paint ready in a paint tray and using a roller, apply the paint onto the surface of the garage door. You might not be able to paint the whole surface with the roller. The small patches that are left out can be filled by using a paintbrush. If you are in an idea of having a second coating, then apply the first coat vertically and the second coat should be applied horizontally. This creates a professional look to the surface.

5. Finishing :

Once the painting is completed, leave it to dry. Remove the painter’s tape attached to the surface of the door. You should remove it well before the paint is dried up, else the paint will peel off with the tape.

Some Tips Before Painting the Garage Door :
  • Be sure that the weather is clear before the process is started.
  • You can use a paint gun to paint the metal doors of a garage.
  • Start the paint job early in the morning, so that you have time in the evening.
  • Be sure that the surfaces are clean before and after applying the paint.

Painting Fiberglass Garage Door

Before painting the Fiberglass door, clean the door with a deck cleaner. Using sandpaper for cleaning may release fiber particles into the air. After the cleanup is completed, apply the primer and paint using roller and paint brush. Use at least two coatings of paint to get a smooth finish.

Painting Wooden Garage Door

The painting of a wooden garage door can be done quickly using a paint sprayer. Before painting, remove flaking, paint peelings, and bad wooden parts using a scraper. Apply caulk to the cracks present on the door. Fill the holes with wood filler where the rotten wood was removed. Sand the patched areas and apply the primer first and then paint using the sprayer. Multiple little coats can be coated on the wooden garage door to get a smooth finish.

Painting the Steel or Aluminium Garage Door

Ensure that the aluminum or steel garage door is clean before painting. The most efficient way to clean a metal door is through pressure washing on both sides. You need to see that all the dust, dirt and cobwebs are cleaned off the surface. Painting of metal door is the same as painting other garage doors. You need to follow a separate process to paint a galvanised steel garage door. Use long strokes to apply a single coat on the surface. Let the surface dry before applying the second coating. If you want an even coating for the door, you can apply the paint using a roller. You can try different patterns on the aluminum or steel garage doors using the paint brush.

Know more about the steps to paint an aluminum siding or garage door.

What Type Of Paint For Vinyl Garage Door?

The three factors to consider while painting a garage door are :
  • Type of Door
  • The Color you would like to paint
  • Size of the Garage Door

Type Of Paint:

Either oil-based or latex paint can paint most of the metal and wooden doors. But for vinyl doors, extra precautions are to be taken. Take the help of a professional to know the exact paint that will adhere to the surfaces of the vinyl doors. The type of primer you use should also comply with the kind of paint used. The color chosen for the garage door should blend with the exterior of the house.

The Cost to Paint Garage Door:

Cost for painting a garage exterior door vary with the size of the door, job quality, and the time of painting. The price is calculated based on the area to be painted. Additional fees are charged for typical designs done on the doors.

Conclusion

A well painted and good-looking garage door can improve your home’s curb appeal in a matter of a few hours. Painting this also protects from external elements like wind, rain, and sunlight thereby making your parking door rust proof. Hire our professional exterior painting services in Toronto to turn your garage door as your neighbor’s envy. Contact or Call (416)-410-0164 to get in touch with Executive Touch Painters in Toronto today.