Categories
Home Renovations

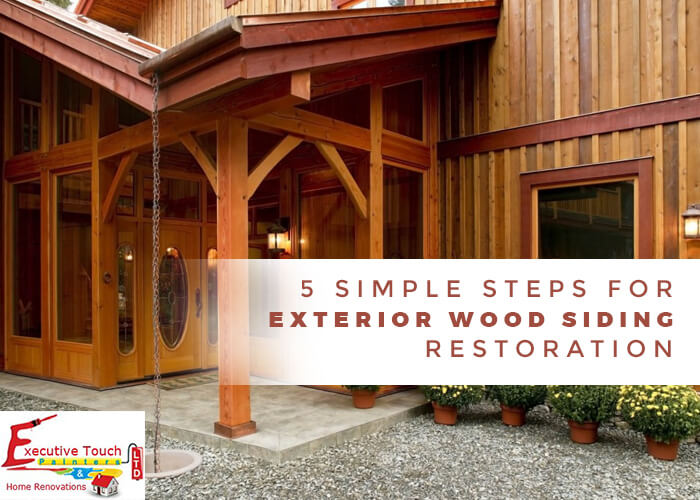
5 Simple Steps for Exterior Wood Siding Restoration

Wood performs an essential role in the construction of exterior and interior of house elements. The wooden items are to be taken care of regularly otherwise there is a chance that the wood begins to deteriorate. Even the best wood types can become prey to the exterior dust, humidity, and heat from the sun. Can you restore the wood structure if it is in the right shape? Yes! Follow the below 5 Simple Steps for Wood Siding Restoration like a pro.

5 Important Steps to Follow

1. Remove the Old Paint on the Wood :

Before the actual restoration process has begun, the paint on the wood has to be removed. The paint removal is done to see what are the damages in the wood. To have the paint removed, use tools like heat gun and putty knife. Do not use gunfire that emits fire as it can damage the wood. Use an electric gun that emits heat only. The heat emitted from the gun cracks the paint on the wood, then using the putty knife have the paint removed. It’s not easy to remove all the paint at once. Remove part by part by using the heat gun and putty knife. Continue the process unless all the damages can be seen clearly and you are sure that the paint from the wood is completely removed.

2. Sand and Fill the Exterior Wood :

Once the scraping of paint is completed, check for the areas where the wood got damaged and repair them. In the process use a wood filler to fill all the gaps you meet, cover the loose gaps using caulk. After the gaps are filled up, wait for sometime for the fillings to be dried out completely. The sandpaper can be used to remove any unwanted materials formed during the filling and caulking process. After the completion of the sanding wash the wood materials by using the garden hose.

3. Repair and Restore the Wooden Structures :

The decorative wooden items have many joints and connections. Exposed joints can be broken and lead to the whole damage of the structure. So use procedures like re-gluing, clamping, tightening, replacing on loose screws, nails, and wood strips. Using galvanized fasteners inhibits rusting. Refinishing is another option available for repairing the old wooden flooring or items of your house.

4. Apply Primer :

After the complete washing of the wood items, it’s time to get it painted. Even before painting, the primer is to be applied to the surface. Before the application of Primer, the surface should be dry and free from impurities. Select a high-quality primer and also the color of the primer should be matching with the paint color that you wish to paint on the wooden surface. Apply the primer evenly on the wooden surface. Go for another coating if the first coat of the primer does not help in saturation of the wood.

5. Protect and Beautify with Paint :

The paint helps in protecting the surface of the wood. So be careful in selecting the paint. Gloss paint protects from moisture and humidity. The paint should be applied to the primer for getting a smooth and desired finish. If you are painting for wood items outside the house, then its better to go for UV protection paints, so that the paint protects the wooden items from the harsh UV rays. But make a note that even the most expensive paint cannot protect the structure for a lifetime, so repainting is to be done every 3-5 years.

Conclusion

Maybe it is a wood siding, a deck, a fence or any other type of wooden structure the restoration can be done easily by following the above wood siding restoration process if it is in a decent shape. But the restoration of some moderately damaged wooden structures definitely requires expert hands. If you came to know that you require a professional contact Executive Touch Painters in Toronto for customized carpentry and trim works or call us at (416)-410-0164 now to book a free estimate.

Categories
Home Renovations

How to Install Crown Molding?

One of the excellent ways to add beauty to a room is to use crown moldings on the walls. The installation process is however complicated for the homeowners to do by themselves. With proper research and right tools, homeowners can do the work on their own. The appropriate molding selection plays the vital role in the cutting and installation of the molding on the walls. The color of the molding should match with the color of the walls. Wrong moldings and contrast colors can affect the beauty of the wall and room.

Tools Required for the Installation :

  • Crown Moldings
  • Miter Saw(Electrical)
  • Measuring Tape
  • Drill, Hammer, and Nails
  • Caulk and Wood Filler
  • Pencil for Marking
  • Stud Finder
  • Fine Grit Sandpaper

Instructions for Installing Crown Molding :

1. Choosing the Molding for the Room

First, you need to choose the correct molding for the room. The moldings are available in different colors and shapes in the market. You should select the molding according to the requirement of the room. Most of the people tend to choose moldings with more carving details in them. If the work is done by a professional, then you can select the molding with detailed carvings. If you have chosen to do the work by yourself, then be careful in choosing the molding. The molding must also be matching to the colors and decorations of the room.

2. Take the Measurements of the Wall

Using the measuring tape, take the exact measurements of the wall. Make a note of all the measures on a paper. With the help of stud finder, find all the studs and a pencil marking on the stud. The marking is to make as you should nail the moldings to the studs. If possible try to select the moldings precisely as the measurements of the wall.

3. Cutting the molding

The most critical job in the installation of the molding. Most of the cases the angle between the moldings would be 45 degrees, and the cutting would not be a tough task. (Read our previous article on How to Cut Crown Molding)

4. Installation of the Moldings

Nail the crown moldings to the walls. Be sure that you hammer the nails precisely to the studs that you have marked. For the installation at the corners blocks, see that the cut moldings are fitting correctly with the ones on the adjacent side.

5. Filling the Nail Holes and Caulking

After attaching the moldings to the wall, fill the holes formed by the nails with the wood filler and use the sandpaper to make a smooth finish. If there are any gaps between the moldings, fill them with the caulk. Make a smooth finish using the fine grit sandpaper.

Kitchen Cabinet Crown Molding :

Installation of moldings in a kitchen room is a good idea, and also it updates the appearance of the cabinets of the kitchen. Crown moldings in the kitchen too add value to our home at the time of selling.

Here are the Steps for Installation of the Crown Moldings on the Kitchen cabinets

1. Measure: Take the length of the cabinets where you wish to install the crown moldings. Take the precise measurements, and you can always purchase a little extra length of molding than the required.

2. Cutting: As per instructed in the above procedure make the cuttings required, with the miter saw. The crown molding angles are mostly 45 degrees for the edges. Make sure that the cut pieces are fitting into each other exactly.

3. Installation: Place the molding on the top of the cabinets and with the help of hammer and nails, nail the molding into the place. Make sure the nails are nailed correctly so that the molding does not come out of the wall. Be careful at the edges of the walls and cabinets. The cut moldings should fit into one another perfectly for a smooth finish.

4. Caulking: After completing the installation, use the caulk to fill up the gaps. You can also use wood glue to seal the holes. Use the sandpaper to remove the excess caulk and wooden glue present after application.

Conclusion

Installing Crown moldings on the walls and cabinets of the kitchen is the very tough job that cannot be completed by the homeowners themselves. So, you need to hire an expert for the job. Our Professionals at Executive Touch Painters are always there to help you in crown moldings and all other types of home renovations in Toronto. Call us at 416-410-0164 or Contact us for more details like the cost etc., and get a Free Estimate Now!

Categories
Home Renovations

How To Cut Crown Molding

Crown molding is the piece of wood that sits in between the corners of the wall and ceiling at about 45-degree angle. The moldings can be at the bottom or the top of the corners. Cutting the moldings is not tricky, but could be if the walls are not exactly square in shape.

Tools you need for Cutting the Crown Molding

  • Miter Box
  • Pencil
  • Coping and Handsaw
  • Dowel
  • Combination Square
Steps for Cutting the Crown Mold
  • Insert the crown molding in the miter box with bottom edge facing upwards. Hold it at an angle, to fit against the corners of the base and ceiling. Now cut the side at an angle of 45-degrees. The edge that is on the bottom of the box is the longer edge.
  • Now remove the saw from the pair of the notches and insert into another pair so that it’s played in the opposite direction.
  • Miter the edges in the same way for a smooth finish.
  • Use a coping saw to fit crown moulding in inside corners that aren’t square. Begin by cutting the edge of one section of molding at a 90-degree angle and securing it in position with that end flush against the wall.

Tip: If you wish to paint the edges, use acrylic latex caulk to fill up the imperfect gaps.

How to Cut Inside Corner of Crown Molding?

1. Measure the Angle of the Corner between the Walls :

Use a Protractor to measure the exact angle of the edge. Most precisely the angle would be 90-degree, must measure the correct angle. Make sure that the protractor is placed parallel to the bottom and ceiling, to get the right angle. Cut each of the two crown molding pieces at half of the measured angle to make them fit precisely in the corner.

2. Cut the Right Side Corner :

Set the compound miter saw to the required angle. Place the piece to be cut on the bed of the saw and cut while you held the mold with your left hand. Be sure that the bottom of the molding should be up when you make the cutting. Do not turn the saw while cutting, as it might change the angle.

3. Cut the Left Side Corner :

Now set the angle again on the miter and make the cutting of the left corner. Place the molding on the bed of the saw and while you held the mold with the right hand, make the cut. Here also the bottom of the molding should be kept up while cutting and also the saw should not be turned while cutting.

Warning: Take precautionary measures when working on the miter and saw.

How to do Crown Molding Outside Corner Cuts?

1. Mark the Length Required :

Marking is the crucial step to be done carefully. Measure the length of the crown needed for the outside corners of the walls. Using a tape, measure the dimensions of the outer edge where the molding is to be fitted. Mark the lengths clearly with a pencil.

2. Determine the Angles :

Using a large protractor measure the angle between the outside corners. Note down both outer angles from each corner of the wall.

3. Cut the Molding using a Miter Saw :

A miter saw is a device needed now. The miter saw is used to cut the crown mouldings at the particular angle that is required. Set the required angle in the miter saw and cut one of the moldings. Pick up the second molding piece and perform the cutting by placing it upside down on the saw. Pick up the two pieces and check if they fit on the outside corner perfectly. Usually, the angle for cutting the moldings is 45 degrees.

Now that you came to know about how to cut crown molding, follow the next step of installing crown molding here.

Conclusion

The above-mentioned instructions on how to cut crown molding will be helpful if you had some previous experience in using the sharp tools, else it is a wise decision to get your job done by a professional because a single mistake made in the process can create a whole mess and will result in the loss of material, money and of course your valuable time. Our Professionals at Executive Touch Painters and Home Renovations Ltd has got years of experience in various custom carpentry and trim work for residential and commercial spaces in Toronto. Contact or Call us at 416-410-0164 for a Free Estimate Now!

Categories
Home Renovations

How to Frame a Basement Wall?

Framing your basement walls is the first step in finishing your basement. Get ready, because this is when all of your time spent researching, planning, and designing your basement will finally pay off. First, decide on the type of frame that you got to be installed on the wall.

Materials Required for Basement Framing

  • Foam Board
  • Foam Board Glue
  • Drills and Drill Bits
  • Hammer and Nails
  • Saw (For Cutting)
  • Drywall Screws
  • Safety Goggles

Step by Step Process to Frame a Basement Wall

1. Exterior Wall Set-Up :

Prepare the exterior wall before installing the frames to them. Before attaching the foams, check for any damages to the walls and repair them if necessary. Make markings on the wall for studs and make sure to make the same marking on the foam boards as well. Foam Boards are used to keep the basement energy efficient. Drill holes through the foam board to the exterior walls and hammer in the screws through each hole.

2. Prepare the Frame :

Start assembling the wall frame on the floor and it’s faster and easier to construct a wall on the ground. Make markings on the frame, where the studs are to be installed. Have all the markings face the same direction, so its easy to nail them and avoid a curved wall. It’s comfortable to construct your frame with the crowns up; that way both ends of the studdings are solidly on the ground when you attach the top and bottom plates. Be careful in building the frame so that it can tip up quickly without getting stuck in the room edges.

3. Tip the walls :

It’s usually comfortable to tip a wall up with the bottom plate against the wall, but if the floor joists are sagging or there are pipes, you may have to raise the top of the wall in first and push the bottom plate into place.

4. Fasten the bottom frame first :

After tipping up the structure to the wall, time to fasten the frame to the wall. You can use construction adhesive and nails to secure the bottom frame to the wall. Wear safety glasses and gloves for protection. You can use drilling machine to make holes and nail down the screws and fasten the frame.

5. Fasten the Top of the frame to the wall :

Nail the top frame to every joist present and use plumbing tools to secure the nails on to the structure. It’s not essential to adjust the studs straight under floor joists, but it’s a good idea if you plan to run ductwork or pipes in the walls.

6. Inside Corners :

When there are inside corners, turn the last board on the first wall sideways and overlap it about halfway pass the connecting wall. By making in this way, you can fasten the two walls together.

Conclusion

You require patience and well planning for framing a basement wall. If you want a professional to take off the hassle on you? Contact Executive Touch Painters in Toronto for expert basement renovations. Call us at 416-410-0164 and get a Free Estimate on the cost to frame a basement wall.

Categories
Home Renovations

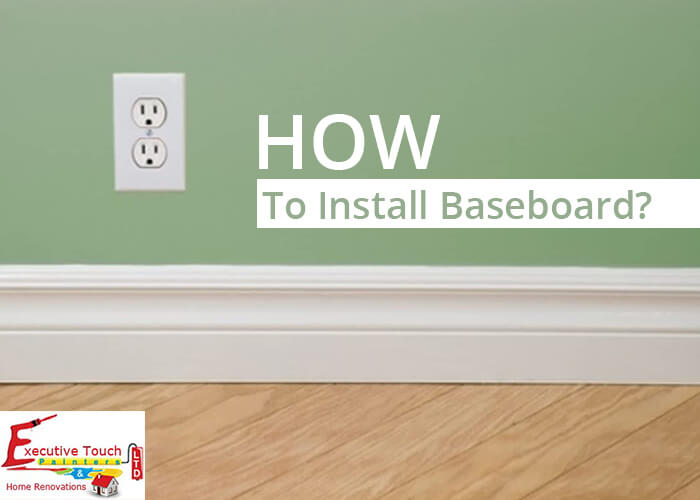
How To Install Baseboard?

Baseboard molding on the walls of your house give a final appearance and also add beauty to the home. Baseboard moldings are the final trims to be done in the rooms and are meant to fill gaps between the wallboard and floors. The moldings also form a pleasingly cohesive perimeter. The moldings are added after the painting to the room is completed.

Choosing a Baseboard Style :

Always choose a board style that is complimenting to the room and should also mix well with the existing mill work of the room. There are a variety of board styles available, and you can choose from the best possible design.

Installing Baseboard

Materials Required for Installation :

Many materials are required to install a baseboard in your room. Some of them are mentioned here,

  • Baseboard Molding
  • Cap Molding
  • Measuring tape
  • Miter and Circular Saw
  • Stud Finder
  • Pencil and Level
  • Carpenters glue and Construction Adhesive
  • Nails and Nailgun
  • Hammer
  • Compass
1. Measuring and Cutting of the Molding :
  • Be careful while cutting the molds. The cutting should be done as per the measurements. Always cut few inches extra for the molds that meet outside the walls.
  • Make numbering on the molds, so it’s easy for installation.
  • Make sure that the floor is completely leveled, check once with the level.
2. Begin the Installation:
  • Start the installation at a convenient location.
  • Hammer two finishing nails through the board at each stud, near the top and bottom of the baseboard.
  • If needed added splices, when the length of the wall is more than the moldings.
  • See that the joint is not on the stud, where nails are nailed.
3. Miter Corners
  • To miter, the outside corners, fit the coped end of the molding first and then mark the joint location with the piece in place.
  • Keep in mind that corners are not always square. You may need to adjust joint angles slightly for a good fit.
4. Add Shoe Molding
  • To complete the work add shoe molding.
  • Place the shoe molding on the bottom of the molding and nail it to the baseboard.
  • To have a more traditional look, you can add cap molding at the top of the frame.
5. Review the work completed
  • After nailing the molding to the wall, leave it for some time and come back to check the work completed.
  • Use sandpaper to remove extra adhesive. Remove the sharp edges by using sandpaper.
  • Apply putty on the nail holes and let dry for some time
  • Add another coat of paint or putty if needed
  • After the putty is dried up, use the sandpaper to remove the extra putty and make it smooth.

Now that you have completed baseboard molding, it’s time to apply primer and paint to the molding.

Conclusion

For Painting services for your home Contact our Professional Painters at Executive Touch to get started or Call (416) 410-0164 to get a Free Estimate.

Categories
Home Renovations

How to Repair Stucco?

Stucco repair is the most used technique for repairing the damaged walls and ceilings. Traditional Stucco is prepared from sand, water, and lime. But in modern days it’s made from Cement, sand, and water. Stucco repairing technique is effortless for the homemakers, and you can also apply the texture to the stucco applied. Some stucco materials are water resistant, choose the best one suitable for your home.

Step by Step Process to Repair Exterior Stucco Walls or Ceilings

Step 1: Break the Loose Stucco

Using a hammer break up the loose stucco that is hanging on the walls and be careful not to damage the underlying wooden supports.

Step 2: Chip off the Edges

Continue the above step until you have found the stucco firmly adhered to the wooden support. Remove the wire mesh that is present.

Step 3: Cover the Exposed Lath

Trim the piece of builder’s paper with a utility knife tightly right at the point where the wood lath meets the old stucco. Fasten the paper further using some roofing nails then add the second layer on the top of the first.

Step 4: Add the mesh

Place galvanized metal lath over the paper and trimmed it tight against the edge of the concrete. Snips with offset handles will make this job easier. Drive more roofing nails through the mesh and into the wood lath.

Step 5: Mix up the ingredients and Prepare the Stucco

Wet the existing stucco so that it does not suck the moisture from the newly added one. Apply the stucco on the mesh attached to the old one. Smooth the stucco mix with a finishing trowel, then pack it against the edge of the old stucco with a brick trowel. Keep adding more material until this layer is about 1/2 inch below the existing stucco surface. Make scratches to improve the bond with the second coating. Cover the area coated with a plastic sheet and plaster it to stucco from drying out.

Step 6: Apply the Second Coat

Wait for seven days after completing the first coating. Remove the plastic and drizzle the patch with water. Mix stucco according to the second-coat recipe on the packet, and blade on a 3/8-inch-thick coat, working from the bottom up. Cover again with the plastic sheet.

Step 7: Finish it up with a Final Coat

After about three days remove the plastic cover, mix up the stucco and make a finishing coat that is matching with the remaining wall or ceiling.

Step 8: Wait to Paint the Area

Let the stucco patch prepared to be cured for a week before painting it. Make sure the painting is done carefully so that the spot is not visible.

Conclusion

So when are you thinking of repairing patches on wall or ceiling think of Stucco Repair? Patching of holes and repairing cracks can be a difficult task, so you need a professional Stucco Contractor in Toronto to get your job done right. We at Executive Touch Painters offer expert stucco repair service at affordable costs. Contact or Call us at (416) 410-0164 for a Free Quote or to clear your doubts.

Categories
Exterior Painting

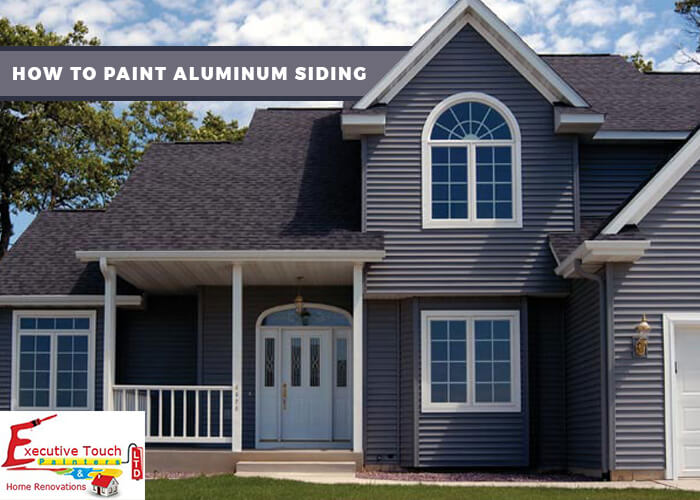
How To Paint Aluminum Siding?

Many homeowners in Toronto tend to remove the old aluminum sidings. Instead of replacing the old aluminum siding, it is more cost-efficient to repaint it. It is a simple process that can be completed in less time than you think. Often the question arises on how to paint the old Aluminium siding? In this article, we discuss the process in simple steps.

Steps to be Followed in Painting Aluminium Siding

Step 1: Repair the Damages

Repair all the damages that are present on the siding. Any sagging and separation, especially where the roof meets the wall, should also be inspected.

Step 2: Clean the Surface

Use sandpaper to scrub the surface of the siding. After using the sandpaper use a pressure or power washer to clean up the surface.

Step 3: Fill the Gaps or Holes with Caulk

Siding with holes will not be beautiful after painting. So be sure to fill all the gaps on the siding surface. Caulking is the best process to fill up the holes. Use a caulking solution to fill up the holes and cracks in the siding.

Step 4: Apply the Primer

Before going to the actual painting, first, apply the primer. The primer must be well paired with the paint that you are going to use on the siding. Always use two coats for that extra protection of the siding. Avoid using latex primer as it reacts with aluminum siding and fails to stick to the paint applied afterward.

Step 5: Apply the Paint

Depending on the paint you chose, the number of coatings can be changed. But always be sure that you have a minimum of two coats applied. Depending on the surface and your convenience you can use rollers or brushes. Spraying is also another technique used, but be sure that the climate is not too windy when using the sprayers for painting.

Step 6: Keep an Eye on the Climate

Do not go for painting if it’s too hot or raining. Always give a gap of one day after applying the primer to the siding. Give time for the primer to stick well to the surface.

Conclusion

Painting an Aluminum siding is more complicated than the painting surfaces of the wall and other surfaces, there are many real-world scenarios in Canada where homeowners attempted the job and tend to fail which leads to the loss of hard-earned money and valuable time. So, it is a wise decision to hire a professional to paint your exterior aluminum sidings rather than doing it yourself or removing the sidings to save you thousands of dollars. Contact Executive Touch Painters to get started or Call us at (416) 410-0164 for a Free Estimate today!

Categories
Interior Painting Painting Ideas

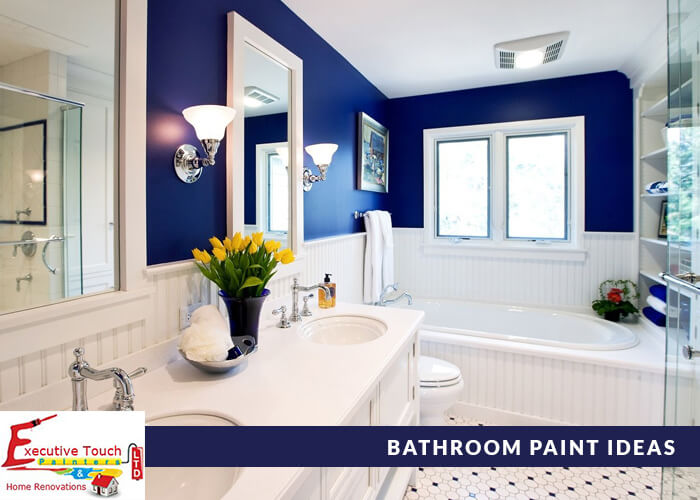
Bathroom Paint Ideas

When it comes to decorating a house, all the rooms get equal attention and the rooms are well furnished, but the bathrooms are neglected and frequently forgotten and completed with half-hearted designs. But why? We spend time in the bathrooms and yet the decoration of the bathroom is ignored. All you need to transform the space is a pop of color on the walls.

The bathroom is the place where you get ready to face the world, and it’s also a private place to get recharged. Check these painting ideas for your bathroom. Choose the right color and paint to avoid bathroom paint peeling, cracking or bubbling.

Choosing The Right Colors

Opt for Light Colors

The colors should not alter the light in the bathroom, which might affect your grooming. Strong colors have the most impact, so always go for light creamy colors.

Soothing colors

A master bathroom is a place which lets you seize yourself for some time. Choose soothing paint colors that ease you to relive your stress, anxiety, frustration or more. Master bathroom paint color ideas should be according to the bedroom colors. Choose colors that share either cold or warm undertones of the bedroom.

Vibrant Colors for Small Bathrooms

If the Small bathroom doesn’t have natural light, vibrant color can play with artificial lighting sources to make a strong style statement.

White Color adds Softness

Bathrooms are full of mirrors, tiles and other hard surface materials. So the color should bring a sense of softness to space. White and neutral colors bring a touch of softness to the bathrooms when complementing them with hues.

Some Unique Small Bathroom Paint Ideas

If you want to decorate your powder room a bit different from others? Try these ten vivid colors for your small bathroom painting in Toronto.

Vibrant Teal :

A bright shade of teal color gives a quite strong statement in this modern world of designing. Choose a vibrant color for the walls and if possible pop out fixtures and artworks on the walls.

Black :

Bring a modern look to your bathroom by combining Black with silver accents. Consider adding a silver mosaic tile as the background to make the space shine.

Glimmering Copper :

Metallics are a definite style statement nowadays. So why not incorporate them into the bathrooms also. With glimmering copper, you can add instant elegance to your bathroom. Use mosaic tiles with the color combination of brown and neutral color for the backsplash. Using a floating marble countertop will complement the look of the mosaic tiles.

The Magenta’s :

Try a girly side with a pop of pink. A graphic accent not only adds fun pattern into the design but helps counteract the brightly painted walls.

Powder Blue :

If not interested in vibrant colors, go for light colors like powder blue. Try light blue color in the baby bathroom. A sunny shade of yellow sets perfectly with the space to enhance it further.

Pretty Plum :

Dark purple color adds womanishness and gives a bold look to the bathroom. Don’t be afraid to use different combinations of colors to get a bold look.

Neon Yellow :

Bright yellow stripes give a young vibe to a small bathroom also. Use minimal fixtures and accessories when using yellow lines in the bathroom space.

Deep Cherry Red :

Energize the children bathroom with a deep cherry shade of red and is also an excellent color choice for the kids. Decorate the space above the toilet by creating a colorful gallery wall showcasing the artwork of your child.

Serene Green :

On the lighter side, use the light green shade in the bathroom. Green color when combined with all fixtures in white color, gives a peaceful and rejuvenating space to freshen up.

Orange:

Orange color adds warmth and comfort to the space of the bathroom.

Conclusion

If you are considering to paint your bathroom with the above colors, Contact or Call our Professionals at Executive Touch Painters on (416) 410-0164 to get a Free Estimate. If you are looking for more bathroom paint ideas, Get in touch with our experts for a Free Color Consultation.

Categories
Interior Painting

Painting Tips to Make your Condo Look Bigger

Are you having a small space in your condominium but want to make it look substantial? Then change the way you paint your home. Follow these painting tips to make your Toronto Condo look bigger.

Useful Tips in Condo Painting

Paint with White Color :

Chances are there that space looks little bigger when space is painted in white color. Do not go for darker colors. Try to use white or neutral colors. A designer says that if you want to make space look bigger use white or light neutral colors.

Use the Same Light Colors for Painting the Walls and Trims :

Paint the boards, moldings, doors, window trimmings and inside shutters with the same color as of the wall. By giving the same light color, you don’t see boundaries, and you can feel that space has increased a bit. Try to use white or light colors. If you use too much of only one color, including the furniture, then it can look dull or cold. So always have touches of color in your furnishings.

Use Trendy Painting Palettes :

White is not the only color that makes your condo spacious. Use trendy palettes for places that have natural light coming in. Also painting these rooms with grey color make the room look roomy and bright. Try different splashes of paint to create new designs. Pale blue-green color is another way to generate an illusion of space. An added benefit is the natural color, which makes the room look bigger and bright.

Be Monochromatic: The white baseboard and cream walls go very well with the white cabinets and curtains, added with a light wooden table makes your space look fresh and inviting.

Shape your Room with Bright and Lighter Color Combinations :

If you have narrow space, as the Toronto condo painters do, you can paint the shorter side a little brighter than, the longer side. This ‘widens’ the shape of the room, so it becomes less rectangular. Why is that? It is because lighter colors recede, while darker colors advance, seemingly moving that shorter surface closer to you.

Paint Stripes to Create Height or Width :

Whichever way you’d like your room to expand, either vertically or horizontally, strips are your friends so paint them on your walls. Besides, they add visual interest.

Paint the Adjacent Rooms with the Same Color :

Paint the adjoining places with the same color so that your eye is lead easily from one room to another. If you do not want the same color, then use different shades of the same color.

Color Ideas to Paint different Rooms in a Condo

The Living Room :

The deep and warm reddish color is suitable for light wood furniture. There are many living room paint ideas to showcase your house beautifully.

The Bedroom :

Use cool and earthy colors for complimenting the warm tones of the furniture present in the bedroom.

The Kitchen :

The bright green color blends well with the kitchen appliances. By using dark colors, there is no need to be afraid of using deep or bold colors even in small spaces.

The Dining Room :

Use colors that blend well with the furniture present in the dining room. Use natural colors through the interiors of the dining room and create a cohesion between the colors and the adjacent spaces.

Conclusion

Considering to improve your room space in your condominium with the above paint colors which will add more space to your condo in Toronto for sure. If you feel you need more color ideas, or if you want to get started with your condo painting by hiring professional Toronto condo painters, Contact or call Executive Touch Painters at 416-410-0164 to get a Free color consultation or an Estimate to match your requirements.