Categories
Interior Painting Residential Painting

What Should You Know Before Having Your Toronto Apartment Painted Professionally?

Are you planning to convert your rental property into one of the best options in the market? Then you need to hire a Professional Toronto apartment painter to attract more tenants.

Consider some of the below points to give your apartment a fresh look with essential paintwork or something different to set your property look separate from the others.

1. Paint Problems

A property owner gets annoyed when watching bubbles, cracks, or mold stains that happen on the painted surfaces after some weeks of painting. The incorrect execution of painting projects leads to the formation of bubbles and cracks. Unwanted paint problems can occur if the correct paint products are not used. Careful assessment of the climate has to be done before choosing the paint products.

If you hire the right Toronto Painting Professional, then you will not experience this type of problems. A Professional contractor like Executive Touch Painters hire painters who have a lot of experience in handling various commercial, residential, and industrial paintings. Furthermore, the painters are trained to deliver the best services to the customer.

Trained Professional Painters can be able to

  • Properly prepare the surfaces before painting
  • Identify the best weather conditions for painting the exteriors
  • Identify and rectify water leakage problems that could affect the paint durability
  • Recommend the best premium paint that is best for the surfaces
  • Having experience in using exclusive products to prevent future coating failures.
2. Technology

A Professional Toronto Painter has hands-on experience in using the latest technology in painting and gives the best quality and experience to the customers. Technology has become a part of every company, and at executive touch painters we use the latest methods to

  • Provide the latest and advanced coating solutions.
  • Come up with unique color schemes to change the entire look of your apartment space
  • Maximize the safety measures, productivity, performance, and efficiency of every painter during the several phases of painting projects
  • Use real-time information to update plans and information in an organized manner.
  • Offer the correct, fair, consistent, and accurate painting estimates always.
3. Curb Appeal

Whether you have a small or big apartment, image is more important than you think. Some sophisticated color schemes or crown molds mixed up with professional-looking paint job can create interest in the mind of tenants. Creating the first impression is the best one, and high-end aesthetics can make more tenants contact you.

Conclusion

Use of latest technology and pairing it up with experience and expertise has made Executive Touch Painters the best painting company in Toronto. No one equals our services in the industry. Contact our experts to discuss how to convert your rental apartment into a more desirable property in Toronto. Call us at (416) 410-0164 for a Free Estimate Now.

Categories
Commercial Painting Exterior Painting Interior Painting Residential Painting

Tips for Choosing Professional Painters in Toronto

Decorating your space can be a difficult task to do it yourself. Even if the project can be seen as a DIY, the expertise of an experienced person can be not a match when it comes to handling complicated and large scale endeavors. You can always rely on those professional painters who deliver the promise made to you about the completion of the project.

How Can You Find the Best Painting Professional in Toronto?

Read on this article to know more about the tips to choose the most reliable painter in Toronto to complete your project.

1. Look for well-established Painting Contractor

A well-established painting contractor has wide experience and diversified portfolio. Numerous testimonials give an impressive track record of the work done and attesting the professionalism in executing the work. The companies also have enough staff and experts, who can complete the work in the time frame. The easiest way to get the best among the painting companies, take reviews from the neighbors who have already have good experience with the painters. Check for online reviews before consulting the contractor.

2. Lookup for the Licenses and Certifications

Licensed contractors always ensure to give the best and follow the standards. In Toronto, all the contractors need to have a license and register through the secretary of the state. You can check on the department of business and regulation website to know about the permits of the Toronto Painter you are trying to reach for repainting your house.

3. Get Clear and Comprehensive Quotes

The quote from the contractor should be transparent and comprehensive. The nature of work, use of materials should be understandable. Be clear on what work will be done, what products will be used, and recommended steps to complete the job.

4. Be Sure that the Company Provides Insurance

The most important thing that is mostly overlooked is insurance. Even the most experienced painter cannot avoid accidents. So to prevent the damages or painter falling from ladder occurring in your property is ultimately your responsibility. The correct and adequate amount of insurance can rescue you in tough times.

5. Ask Questions to Clarify Your Doubts

After you have picked some of the contractors, you must meet them in person to have a detailed discussion. Here you have the chance to ask the right questions. The questions could be related to the bids, the insurance provided, and what are the products used for the project. During the discussion, you can get about the level of professionalism in the contractor.

6. Analyze the Approach to your project

Whenever a contractor comes to take up a project, do not hesitate to ask about the appropriate steps that are taken to complete the project in time. A contractor who is a professional will be able to explain all the steps with time schedules. If there is no sufficient information provided, then you can understand that the project will most probably fail.

7. Walk with the Contractors around Premises

It is a good idea to have a look at the areas that need to paint along with the contractor. Show the specific areas that should have special attention. Discuss the situation and let the painter decide on what work should be completed first.

8. Get Estimates

The quality of the products is essential, and the price is also crucial. To get the best quotes, make sure that all the contractors follow the same criteria, preparation and repair works, cleaning, etc. The time framework is also essential and ask the contractors to add the estimated time to complete your project.

Conclusion

If you are looking for the best Toronto painters to produce top-notch results, then contact Executive Touch Painters. We are having a team of professionally trained and experienced painters having experience in exterior, interior, commercial, and residential painting.

Take the help of our painters who can comply with the comprehensive set of requirements to complete your project in time and meet your quality and expectations. Contact us for more details. Call us today at (416) 410-0164 to discuss your project and get a free estimate.

Categories
Interior Painting

How Often Should You Paint Your House Interior?

How often should the interiors of your houses be painted? This question arises in the mind of every house owner. The typical answer is that the painting depends on the decors of the house. If colors are outdated, looking very dull, or you are the new resident of the house and the colors are not your favorite, then the house interiors need to be painted. At the present scenario, the increased durability of the acrylic paint is a boom to the homeowners because of the long durability and non-yellowing characteristics of the paints. Paints applied with proper preparation work have life from 5 to 10 years.

Details About Rooms That Need To Be Painted From Time To Time

1. Hallways and Corridors

The hallways and corridors are the places that take most of the traffic and often see a lot of wear and tear. The walls take the fingerprints, scuff marks, and there is a possibility of dents and cracks at the bottom. If you have used washable paint, it is easy to wash off the dirt. The dents and cracks at the corners of the walls can be patched and repaired using the same color shade. If the cracks are in the middle, then they should be fixed. According to most of the customers, the hallways are painted more frequently than the other areas of the home. Most of the halls are even painted once in 2 to 3 years.

2. Bedrooms

The paint job for the bedrooms depends on the persons using it. Bedrooms do not see much of activity, so they need not be painted from time to time. If the bedroom is used by children, then it has much activity. So the children bedroom need to painted every 2-3 years. Also make it a point to use Eggshell sheen to get beautiful, finish for the room. Use chalk paint for one of the walls, to encourage the children to present their creativity, and also the other walls are safe from the activity of the children.

3. Living and Dining Rooms

Living and dining rooms are the most used rooms in the house and often take heavy traffic. Lots of activity happening in these rooms, and so the wear and tear of the paint occur frequently. Proper prep work and use of high-quality paint will reduce the damages. Using various decoration items like lamps, furniture, and plants can help people stay away from touching the walls. Taking all these reasons into account, painting the living and dining rooms is necessary for every 5 to 7 years.

4. Other Rooms

Other rooms in the house are kitchen, bathrooms, and laundry. These rooms are the busiest rooms. The paint used should be most durable, where lots of activity happens. In the kitchen, it is best to use washable paints as there is a lot of cooking going on the walls need to be cleaned from time to time. Kitchens and bathrooms need a lot of preparation work and use paint that gives you a pearl or satin finish. The bathrooms and laundry are filled with water, so they need to be painted with water-based paints to control the mildew. The rooms also need to be ventilated to have the moisture or humidity escape and keep the paint dry. Even if you have taken most care too, the paint on these rooms needs to be changed once in 3-4 years.

Conclusion :

There are also structural reasons that decide the painting time of the rooms. If you are the new persons coming to the house, then you need to see that all the cracks need to be repaired and new paint applied. For any help or assistance regarding the interior painting in your area, contact Executive Touch Painter in Toronto by calling us at (416) 410-0164.

Categories
Interior Painting

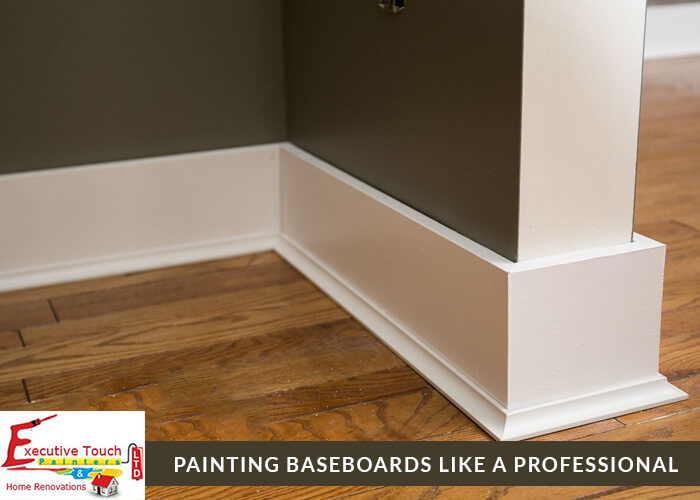
Painting Baseboards Like a Professional

It’s challenging to paint up your room and baseboards if you are having carpet spread over the place. There are many chances that the paint will fall on the mat and paint is not that easy to clean up from the surface of the carpet. It’s very tricky to paint the baseboards without getting the paint on the carpets.

Materials Required to Paint Baseboards:

  • Sandpaper for Cleaning
  • Tack Cloth
  • Putty Knife
  • Paint Brush
  • Paint Thinner
  • Required Paint
  • Clear Varnish
  • Wood Fillers for Filling Gaps

What Type of Paint Should You Use for Baseboards?

Baseboards are often subjected to most dirt and dust, so the paint should be easy to clean. You can use semi-gloss paint for the baseboards. Semigloss paints offer a bit of sheen and also easy to clean.

What Color Should You Paint Your Baseboards?

There are different approaches to choose colors after installing your baseboards. The color of the baseboard trim must compliment the wall color. Use light or dark shades to that of the wall color. It is also advisable to choose the same color as that of the wall.

Steps to Follow for Painting Baseboards

1. Protect the carpet with Drop Sheet :
  • Before starting the painting work, cover the main areas of carpet with a drop sheet.
  • Tuck Painters tape under the baseboard.
  • Make sure not to damage the baseboard or gouge while attaching the drop sheet of the painter’s tape.
2. Clean the Surface before Painting :

Dust always accumulates at the bottom of the walls. It’s essential to clean the surfaces well before starting the painting process. Use trisodium phosphate(TSP) to remove all dirt and grease from the walls. TSP is a non-toxic powder that can be used in your households for cleaning. Mixing the powder with water forms an effective cleaning solution.

3. Fill the Gouges and Nail holes :

Before starting the paintwork, be sure that there are no gaps on the baseboards formed by the nails. Fill up the big holes and dings with spackle and allow it to dry. Now using the sandpaper clean up the areas, you have repaired.

4. Painting the Baseboards :
  • As the gaps and holes are filled up, use a vacuum cleaner to remove the dirt and clean up with a damp cloth.
  • Now since drop sheet and paint tape protect the carpet, it’s time to start the painting.
  • Using a paintbrush paint all the baseboards with the color you like.
  • Dip the paintbrush into the bucket and see that there is no excess paint on the brush. It’s essential that the paintbrush does not drip.
  • While painting on the bottom of the baseboard see that you apply only small strokes and avoid dripping of paint onto the carpet.
  • Immediately wipe off any mistakes use a small cloth.
  • Apply a few more coats if necessary.

Conclusion

Painting of Baseboards is a very tedious job, and you should be very careful in trimming and painting all the surfaces at a time. The painting work is also time taking and it needs a lot of patience to handle the job. If you do not have that much time, then contact our Professionals at Executive Touch Painters for having your baseboards and walls painted without any hurdles. Call us at (416) 410-0164 for a Free Estimate!

Categories
Interior Painting

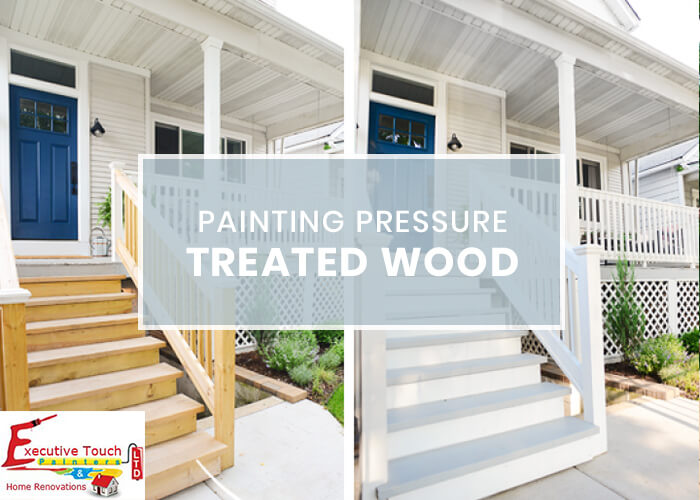
Painting Pressure Treated Wood

What is Pressure Treated Wood?

Pressure treated wood is the type of wood that has been treated with chemicals to protect the wood from harsh environmental changes. So, it is resistant to rain, wind, bugs, and mildew and good for outdoors. Pressure treated wood is the best material for fences and it is also comfortable to repair the wooden fences than the fences made of other materials like steel, iron etc.

Can you Paint Pressure Treated Wood?

Yes, It is completely paintable, but the painting job must be done properly, otherwise, your coat of paint will eventually start peeling. Also, More time and a large quantity of paint are needed to complete the work.

Steps for Painting Pressure Treated Wood

For ultimate results, there are some necessary steps to be followed while painting pressure treated wood which is discussed below.

1. Clean the Surface of the Wood :

Maybe you think cleaning the pressure treated wood is not necessary, but what if the wood has accumulated dust and debris. So, Clean the surface with soapy water and a brush to scrub off the dirt present on the surface. Scrubbing is to be done in the direction of the grain and wash it with water.

2. Wait for the Wood to Dry :

Regular pressure treated lumber dries within few days, but some might take more time depending on the type of chemicals that are used for the treatment. Painting on a wet surface is waste as the paint quickly peels off from the wet surfaces. Sprinkle water on the wood to test if the surface is dry or not. If the water is soaked into the layers of the wood, then the surface is dry. If the water rests on the surface as needed drops, then the surface is not dry, and you have to wait for some more time for the wood to dry.

3. Apply the Primer First :

As per the regular painting projects, here also the primer is applied before the actual painting. The primer takes time to dry than the regular surfaces. Make sure to use a primer that is suitable for the pressure treated wooden surfaces. Remember that for primer or paint, thin coats dry quickly. Pressure treated wood has resistance to liquids, so always follow the instructions on the primer container for a better finish.

4. Let the Primer to Dry :

After applying the primer, allow it to dry for some time. Luckily, the drying process may not take more than a day or two depending on the type of primer used. Do not go for painting until the primer is thoroughly dried. For the treated wood the time may be little more, allow the primer to dry for a day or two for better results.

5. Painting the Surfaces :

The final step in the process. Paint the surface of the pressure treated wood after the primer is thoroughly dried up. Latex paints are the best paints for the wood surfaces. Oil-based paints have a resistance to the surface of the pressure treated wooden surfaces. The proper painting on the surface of the wood will last for few years without damages. If you see any damages, then repaint the surfaces. If you are not in a situation for repainting the surface regularly, then you can go for staining process. Other than paint and stain, a protective sealant can also be used to apply on the surface of the pressure treated lumber.

Conclusion

The pressure treated wood is a special type of material that is to be maintained with more care. As its surface is resistant to elements like dust, heat, and water, the proper application of paint allows it to last for longer times. So, taking the help of a professional is a wise decision to paint treated wood. Executive Touch Painters in Toronto offers expert interior and exterior home painting services since 1989. Contact or Call 416-410-0164 at to Get a Free Painting Estimate Now!

Categories
Interior Painting Painting Ideas

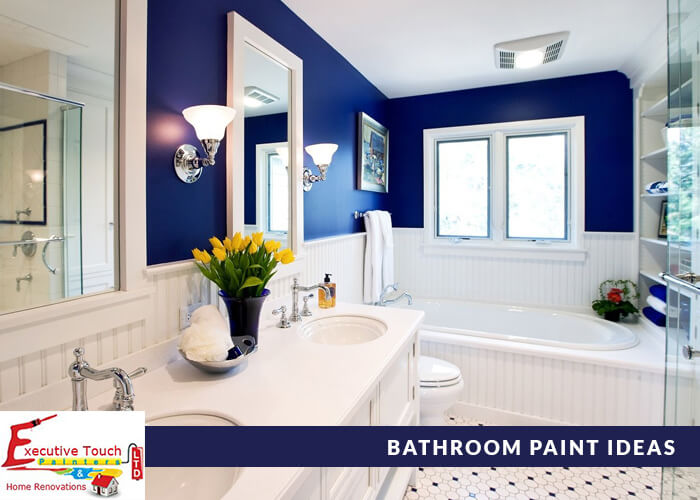
Bathroom Paint Ideas

When it comes to decorating a house, all the rooms get equal attention and the rooms are well furnished, but the bathrooms are neglected and frequently forgotten and completed with half-hearted designs. But why? We spend time in the bathrooms and yet the decoration of the bathroom is ignored. All you need to transform the space is a pop of color on the walls.

The bathroom is the place where you get ready to face the world, and it’s also a private place to get recharged. Check these painting ideas for your bathroom. Choose the right color and paint to avoid bathroom paint peeling, cracking or bubbling.

Choosing The Right Colors

Opt for Light Colors

The colors should not alter the light in the bathroom, which might affect your grooming. Strong colors have the most impact, so always go for light creamy colors.

Soothing colors

A master bathroom is a place which lets you seize yourself for some time. Choose soothing paint colors that ease you to relive your stress, anxiety, frustration or more. Master bathroom paint color ideas should be according to the bedroom colors. Choose colors that share either cold or warm undertones of the bedroom.

Vibrant Colors for Small Bathrooms

If the Small bathroom doesn’t have natural light, vibrant color can play with artificial lighting sources to make a strong style statement.

White Color adds Softness

Bathrooms are full of mirrors, tiles and other hard surface materials. So the color should bring a sense of softness to space. White and neutral colors bring a touch of softness to the bathrooms when complementing them with hues.

Some Unique Small Bathroom Paint Ideas

If you want to decorate your powder room a bit different from others? Try these ten vivid colors for your small bathroom painting in Toronto.

Vibrant Teal :

A bright shade of teal color gives a quite strong statement in this modern world of designing. Choose a vibrant color for the walls and if possible pop out fixtures and artworks on the walls.

Black :

Bring a modern look to your bathroom by combining Black with silver accents. Consider adding a silver mosaic tile as the background to make the space shine.

Glimmering Copper :

Metallics are a definite style statement nowadays. So why not incorporate them into the bathrooms also. With glimmering copper, you can add instant elegance to your bathroom. Use mosaic tiles with the color combination of brown and neutral color for the backsplash. Using a floating marble countertop will complement the look of the mosaic tiles.

The Magenta’s :

Try a girly side with a pop of pink. A graphic accent not only adds fun pattern into the design but helps counteract the brightly painted walls.

Powder Blue :

If not interested in vibrant colors, go for light colors like powder blue. Try light blue color in the baby bathroom. A sunny shade of yellow sets perfectly with the space to enhance it further.

Pretty Plum :

Dark purple color adds womanishness and gives a bold look to the bathroom. Don’t be afraid to use different combinations of colors to get a bold look.

Neon Yellow :

Bright yellow stripes give a young vibe to a small bathroom also. Use minimal fixtures and accessories when using yellow lines in the bathroom space.

Deep Cherry Red :

Energize the children bathroom with a deep cherry shade of red and is also an excellent color choice for the kids. Decorate the space above the toilet by creating a colorful gallery wall showcasing the artwork of your child.

Serene Green :

On the lighter side, use the light green shade in the bathroom. Green color when combined with all fixtures in white color, gives a peaceful and rejuvenating space to freshen up.

Orange:

Orange color adds warmth and comfort to the space of the bathroom.

Conclusion

If you are considering to paint your bathroom with the above colors, Contact or Call our Professionals at Executive Touch Painters on (416) 410-0164 to get a Free Estimate. If you are looking for more bathroom paint ideas, Get in touch with our experts for a Free Color Consultation.

Categories
Interior Painting

Painting Tips to Make your Condo Look Bigger

Are you having a small space in your condominium but want to make it look substantial? Then change the way you paint your home. Follow these painting tips to make your Toronto Condo look bigger.

Useful Tips in Condo Painting

Paint with White Color :

Chances are there that space looks little bigger when space is painted in white color. Do not go for darker colors. Try to use white or neutral colors. A designer says that if you want to make space look bigger use white or light neutral colors.

Use the Same Light Colors for Painting the Walls and Trims :

Paint the boards, moldings, doors, window trimmings and inside shutters with the same color as of the wall. By giving the same light color, you don’t see boundaries, and you can feel that space has increased a bit. Try to use white or light colors. If you use too much of only one color, including the furniture, then it can look dull or cold. So always have touches of color in your furnishings.

Use Trendy Painting Palettes :

White is not the only color that makes your condo spacious. Use trendy palettes for places that have natural light coming in. Also painting these rooms with grey color make the room look roomy and bright. Try different splashes of paint to create new designs. Pale blue-green color is another way to generate an illusion of space. An added benefit is the natural color, which makes the room look bigger and bright.

Be Monochromatic: The white baseboard and cream walls go very well with the white cabinets and curtains, added with a light wooden table makes your space look fresh and inviting.

Shape your Room with Bright and Lighter Color Combinations :

If you have narrow space, as the Toronto condo painters do, you can paint the shorter side a little brighter than, the longer side. This ‘widens’ the shape of the room, so it becomes less rectangular. Why is that? It is because lighter colors recede, while darker colors advance, seemingly moving that shorter surface closer to you.

Paint Stripes to Create Height or Width :

Whichever way you’d like your room to expand, either vertically or horizontally, strips are your friends so paint them on your walls. Besides, they add visual interest.

Paint the Adjacent Rooms with the Same Color :

Paint the adjoining places with the same color so that your eye is lead easily from one room to another. If you do not want the same color, then use different shades of the same color.

Color Ideas to Paint different Rooms in a Condo

The Living Room :

The deep and warm reddish color is suitable for light wood furniture. There are many living room paint ideas to showcase your house beautifully.

The Bedroom :

Use cool and earthy colors for complimenting the warm tones of the furniture present in the bedroom.

The Kitchen :

The bright green color blends well with the kitchen appliances. By using dark colors, there is no need to be afraid of using deep or bold colors even in small spaces.

The Dining Room :

Use colors that blend well with the furniture present in the dining room. Use natural colors through the interiors of the dining room and create a cohesion between the colors and the adjacent spaces.

Conclusion

Considering to improve your room space in your condominium with the above paint colors which will add more space to your condo in Toronto for sure. If you feel you need more color ideas, or if you want to get started with your condo painting by hiring professional Toronto condo painters, Contact or call Executive Touch Painters at 416-410-0164 to get a Free color consultation or an Estimate to match your requirements.

Categories
Interior Painting

How to Paint a Brick Fireplace?

Despite proper maintenance of brick Masonry fireplaces, a fair amount of soot, mildew, and efflorescence get accumulated on the furnaces and damages the paint on the blocks in the place. Brick has a unique texture, that is to be taken into consideration while painting the surfaces of the fireplaces. Follow these simple steps to paint up your fireplace bricks.

Materials Required for Painting the Fireplace :

  • Water
  • Soap
  • Stiff bristle brush
  • Painters Tape
  • Drop Cloth
  • Paint Roller
  • Bleach for cleaning
  • Paint Brush
  • Acrylic latex paint color
  • Primer

Steps to Paint a Brick Fireplace:

Step 1: Clean the Surface

The bricks in the fireplace tend to accumulate dirt and grit. So to remove them clean the brick with soapy water using a stiff bristle brush. Use the scrub brush to remove white powdery mineral deposits on the surfaces. If the fireplace also has soot, wash the brick with bleach and water. After cleaning allow it to dry down for 24 hours before painting.

Step 2: Check for Cracks

Before painting check for any cracks present on the surface of the bricks. If any breaks are there, fill them with some acrylic caulk. Read on the instructions given on the caulk bottle and provide the required time for the caulk to dry.

Step 3: Apply the Primer

Before going to paint, you have to apply the primer on to the surface of the bricks. Cover the areas that you wish not to paint with cloth and also protect the flooring from the paint splatter by covering with a cloth. Pour the primer into a bucket and by using a roller apply the primer on the surface of the brick. Make sure that you apply primer to all the bricks evenly. For joints and edges, use a brush to apply the primer. Where ever you have cleaned the efflorescence, apply two coats of primer for extra protection. If necessary apply two coats of primer. Allow the primer to dry completely overnight.

Step 4: Paint the Fireplace

After the primer is dried for overnight, it’s time to paint the fireplace. The fireplace paint should be heat resistant. Use the Stiff bristle brush to paint between the crevices of the mortar and brick. After that dip the roller into the bucket and apply paint to the remaining areas evenly. Gently apply a top coat of the paint to the brick block using overlaying strokes to cover all the bricks as best as possible, and leave it all to dry.

Step 5: Perform Final Touch-Ups

After the paint has dried up, look if there are any patches present. Fill up the spots with paint and allow it to dry. Take off the protection cloth on the floor and clean up any paint splatters with warm water. Clean the paint splatters as soon as possible. Clean the brushes for future use.

If you wish to add more decoration to the fireplace, then you can use Mantel for decorating around the painted brick fireplace. Use the mantel to give details and add molding to the mantel with wooden screws. Sand the mantel and paint it. Find the studs in the wall and nail the screws into the mantel through the wall.

Conclusion

Painted brick fireplace looks very neat and attractive and will also add potential to your home. So Bricks in the fireplace should be cleaned and painted from time to time. If you need a professional for painting your fireplace other than DIY, contact our Professionals at Executive Touch Painters on (416) 410-0164 to get a Free Estimate.

Categories
Interior Painting

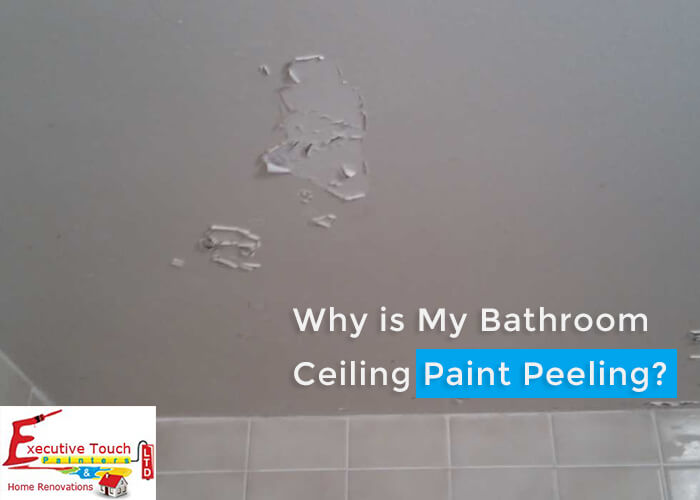
Why is My Bathroom Ceiling Paint Peeling, Cracking or Bubbling

Why is My Bathroom Ceiling Paint Peeling, Cracking or Bubbling

Peeling of paint is a common problem, particularly in areas where there is a lot of moisture, such as a Bathroom or Kitchen. Peeling is unsightly, but more importantly, it allows the decay of the surface. Over time, moisture can destroy walls and ceilings, so it is essential to address the problem as quickly and thoroughly as possible. The problem can occur at any time after painting, maybe after some days or years.

Peeling occurs when moisture enters between the paint layer and the surface underneath. To stop the process, you have to seal the surface and prevent the moisture from coming.

Main Reasons for Paint Peeling

Water :

Water causes the paint to get detached from the surface, resulting in bulging, cracking and peeling. The water can enter the surfaces through roof leakages and also be the result of permeable walls allowing water to penetrate into the walls.

High Humidity and Excessive Condensation Conditions :

High moisture causes a build-up of moisture on walls which heads to the blistering and bulging of the coatings. The result is cracking and splitting of the layers. On the other hand, condensation causes dampness which favors the increase of mold and fungus.

Poor Surface Preparation Before Paint :

For paint to stick properly, the surfaces are to be coated with primer adequately. If applied on uneven or non-primed walls, the color gets blistered and peels off. So the preparation of the surface is most important.

High Temperature and Effect of Direct Sunlight :

High temperatures make the paint to dry quickly and does not allow it to form a bond with the surface. On the other hand, intense sunlight makes oil paints fragile and vulnerable to cracking. Both latex and elastic paints expand and contract when exposed to the sunlight, weakening their adhesive bonds.

Incompatible surfaces :

Some paints do not go well with some types of surfaces. Oil paints do not go well with concrete and galvanized steel, resulting in damages. New or poorly cured wood also prevent adhesion. Flat or shining surfaces also have compatibility problems with some paints. Mechanical adhesion is hard to form on these surfaces, and any color applied to them flake off immediately. Special care is to be taken while preparing the popcorn ceiling for painting.

Different Coatings on the Same Surface :

Some paints do not bond with each other. Oil-based paints do not bond with latex based, and alkyd paints cannot bond with latex paints as well. Blistering occurs by applying both the colors on the same surface.

Too many Layers :

If too many layers are attached to a surface, the paint becomes heavy and can end up falling off. If there are no firm adhesive bonds to support the weight of the layers, the coating falls off immediately.

Low-Quality Paints :

Poor quality paints do not have the right adhesion property. The poor adhesion does not allow for bonding with the surfaces and peeling occurs. Low sticking property is also the main reason for blistering.

Wrong Paint on the Wrong Surface :

Some paints are designed for a particular surface only like there are different paints for wooden surfaces, metallic, concrete and plastic surfaces. The primer is also essential for the paint to stick to the surface. There are specific primers for specific surfaces also. Therefore, using a wrong primer and wrong paint can also lead to the peeling problem.

Use of Expired Paint :

While purchasing paint for your house, be sure to see the expiry date. If you use expired tint on the surfaces, then there are fewer chances that the paint sticks to the walls, leading to peeling.

Corrosive Substances :

There is a most chance that the paint gets peeled off when a corrosive metal or substances get in contact. The corrosive materials form blisters and bubbles on the paint surface. Good examples of these substances are acids used for cleaning bathrooms.

Poor Application Methods :

Applying thin layers of paint on the surfaces also leads to peeling of the paint. Use of wrong brushes fails to create a strong between tint and the surface. Lack of reliable bond creates cracks, blisters and peeling on the surfaces.

Extreme Dryness :

Extreme dry conditions also cause the paint to peel off from the surfaces. Dry situations do not allow the paint to form a stable adhesive bond with the surfaces.

A Coating that is Too Old :

With time, the cohesive bonds of a coat become stronger than the adhesive bonds and cause the layers to detach from the surface. Old paints lose bond strength and become brittle with time and subject them to cracking and chipping.

Conclusion

Kitchen or Bathroom ceiling paint peeling is a common problem in every house. Now that you have known all the reasons that are causing your paint to peel, crack and bubble, you learned the importance of avoiding this in your home or property.

Let our experts at Executive Touch Painters take the risk of you and make your bathroom or kitchen ceiling in Toronto to stop peeling. Contact us via online for a free estimate now! Or call us at 416-410-0164 for more assistance.