Categories
Commercial Painting Exterior Painting Interior Painting Residential Painting

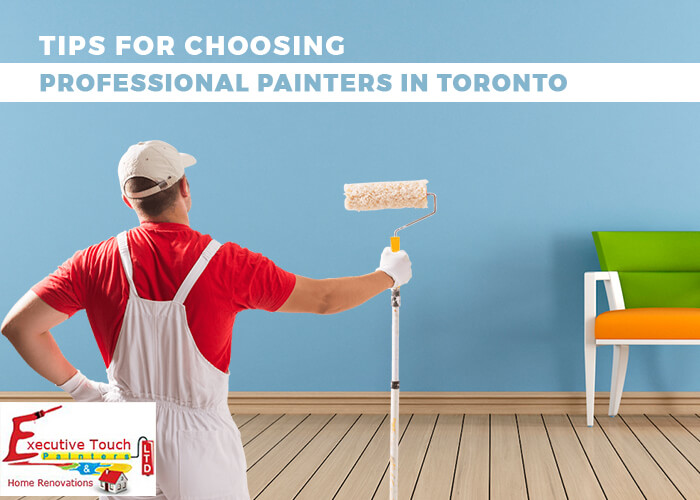
Tips for Choosing Professional Painters in Toronto

Decorating your space can be a difficult task to do it yourself. Even if the project can be seen as a DIY, the expertise of an experienced person can be not a match when it comes to handling complicated and large scale endeavors. You can always rely on those professional painters who deliver the promise made to you about the completion of the project.

How Can You Find the Best Painting Professional in Toronto?

Read on this article to know more about the tips to choose the most reliable painter in Toronto to complete your project.

1. Look for well-established Painting Contractor

A well-established painting contractor has wide experience and diversified portfolio. Numerous testimonials give an impressive track record of the work done and attesting the professionalism in executing the work. The companies also have enough staff and experts, who can complete the work in the time frame. The easiest way to get the best among the painting companies, take reviews from the neighbors who have already have good experience with the painters. Check for online reviews before consulting the contractor.

2. Lookup for the Licenses and Certifications

Licensed contractors always ensure to give the best and follow the standards. In Toronto, all the contractors need to have a license and register through the secretary of the state. You can check on the department of business and regulation website to know about the permits of the Toronto Painter you are trying to reach for repainting your house.

3. Get Clear and Comprehensive Quotes

The quote from the contractor should be transparent and comprehensive. The nature of work, use of materials should be understandable. Be clear on what work will be done, what products will be used, and recommended steps to complete the job.

4. Be Sure that the Company Provides Insurance

The most important thing that is mostly overlooked is insurance. Even the most experienced painter cannot avoid accidents. So to prevent the damages or painter falling from ladder occurring in your property is ultimately your responsibility. The correct and adequate amount of insurance can rescue you in tough times.

5. Ask Questions to Clarify Your Doubts

After you have picked some of the contractors, you must meet them in person to have a detailed discussion. Here you have the chance to ask the right questions. The questions could be related to the bids, the insurance provided, and what are the products used for the project. During the discussion, you can get about the level of professionalism in the contractor.

6. Analyze the Approach to your project

Whenever a contractor comes to take up a project, do not hesitate to ask about the appropriate steps that are taken to complete the project in time. A contractor who is a professional will be able to explain all the steps with time schedules. If there is no sufficient information provided, then you can understand that the project will most probably fail.

7. Walk with the Contractors around Premises

It is a good idea to have a look at the areas that need to paint along with the contractor. Show the specific areas that should have special attention. Discuss the situation and let the painter decide on what work should be completed first.

8. Get Estimates

The quality of the products is essential, and the price is also crucial. To get the best quotes, make sure that all the contractors follow the same criteria, preparation and repair works, cleaning, etc. The time framework is also essential and ask the contractors to add the estimated time to complete your project.

Conclusion

If you are looking for the best Toronto painters to produce top-notch results, then contact Executive Touch Painters. We are having a team of professionally trained and experienced painters having experience in exterior, interior, commercial, and residential painting.

Take the help of our painters who can comply with the comprehensive set of requirements to complete your project in time and meet your quality and expectations. Contact us for more details. Call us today at (416) 410-0164 to discuss your project and get a free estimate.

Categories
Interior Painting

How Often Should You Paint Your House Interior?

How often should the interiors of your houses be painted? This question arises in the mind of every house owner. The typical answer is that the painting depends on the decors of the house. If colors are outdated, looking very dull, or you are the new resident of the house and the colors are not your favorite, then the house interiors need to be painted. At the present scenario, the increased durability of the acrylic paint is a boom to the homeowners because of the long durability and non-yellowing characteristics of the paints. Paints applied with proper preparation work have life from 5 to 10 years.

Details About Rooms That Need To Be Painted From Time To Time

1. Hallways and Corridors

The hallways and corridors are the places that take most of the traffic and often see a lot of wear and tear. The walls take the fingerprints, scuff marks, and there is a possibility of dents and cracks at the bottom. If you have used washable paint, it is easy to wash off the dirt. The dents and cracks at the corners of the walls can be patched and repaired using the same color shade. If the cracks are in the middle, then they should be fixed. According to most of the customers, the hallways are painted more frequently than the other areas of the home. Most of the halls are even painted once in 2 to 3 years.

2. Bedrooms

The paint job for the bedrooms depends on the persons using it. Bedrooms do not see much of activity, so they need not be painted from time to time. If the bedroom is used by children, then it has much activity. So the children bedroom need to painted every 2-3 years. Also make it a point to use Eggshell sheen to get beautiful, finish for the room. Use chalk paint for one of the walls, to encourage the children to present their creativity, and also the other walls are safe from the activity of the children.

3. Living and Dining Rooms

Living and dining rooms are the most used rooms in the house and often take heavy traffic. Lots of activity happening in these rooms, and so the wear and tear of the paint occur frequently. Proper prep work and use of high-quality paint will reduce the damages. Using various decoration items like lamps, furniture, and plants can help people stay away from touching the walls. Taking all these reasons into account, painting the living and dining rooms is necessary for every 5 to 7 years.

4. Other Rooms

Other rooms in the house are kitchen, bathrooms, and laundry. These rooms are the busiest rooms. The paint used should be most durable, where lots of activity happens. In the kitchen, it is best to use washable paints as there is a lot of cooking going on the walls need to be cleaned from time to time. Kitchens and bathrooms need a lot of preparation work and use paint that gives you a pearl or satin finish. The bathrooms and laundry are filled with water, so they need to be painted with water-based paints to control the mildew. The rooms also need to be ventilated to have the moisture or humidity escape and keep the paint dry. Even if you have taken most care too, the paint on these rooms needs to be changed once in 3-4 years.

Conclusion :

There are also structural reasons that decide the painting time of the rooms. If you are the new persons coming to the house, then you need to see that all the cracks need to be repaired and new paint applied. For any help or assistance regarding the interior painting in your area, contact Executive Touch Painter in Toronto by calling us at (416) 410-0164.

Categories
Home Renovations

How Long Does a Kitchen Renovation Take?

Kitchen renovation is a big scale project, and the work can take up to some weeks. The time frame for your kitchen renovation depends on

  • The requirement of Structural work
  • Plumbing and Electrical works
  • Unseen damages or asbestos on the floor

Time Frame for Renovation Depends On

Working With Designer

If you have hired a professional kitchen designer, then you need to give at least 6 to 8 weeks for the design to be completed. The time includes meeting time, taking the required measurements, and developing a draft plan prior to starting the work. Sit with the designer and make sure that you are happy before finalizing the designs. Before taking the measurements, all the appliances and cabinets should be locked in, so that the measurements are made correctly and the alignment is perfect.

Working on the Cabinets

If you want to order custom based cabinets, then you need to wait for about 4-12 weeks or the cabinets to be made. If imported material is required, then potentially you have to wait for few more days. If flat packed kitchen is your choice, then picking up the right combination of cabinets and having them delivered is the thing you have to take care of. There could be a difference between the custom and real cabinets that you have received and also do not expect the same quality as of the custom cabinetry.

Time for Prep Work

For the new cabinets to be installed, the old furniture needs to be removed. The work could take just a day. The prep work for the new installation can be started. The preparation work includes plumbing, electrical, and flooring works. The time frame for this work could be from days to weeks depending upon the significant structural changes that have to be made in the kitchen.

Actual Work of Installation

After the cabinets are delivered to your place, then the installation work is quick, assuming that no mistakes are made. But if are planning to install the cabinets on custom stone or engineered counter-tops, then a delay in the installation can take place. This is because the contractor needs to make the correct measurements and install the cabinets correctly so that you can use them for many years to come. The back-splash will also get ready in this time, and you need to wait for some more days to install tiles and glass.

Installation of New Appliances

The final step in the kitchen renovation is the installation of the appliances. The process is straightforward and quick but give at least 1 to 2 days for the completion of work. You should also figure out the way to dispose of the old appliances. Just take the help of dealers to make a deal or sell them online, or donate them or give them to a metal scrap dealer. The contractor hired for the work should also clean the old appliances as a part of the service.

Conclusion

Are you ready for renovating your kitchen or house? Then you need to speak to a renovation adviser to get guidance on how to start and prices for the work. Our adviser will study the complete project, understand your needs, and refer the professionals to get the right quote for your project. This service is completely free, and no consultation fee is required. For more details, Call Us at (416) 410-0164 or Visit our Website.

Categories
Home Renovations

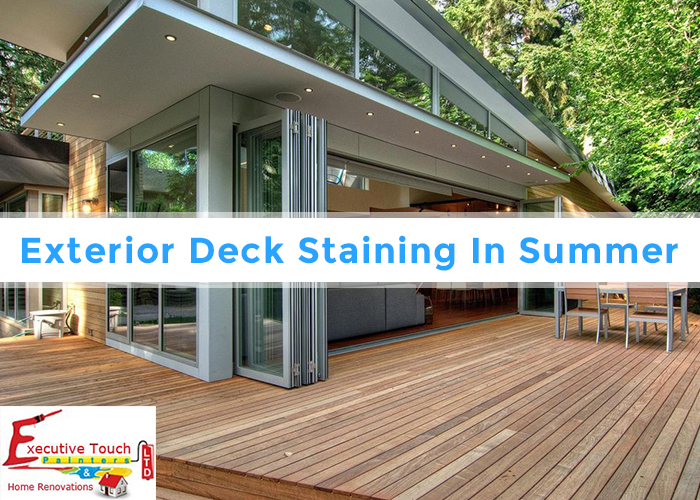
Exterior Deck Staining in Summer

Summer is the time for backyard reunions and other home gatherings. If you would like to impress your guests and relatives with an attractive, spacious, and functional out space, then you need to go for deck staining or painting. Once the deck is stained or painted by a professional, you will be surprised by the look that a good deck creates to your outer space.

Naturally, the wooden decks are subjected to all the harsh elements of the climate year around. The harsh elements cause wear and tear to the decks, making them look dull. High-Quality paint or stain, not only protects the deck from harsh climates but also look beautiful. Staining not only gives an excellent look to the deck, but it also protects the wood from rotting. The stain also comes in various shades, and you can choose the shade based on your interest. A professional painter can help you in choosing the shade that compliments the outdoor spaces and doors.

Tips to Have a Beautiful Deck for Your Outdoor

1. Forecast The Weather

To have the stain applied to the deck wood, there should be no rain. The perfect temperature for staining your deck is 50 to 90 degree F. Check the weather forecast at least two days before applying the stain or paint. Always remember not to stain in the direct sunlight because the stain dries before the wood absorbs it.

2. Preparing the Surface

The basic rule is that there should be no dirt or dust before painting. Begin with sanding and remove the putty on the edges using a knife. After the sanding and removing the putty, use pressure cleaning to remove all the dust and let the deck dry for two to three days. You can also contact professionals to clean the deck. If your deck is made of old wood, then you also need to treat with special chemicals to avoid the insect and rot problems.

3. Usage of Special Brushes

Synthetic brushes are the best brushes for painting wooden surfaces. Roller accompanied with a 1/4 inch nap can be used to help the layer of satin to attach well to the wood deck without pooling.

4. Selection of Stain based on the Wood

Each stain has its advantages and suits a particular type of wood. You cannot apply a semi-transparent stain to a wooden deck coated with a solid stain. The solid stain closes the pores of the wood and does not allow another coat to be absorbed. However, you can add a solid stain to the wooden deck, which is already having the same.

5. Apply Thin Coats

Select the best color stains for your deck. To paint two or more decks at a time, use long and smooth strokes for even finishing. The semi-transparent stains should be applied. Thin strokes of stain will avoid puddles on the surface of the deck. No matter what stain you are using, always make sure that you apply two coats for a smooth finish with no miss outs.

Caring for the Deck

After staining the deck, you need to check for dirt and dust periodically. Clean the deck using a mild detergent or with wood care cleaner, to remove all the dirt and dust present on the surface of the deck. Cleaning the deck rejuvenates the surface of the patio and also extend the life of the wood.

Conclusion

Staining the deck is not a DIY process; you need to hire a professional for the job. If you would like to plan painting or staining your deck this summer, then feel free to get in touch with the professionals of Executive Touch Painters to get a smooth and beautiful finished deck for your outdoor.

Categories
Home Renovations

5 Summer Projects to Protect your Home

Summer is halfway through, and a fresh coat of paint to your interior and exteriors brightens your home and gives a new glow to your rooms. A professionally painted house increases the curb appeal and also boost the value of your home. Now that the task of painting is over, some other tasks are being taken care of to make your home look more beautiful.

You have taken care of the siding and stucco; the outside areas need some sprucing up. Here are some of the projects that you might take up to gain an advantage over the warm weather of summer.

Cool Summer Projects for Your Home

1. Door Painting

With the exterior looking so great, the door lacks the pop up once it had. Changing the color of the door can give a good look for the exterior walls. Try to provide the colors like bright-red, royal blue, deep purple, or lime green color to bring an impressive look to the door.

2. Door Refinishing

If you have a wooden door, try to give a new look by sanding and refinishing it. If you are not satisfied with the look of the door, then you can replace it with a new one. Make sure that the door matches with the deck or porch for consistency or choose something different.

3. Deck Staining

Now that the weather is warming up, it is time that you have a look at the back deck of your house. On these warm days staining or painting the deck will bring a completely new look to the deck, and you can enjoy your outside living areas with family. Getting the deck stained will give you an option for having great dinners at night with family, relatives, and neighbors.

4. Other Exterior Painting Projects

As all the exteriors of your home are painted well, you need to concentrate on other exteriors that need to be regularly maintained. The wooden fence, shutters on your home need to be painted and protected from the harsh elements of the climate. You need to power wash the exteriors before going for the painting projects. Trust the professionals from Executive Touch Professionals to give a good look for your fences and shutters.

5. Cabinet Refinishing and Painting

If your interior was painted, then you might have noticed that crown moldings, baseboards, built-ins, and cabinets need some extra care. You will be amazed at how a refinished cabinet gives a new look for your home and interiors.

Conclusion

There is always a to-do list for every home, and the homeowners must prioritize the works. As you know, the painting of the house is given the first preference and is also the most significant project for the homeowner. So we found that summer is the best time to refresh your home in Toronto. Our professionals are known for their expertise in home renovations and painting. It all starts with a consultation, talk to our professional for a free estimate now.

Categories
Home Renovations

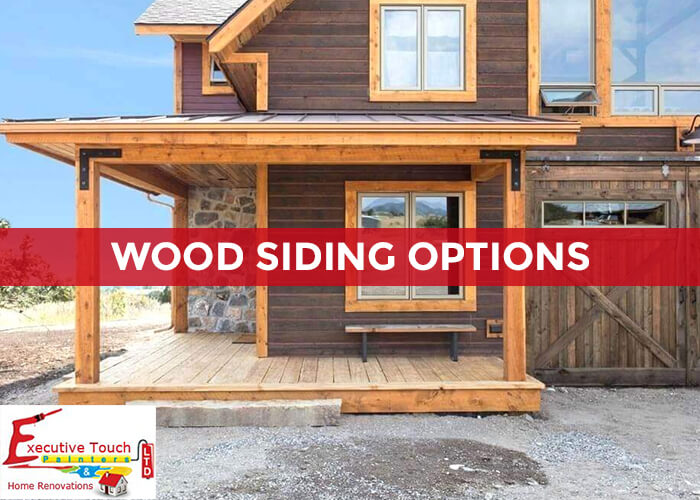
Best Wood Siding Options

Wood siding or cladding is a simple, attractive, and natural way of protecting the exterior of any house. The sidings are designed in various patterns for vertical, horizontal, and board & batten style installation.

Although there are many forms of wood used for siding, Cedar and Redwood are the most opted wood materials for the siding of exteriors.


Why Wood for Siding?

The main reason to use wood for siding because it is natural material available. The natural stuff is beautiful and durable compared to other materials. Wood is used in traditional architectural houses like bungalows, cottages and Cape cod interiors.

Best Wood Siding for House

There are mostly 6 types of natural wood materials used for siding, and one man made alternative wood is commonly used for the siding of exteriors.

1. Cypress


Cypress is a hardwood and highly desired material for siding application. It is incredibly durable, often being salvaged from demolished centuries-old homes for reuse. This wood is rot and insect resistant. It is hard to mill and also it is costly to buy. So this wood is not recommended for modern houses.

2. Redwood


Redwood is one of the most durable and preferred woods used in the siding. The wood accepts stain or other finishes readily due to its very little resin nature. Redwood does not shrink as much as other types of wood, so it doesn’t change shape as much. This reduces cupping and warping. For these reasons, redwood siding requires less maintenance than other types. Merely power washes it once a year and seals it every three years or as needed.

3. Cedar


The wood is very easy to work with and so is the most used type of siding. The straight grain makes cedar very stable when turned into the siding, and provides a beautiful finish when stained, making this the preferred wood when a stained finish is required. Maintenance of cedar is relatively less when compared to the other wood.

4. Fir


The most popular option for sidings. This wood is available on longer boards, and due to its soft nature, it is very easy to cut into the desired shape. The smooth grain on the fir wood accepts nice finishing, and most of the fir blocks are painted. The only problem is that fir is not natural rot and insect resistant. So maintenance is required to keep the integrity of the fir wooden blocks.

5. Spruce


This wood is the family of Pine trees and makes proper sidings for the exteriors. The wood is soft and is easy to cut in any desired shape and mostly available in longer lengths. Like fir, spruce is not rotted and insect resistant. Proper care has to be taken to protect the sidings.

6. Pine


White pine is the most common wood used for siding. Yellow pine is used for preparing frames for windows. Pine does not have any grain, so it is very easy to paint or stain the wooden pine blocks. Pine is not rot resistant and does not repel insects. To retain the integrity of the wood we have to paint or stain it. However, the softness of the wood makes it easier to mill to produce different styles of siding.

7. Engineered Wood Siding


This type of wood is human-made and extremely durable and lasts up to 30 years after installation. The wood is manufactured from wood chips and sawdust combined with various bonding agents. The result is engineered wood siding that is strong and lightweight. Available in different lengths and also easy to mill into desired lengths. For maintenance, the wood is to be painted.

Types or Styles of Wood Sidings

1. Wood Clapboard Siding


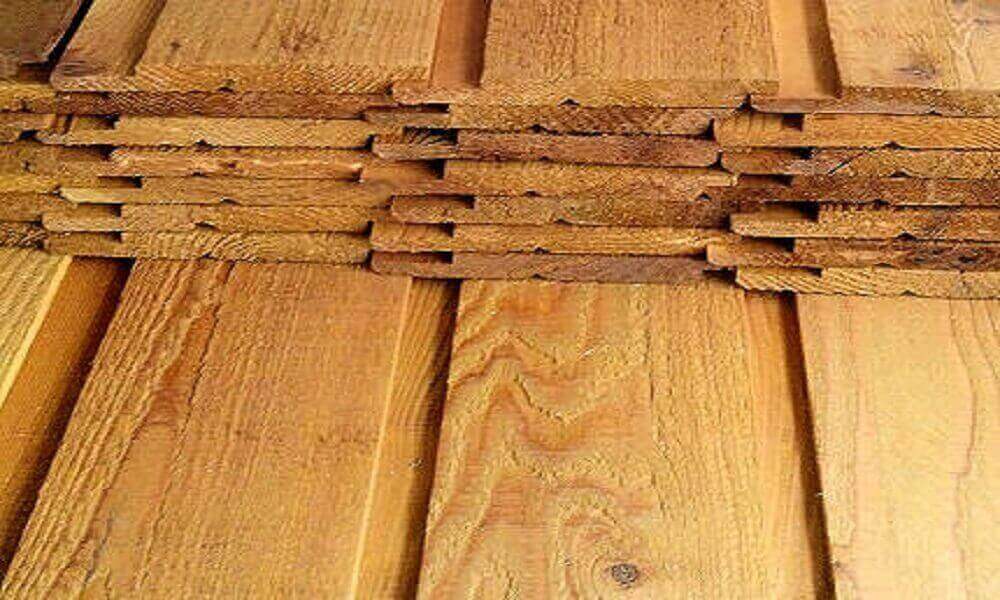
Popularly known as Lap siding, is the traditional type of siding used in the olden days. Long wood boards are sawed in a slight pie shape. After the milling, the boards are placed one over the other, starting with the first board set on the bottom of the wall. Periodic painting or staining maintain lap siding. To reduce the water damage caulking can be done.

2. Drop Channel Siding


This type of siding can be installed horizontal or vertical or diagonally. This type of siding is a common choice for cabins as many cabins are paneled with boards cut with the drop channel method. One long edge of a plank is milled down to be narrower than the rest of the board. On the other long side, a small groove is cut on the bottom of the board. This creates an overlap that shows the sculpturing of the board without creating a ledge on which water can bead.

3. Tongue and Groove Siding


Individual planks are milled with a groove on one long edge side and tongue on the other corresponding edge. The tongue and groove interlock each other to form a smooth surface on the top.

4. Split Logs


This type of siding gives a cozy look to the room. The wood is sawed with the natural bark on it. Then the logs are attached to the wall, and they appear as solid logs. For this type, the wood logs are made from cypress or cedar or oak.

Other Types of Sidings that are Commonly Used:

  • Board and Pattern
  • Shake Siding
  • Shingle Siding
  • Other Materials used for Siding

For siding mostly wood is used due to its durability and other properties. Other than wood the following materials can be used for siding:

  • Vinyl
  • Fiber Cement
  • Stucco
  • Synthetic Stone

Conclusion

Siding for a house is done to protect the exteriors and also a great option to provide color and definition to your home.

Call us at 416-410-0164 or Contact us to get a Free Estimate now.

Categories
Exterior Painting

Reasons Why Spring is the Best Season to Paint Your Toronto Home

The long winter season has come to an end, and it is the time to put together all the to-do list for your home interior and exterior. Typical spring season starts with cleaning of the yard. In this season, the most overlooked area is the exterior walls. The paint might have faded or peeled off and needs a new coating. There is a wide range of benefits when you paint your exterior in the spring season.

Why Spring is the Perfect Time to Paint Your Home?

1. The Exterior Takes a Heavy Thrashing in the Winter Season

The harsh climate of the winter can cause severe damage to the exterior of your home. Most of the people ignore the wear and tear caused by the fog, rain, temperature changes, and sunshine. The harsh weather damages the exterior paint and finds its way into the exterior and damages the trim pieces. Eventually, all the changes make the paint to crack, peel off, and to flake. Even after withstanding the cold temperatures, the coming summer can cause more damage by having pressure on the paint.

2. You Can Find out Many Repairs and Damages

One of the great things in painting job is that you can find out the condition of your exterior. When your painter is going to paint a particular area, there is a chance that the damages or repairs can be found. As you have decided to paint the exterior, you can make it a point to clear all the damages and repairs and finish the painting. Additionally, the peeled off paint can also be removed, and a fresh coat of paint can be applied.

3. Improve the Curb Appeal

When you are looking to purchase a house, the first thing you observe is the exterior walls and painting. The right look of the exterior adds extra beauty to the home, and your guests are surely impressed. A potential buyer drives around to observe the surfaces. If the exteriors appear good, then there is a chance that they will have a look in the interiors.

Many things help in improving the curb appeal of your house. Exterior painting colors add an appeal to the home. Neutral colors like the grey, white, blue and brown, bold colors like red and blue are welcomed for the exteriors of any house.

4. Increases the Value of Home

Painting your home exteriors is a type of investment. You need to invest a low amount of money on the paint. The typical cost of painting your house with the help of a professional is very low when compared to the value of the home increased.

5. Convenience of Time

The warm and bright sunshine in the spring helps the paint to bond well with the walls. Additionally painting your home in the spring season is just part of maintenance that you should conduct every year. Spring is the time for all people to come out and work in their yard and make the home fresher and clean. So as a part of maintenance, spring is the best time for painting your exteriors

6. You Get the Best Price

After long waiting in the cold winter, the painters and companies are getting ready for work. There is usually a competition between them to grab works. So the customers get the chance to get the lowest prices for the exterior painting works.

Conclusion

Spring is one of the best seasons to paint your Toronto home. Are you thinking of repainting your house? Our professionals at Executive Touch Painters and Home Renovations are ready to paint your home with a free color consultation. Contact or Call us at 416-410-0164 for a free spring estimate.

Categories
Home Renovations

Metal Roof Coatings Toronto

Metal roofing has gained importance due to the sustainable nature. But in the summer season, the interior temperatures get increased due to the heat waves outside. The prolonged exposure of the metal roof to the harsh climatic conditions causes the roof to be damaged. At this situation, it is crucial to get a recommendation for the roof covering procedures for your home.

Your unprotected roof exposure to rain and sun causes the metal to expand or contract. This condition also makes the bolts to get loose and causing leakages and damages on the walls of the roof. The replacement of the roof is not a better idea every time, so it is better to go for a coating for the metal roofs.

The roof has to be prepared well before the coating is applied. High-pressure cleaning makes sure that all the dirt is removed from the surface. Rust inhibitor is applied to the places showing the signs of rust. Repair and tighten all the bolts of the surface. Make sure that the bolts, HVAC pipes, bulbs are in the correct position before the roof gets the coating. Good surface preparation makes sure that the coating bonds well to the surface.

Rubber Roof Coating System

Most of the industries go for this type of coating to protect from the climatic conditions. The rubber roofing also protects from the water leakages. The rubber coating system will seal and protect the surface for so many years with a little cost. The rubber coating is far better than going for a new roof.

Metal Roof Painting Contractors

In most of the situations, individual persons tend to start the coating of metal roofs of a house. The work process for covering the roof is complicated. You need to find out the correct elements required for covering the roof, and you should explore online websites to discover the necessary products or paints for carrying out the process. On the other hand, if you do not have prior experience, then you have to depend on the metal roof covering builders, and there is also no guarantee that you will succeed in getting the work done as it should be. A professional metal roof painting contractor will recognize what kind of materials are perfect for your roof, and even the covering of the roof also needs experience.

Conclusion

In case you have a metal roof, get in touch with our professionals at Executive Touch Painters to suggest and paint the perfect combination of coating that would be suitable to protect the roof from all kinds of harsh climatic conditions. Call us at 416-410-0164 or Contact us to get a Free Estimate now.

Categories
Commercial Painting

FAQ’s on Commercial Painting

Painting a commercial space is entirely different from a residential area painting. While
some homeowners try their home painted on their own, most of them prefer to hire a
local painting team to get the desired results. But a DIY painting job is not recommended because a simple mess up can cost some serious dollars and physical or material damage. Whereas, in the case of painting a commercial area, it is mandatory to hire some professional painters to bring new life and value to your business.

Our expert team at Executive Touch Painters in Toronto compiled a list of frequently asked questions obtained from different business owners. Below you can find the
relevant answers to the questions if you have any further queries feel free to Contact
Us.

List of FAQ’s

What is Commercial Painting?

When there is a business with a physical location and needs paintwork to be done, then the professional carrying out the work is called as the commercial painter, and the process is called Commercial Painting. Larger space, then many painters are required,
and they have to take care of all the aesthetics of the company to create a good impression on the client visiting the company premises. As time is a significant factor,
more painters are also used to complete the project in stipulated time. Commercial painting task is a little bit tough and risky as the whole business affects the look of the building.

How Does Commercial and Industrial Painting Differ?

Commercial and Industrial painting involves painting a building used for commercial or
business purposes, but both the process are done with different goals in mind.

  • Commercial painting involves painting of building where clients or customers are present. But in the case of industrial painting, paint is done for machines or
    a building that needs to withstand the harsh conditions of the manufacturing
    environment.
  • Commercial painting jobs are conducted using latex-paints, as the latex paint dries out quickly and the building can be used for your business. For industrial painting, the buildings are not used by most of the public but need to withstand the harsh machine conditions. So oil-based paints are used, as they tend to be
    more durable and last longer.
  • Commercial Painting offers painting for the building interior and exteriors.
    Industrial painting offers painting for machinery, boats, aircraft, and structures
    such as bridges.
What are the different types of Commercial Painting Services?
  • Warehouse Ceiling Painting
  • Electrostatic Painting
  • Corporate Office Painting
  • Parking Garage Painting and Flooring
  • Painting and Flooring for Retail Spaces
  • Painting and Flooring for Schools and Universities
  • Painting and Flooring Services for Country Clubs and Golf Courses
  • Painting and Floor Coatings for Places of Worship
  • Painting for Health Care Services
  • Painting and Floor Coating for Commercial Properties
Best Commercial Painting Contractor of Canada

For the last 30 years, Executive Touch Painters has been building up its reputation and
has become the leading service provider for commercial and interior painting. Our team is specialized in transforming residential and commercial projects into ones that
make your guests or customers jazzed up the moment they notice the property from
the outside. Our team will always be ready to decorate the way you like. To discuss
your commercial or residential painting projects get in touch with us today. You can also call us at 416-410-0164 to book a free estimate.