Categories
Home Renovations

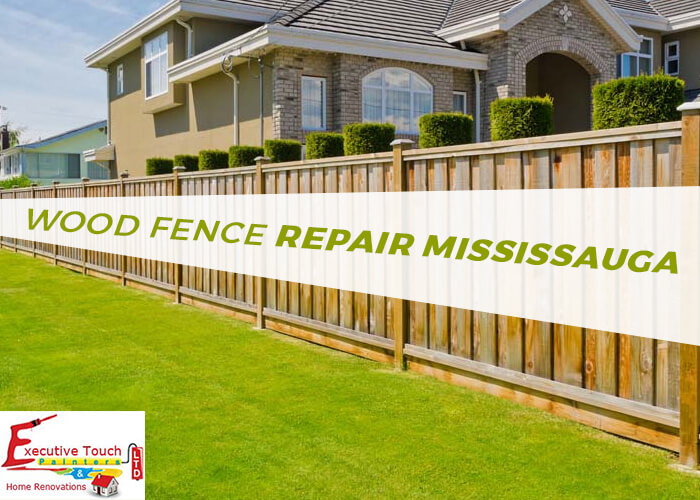
Wood Fence Repair Mississauga

There is a saying that good fences make good neighbors. Install a fence to your house to increase its value. Many materials can be used for fencing. These materials have made the fence installation inexpensive and also readily available. The fences define the demographic border of your home or office premises. The introduction of other materials like vinyl has provided an alternative to the wooden fences. For the decoration of barriers, materials like wrought or ornamental iron are used to remove the dull look of the fence.

If you live in a house that has already a fence, then you should ensure that the fence is well maintained. It is essential that you perform periodic repairs on the fence so that the fence stays long for many years. There are specific measures to be taken for the wood fence maintenance in Mississauga.

Choosing the Best Material for Fence :

There are many materials with which the fence for your home can be designed. You should consider the climate of your area before selecting the material for your fence. If your area is prone to harsh climates like winds or tornados or hurricanes, then your material must be a position to withstand the climatic conditions. It is essential that the material also withstands the long winter seasons.

Here are Some of the Most Well-Known Materials used for Fences

Wood: With numerous varieties of wood available, you can use wood as a material for the fence. Little interest and research can do wonders on the wood of your fencing.

Metal: Metal fencing also comes in a different selection of materials. Varieties of metal fencing include chain links and wrought iron decorations. Wrought iron brings a look of classic fashion and elegance to your fence.

Why Choose Wood Instead of Other Materials?

Fencing protects your yard from various things and also defines the border of your property. So the fence and the material used should be strong and durable. Wood is the standard material choice for fencing. Pressure treated wood is best for your house as it can withstand all climatic conditions.

Best Wood for Fences in Mississauga

Pine, Fir or Spruce :

Pine, Fir, and Spruce are the most used wood for fencing due to the best durability and affordability. Spruce is generally used for stockade, prefabricated or picket style fences.

Redwood :

The most expensive material that can be used for fences, but uneconomical when used for long fences. Higher grade redwood is the most durable and resistant to insects and rot.

Cedar and Cypress :

Cedar contains natural oils, and Cypress has natural chemicals present in them. This property of Cedar and Cypress makes them most resistant to rot and insects. Due to the resistant property, the fences made of cedar and cypress have more lifespan than the other wooden fences.

New Fence Installation :

A new fence adds safety, privacy, and style to the exterior of your home. The fencing to your home must be done carefully with the use of durable and stylish materials. Characteristics like lattice panels will give you the appropriate amount of privacy and style so you can enjoy your beautiful yard in peace.

Factors To Be Considered Before Laying a Fence :

The function of the fence: A well-designed fence protects your yard from harsh winds and acts as security for your home. The fence also prevents your pets from escaping.

Style of the Fence: The design of the fence should compliment the architecture and landscape of your house.

Privacy: If you are seeing for more privacy in your yard, then use fencing materials like wood or vinyl.

Know the Exact Boundaries: You need to know the exact boundaries of your property to install a fence in the area.

Termites and Fire issues: In an area that is more prone to termites and fire accidents, ensure that your fence is termite and fire resistant.

Types of Fencing :

Timber paling: These types of fencing are versatile and easy to work and install.

Screen Fencing and Privacy Screens: These type offenses are becoming popular these days and give an excellent look to the yard.

Steel Fencing: These fences are termite resistant, so can be used where there is a scope of having more termites.

Classic Picket Fencing: These are eco-friendly fences made of timber and can be very special to your home.

Conclusion

A well-maintained fence adds unique beauty and protection to your home. The maintenance pattern depends on the type and material used for the fencing. If you are looking to install a fence or thinking of repairing it? Then contact Executive Touch Painters for wood fence repair in Mississauga or Call us at (416)-410-0164 to get a Free Estimate Now.
Categories
Commercial Painting Residential Painting

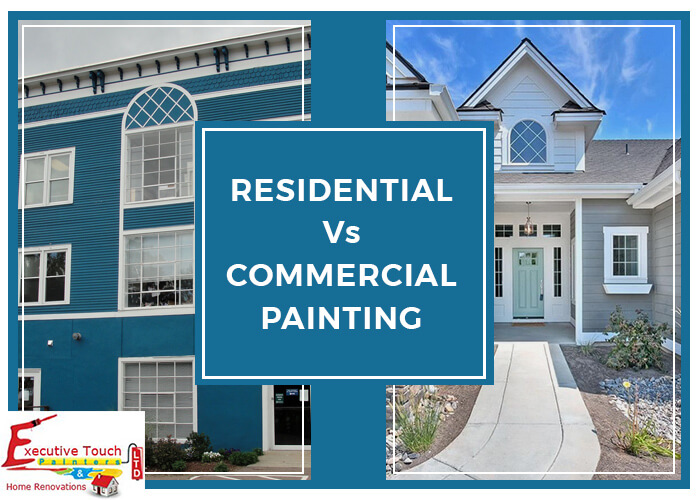
Differences between Residential and Commercial Painting

Most of the people think residential and commercial painting work is the same. But there are lots of distinctions between them. Residential painters provide personal home painting services, whereas the commercial painters step in when the task is too big for the residential painters. Know the main differences between residential and commercial painting and painters.

What is Commercial Painting?

Not only the painting of industrial buildings and offices, multi-family residences and apartments also come under Commercial Painting. The painters are equipped with more tools and required to paint large areas at a time.

What is Residential Painting?

Residential painting is just used for the painting of exteriors and interiors of a simple house. Residential painters are experienced in conducting painting work for small houses and know all color combination that will be best for your house.

Commercial Painting vs. Residential Painting

Based on the following factors the type of painting contractor can be chosen for your property.

Number of Painters:

In Commercial Painting large works are conducted compared to residential painting. So it requires more workforce for this kind of projects. The commercial painters mostly work in big apartments, restaurants, and other commercial buildings. Commercial painting companies employ more people so that the work can be completed at the scheduled time.

A Residential Painting Company is confined to paint only small houses. So there is no need to have many employees. In some cases, the whole house need not be painted, so only a few residential painters are sent to complete the small work.

The quantity of Paint:

When compared to residential painting, the amount of paint to be used is very high for commercial painting. As more paint is used, the time taken for completion of the work is also more. Whereas in home painting, the paint needed is very less and the work is also completed in very less time.

Experience:

A Commercial painter is more experienced than a residential painter. Even a homeowner can do the painting of his house, but it is not the case in commercial painting. For commercial buildings, the look is essential, and only an experience commercial painter can bring the look.

Residential Painters are well experienced in talking with the homeowners and know exactly what type of work or paint is required. The painters are also experienced to protect your furniture and flooring while the painting work is carried out.

Time Scheduling:

Commercial painting is done according to the schedule of business owners. Some commercial building owners appreciate the painters for not interfering with the working hours. Most of the industrial painting work is scheduled after the working hours and even night shifts are done to complete the job. But in the case of residential painting, the painters typically work from Monday to Friday and do not work on weekends, even if the work is pending.

Range Of Services :

A company offering only residential painting, will not have many services to offer. But Commercial Painting companies have other services like flooring installation, faux finishing, electrostatic painting services, and sandblasting.

Conclusion

Whether it is a simple painting job for your home or a large scale painting project for your business, you need a professional painting contractor in Toronto. Because these companies will have the right tools, machinery, and workforce to handle any size of a job. Executive Touch Painters offers expert residential and commercial painting services in Toronto since 1989. Contact or Call us at (416) 410-0164 for a Free Painting Estimate or to know more details.

Categories
Exterior Painting

How To Paint Vinyl Siding?

What is Vinyl Siding?

Vinyl Siding is a plastic siding that can be installed on the exterior of any house. Long strips of PVC are combined to form an outer shield for the house, and the cladding can be used for decoration purposes also. Vinyl Siding the most opts for exterior selections as it’s very economical and requires less maintenance.

Can You Paint Vinyl Siding?

In due time, the siding fades out or becomes worn out. When the siding fades out, the often concern of the homeowners is that “Can I paint the vinyl siding?“. Most of the people come to the conclusion that vinyl siding cannot be painted and thus go for changing the faded vinyl siding. However, Vinyl Sidings can be painted and can be repaired. Vinyl has the property of contracting and expanding depending on the temperature. So all types of paint will not go well with the vinyl siding. But Painting vinyl has its benefits and beautifies the exterior of your home.

Best Paint for Vinyl Siding

Vinyl expands and contracts when there are climatic changes, and this might create gaps at the seams. So the Paint to be used for vinyl siding is to be selected very carefully. Every type of vinyl is designed to absorb a certain amount of heat from the surroundings. So the light paint colors should be chosen for the sidings. If dark colors are selected, the heat absorbed would be more as dark colors would absorb more heat. This overheating causes the vinyl to warp or buckle.

Type of Paint to be Used

Now in the market, a wide range of vinyl-safe colors are also present to reduce the heat absorption of sidings. Many of these types of paints are a mix of urethane and acrylic resins. The combination of these paints gives more flexibility and excellent adhesion.

Painting Vinyl Siding

Applying paint to the vinyl siding improves the durability of the siding and also adds beauty to the exterior of your house. It is easy to paint the siding as it is effortless to clean and paint dries quickly. The other advantage is that the siding does not retain moisture.

4 Simple Steps to Paint your Vinyl Siding

Cleaning :

Before starting the actual painting process, you have to remove all the debris and dust present on the surface of the siding. Using a scrub or by power wash, you could clean the surface and remove all the dirt, mildew, chalking and other residues.

Priming :

The vinyl surface does not need priming but if the surface is degraded, pitted, porus and the original color is worn away, then you should use a primer. The primer makes the surface ready for the paint.

Paint Selection :

As said above, Use special exterior paints like latex for the vinyl sidings. The specific compounds in the paint have elastic property, and this helps the color to remain on the surface and withstand the contrast and expanding property of the vinyl siding. Other paints do not have this property and get cracks in no time.

Applying the Paint:

  • Use a roller or sprayer to apply the paint on the surface of the siding.
  • Apply the paint evenly on the surface. Be sure that the paint layer is not too thick.
  • The corners of the siding can be painted with a paintbrush.
  • After the first coating completely gets dried, apply the second coat.

Benefits of Painting Vinyl Siding

Conclusion

Painting vinyl siding is not a complicated task; you don’t need to be fear of doing it. But it requires few days, some professional tools and some labor to get the job done right.

If you think you don’t have much time and skills and want to take the help of professional exterior painters to paint your Toronto home, Contact Executive Touch Painters or Call at (416) 410-0164 to get a Free Estimate.

Categories
Interior Painting

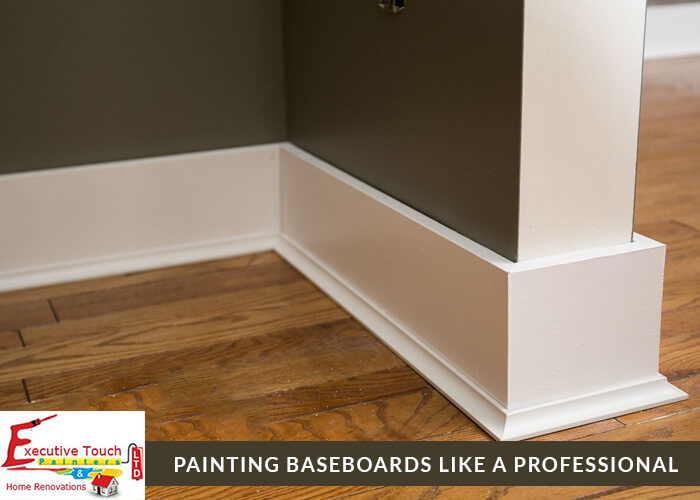
Painting Baseboards Like a Professional

It’s challenging to paint up your room and baseboards if you are having carpet spread over the place. There are many chances that the paint will fall on the mat and paint is not that easy to clean up from the surface of the carpet. It’s very tricky to paint the baseboards without getting the paint on the carpets.

Materials Required to Paint Baseboards:

  • Sandpaper for Cleaning
  • Tack Cloth
  • Putty Knife
  • Paint Brush
  • Paint Thinner
  • Required Paint
  • Clear Varnish
  • Wood Fillers for Filling Gaps

What Type of Paint Should You Use for Baseboards?

Baseboards are often subjected to most dirt and dust, so the paint should be easy to clean. You can use semi-gloss paint for the baseboards. Semigloss paints offer a bit of sheen and also easy to clean.

What Color Should You Paint Your Baseboards?

There are different approaches to choose colors after installing your baseboards. The color of the baseboard trim must compliment the wall color. Use light or dark shades to that of the wall color. It is also advisable to choose the same color as that of the wall.

Steps to Follow for Painting Baseboards

1. Protect the carpet with Drop Sheet :
  • Before starting the painting work, cover the main areas of carpet with a drop sheet.
  • Tuck Painters tape under the baseboard.
  • Make sure not to damage the baseboard or gouge while attaching the drop sheet of the painter’s tape.
2. Clean the Surface before Painting :

Dust always accumulates at the bottom of the walls. It’s essential to clean the surfaces well before starting the painting process. Use trisodium phosphate(TSP) to remove all dirt and grease from the walls. TSP is a non-toxic powder that can be used in your households for cleaning. Mixing the powder with water forms an effective cleaning solution.

3. Fill the Gouges and Nail holes :

Before starting the paintwork, be sure that there are no gaps on the baseboards formed by the nails. Fill up the big holes and dings with spackle and allow it to dry. Now using the sandpaper clean up the areas, you have repaired.

4. Painting the Baseboards :
  • As the gaps and holes are filled up, use a vacuum cleaner to remove the dirt and clean up with a damp cloth.
  • Now since drop sheet and paint tape protect the carpet, it’s time to start the painting.
  • Using a paintbrush paint all the baseboards with the color you like.
  • Dip the paintbrush into the bucket and see that there is no excess paint on the brush. It’s essential that the paintbrush does not drip.
  • While painting on the bottom of the baseboard see that you apply only small strokes and avoid dripping of paint onto the carpet.
  • Immediately wipe off any mistakes use a small cloth.
  • Apply a few more coats if necessary.

Conclusion

Painting of Baseboards is a very tedious job, and you should be very careful in trimming and painting all the surfaces at a time. The painting work is also time taking and it needs a lot of patience to handle the job. If you do not have that much time, then contact our Professionals at Executive Touch Painters for having your baseboards and walls painted without any hurdles. Call us at (416) 410-0164 for a Free Estimate!

Categories
Home Renovations

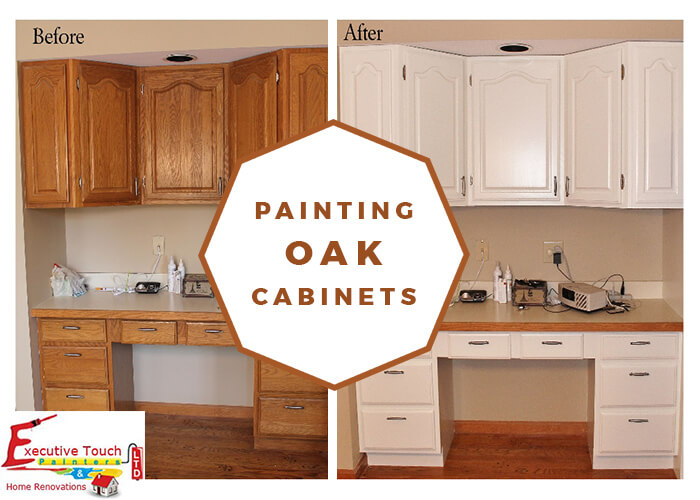
Painting Oak Cabinets

Painting an oak cabinet is not as simple as painting other types of wood. You can change the look of the oak cabinets, and a whole kitchen renovation may not be needed. A fresh coat of right paint at the right time would bring a new life to your kitchen once again. Oak is that type of wood whose grains are visible even after painting. You cannot hide all the grain of oak cabinet, but with some careful steps followed you could cover the visible grain.

Steps to be Followed for Oak Cabinet Painting

Preparation of the Oak Cabinets for Painting :
  • With the help of the screwdriver, carefully remove all the cabinet doors. Make markings to identify for which cabinet is fitted with which door.
  • To remove all the impurities and dirt, clean the cabinet doors with trisodium phosphate. This chemical is found in all the hardware stores.
  • Allow the wood to dry from the chemicals applied for cleaning.
Cleaning the Oak Cabinets :
  • Now it’s time to clean the Oak Cabinets.

Using a sandpaper clean the surfaces of the cabinets. After completing the sanding, clean off the dirt using a soft cloth.

  • The cabinet should be clean before primer is added to the surface.
Applying the Primer :
  • Prime the surface of the cabinet with the selected primer.
  • Apply one coat of Primer and allow it to dry.
  • Lightly apply the sandpaper to remove the grains and go for a second coating of Primer.

If a Professional painter advises you to apply thick primer for proper filling of the oak surface, then use a thick primer for the surface.

  • Do the same process for the doors of the cabinet.
Applying the Paint for the Doors and Cabinet :
  • Apply a coat of latex paint for the cabinet doors and drawers of the cabinet.
  • You can use roller or sprayer for applying the paint for the cabinets and doors.
  • After the first coating is completed, allow the paint to dry for at least one day.
  • You can apply further coats of paint if necessary, but a second coating is a must.
  • Let the coat to dry for at least one week before the doors are installed on to the cabinets.

How to Hide or Minimize the Visible Grain on Oak Cabinets

Spackling is the best process to eliminate or minimize the grain of the cabinets.

  • Using a knife apply a thin layer of sparkle to the surface of the cabinets.
  • After a few minutes of drying, using the sandpaper, sand the surface of the cabinet to leave a smooth finish to the cabinet surface.
  • After the sanding is completed, wipe away the dust using a smooth cloth.
  • After removing the dirt, only spackle will be left on the little crevices of the wood grain.
  • This process makes the surface smoother allowing the primer and paints application easier.

Conclusion

Painting oak cabinets seem simple at first, but to hide all the visible grains, your kitchen cabinets need professional hands. We at Executive Touch Painters in Toronto offer expert kitchen renovation services in which cabinet painting tops our list. Contact or Call us at (416)-410-0164 to get a Free Estimate to paint your oak cabinets today.

Categories
Interior Painting

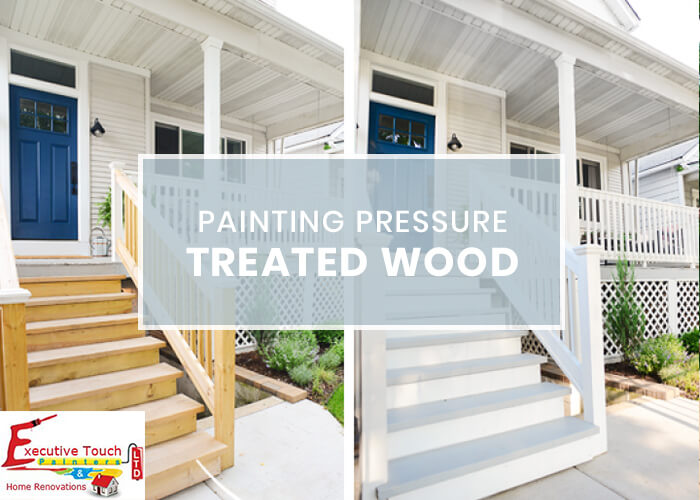
Painting Pressure Treated Wood

What is Pressure Treated Wood?

Pressure treated wood is the type of wood that has been treated with chemicals to protect the wood from harsh environmental changes. So, it is resistant to rain, wind, bugs, and mildew and good for outdoors. Pressure treated wood is the best material for fences and it is also comfortable to repair the wooden fences than the fences made of other materials like steel, iron etc.

Can you Paint Pressure Treated Wood?

Yes, It is completely paintable, but the painting job must be done properly, otherwise, your coat of paint will eventually start peeling. Also, More time and a large quantity of paint are needed to complete the work.

Steps for Painting Pressure Treated Wood

For ultimate results, there are some necessary steps to be followed while painting pressure treated wood which is discussed below.

1. Clean the Surface of the Wood :

Maybe you think cleaning the pressure treated wood is not necessary, but what if the wood has accumulated dust and debris. So, Clean the surface with soapy water and a brush to scrub off the dirt present on the surface. Scrubbing is to be done in the direction of the grain and wash it with water.

2. Wait for the Wood to Dry :

Regular pressure treated lumber dries within few days, but some might take more time depending on the type of chemicals that are used for the treatment. Painting on a wet surface is waste as the paint quickly peels off from the wet surfaces. Sprinkle water on the wood to test if the surface is dry or not. If the water is soaked into the layers of the wood, then the surface is dry. If the water rests on the surface as needed drops, then the surface is not dry, and you have to wait for some more time for the wood to dry.

3. Apply the Primer First :

As per the regular painting projects, here also the primer is applied before the actual painting. The primer takes time to dry than the regular surfaces. Make sure to use a primer that is suitable for the pressure treated wooden surfaces. Remember that for primer or paint, thin coats dry quickly. Pressure treated wood has resistance to liquids, so always follow the instructions on the primer container for a better finish.

4. Let the Primer to Dry :

After applying the primer, allow it to dry for some time. Luckily, the drying process may not take more than a day or two depending on the type of primer used. Do not go for painting until the primer is thoroughly dried. For the treated wood the time may be little more, allow the primer to dry for a day or two for better results.

5. Painting the Surfaces :

The final step in the process. Paint the surface of the pressure treated wood after the primer is thoroughly dried up. Latex paints are the best paints for the wood surfaces. Oil-based paints have a resistance to the surface of the pressure treated wooden surfaces. The proper painting on the surface of the wood will last for few years without damages. If you see any damages, then repaint the surfaces. If you are not in a situation for repainting the surface regularly, then you can go for staining process. Other than paint and stain, a protective sealant can also be used to apply on the surface of the pressure treated lumber.

Conclusion

The pressure treated wood is a special type of material that is to be maintained with more care. As its surface is resistant to elements like dust, heat, and water, the proper application of paint allows it to last for longer times. So, taking the help of a professional is a wise decision to paint treated wood. Executive Touch Painters in Toronto offers expert interior and exterior home painting services since 1989. Contact or Call 416-410-0164 at to Get a Free Painting Estimate Now!

Categories
Floors

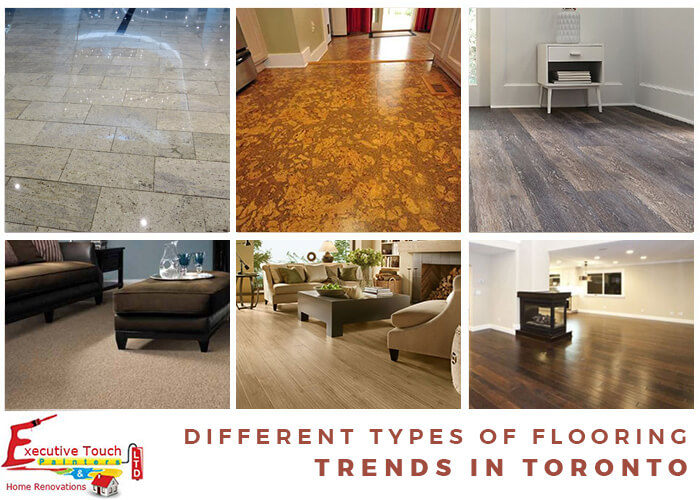
What are the Different Types of Flooring Trends in Toronto?

Flooring is the most critical decoration that is done for a house. The type of floor you choose forms an indispensable element of your interior design. The difficulty of the installation depends on the material you have selected. Each material has its unique features, qualities, benefits, and advantages. You may choose the flooring variety based on your usage, level of finishing, and budget. In this article, we are presenting the various types of flooring trends in Toronto.

Different Types of Flooring Materials Used in Toronto

Ceramic Tile Flooring :

Ceramic Tile Flooring Trends in Toronto

One of the oldest types of flooring available for the homeowners. The tiles come in a wide range of colors and shapes also. Tiles are easy to install and give a glazed look to the house. Some of the types of tiles available are vitrified tiles, ceramic tiles, etc.

Hardwood Flooring :

Hardwood Flooring Flooring Trends in Toronto

Wood is a particular item that never goes out of style. Hardwood material is known for its warmth and beautiful look. Proper maintenance can have the hardwood floor to last up to 20 years. Increase the value of your property by using hardwood for flooring.

Engineered Hardwood :

Engineered Hardwood Flooring Trends in Toronto

Engineered hardwood is a more reliable and cost-effective solution to that of traditional wood. At the same time, it provides the same look and appearance as the hardwood. Its moisture-resistant nature makes it install over concrete basements.

Laminate Flooring :

Laminate Flooring Flooring Trends in Toronto

Laminate flooring is formed as layers by combining various materials. These type of floors are heat resistant and perfect for homes with heavy traffic and pets. Easy to clean and install.

Carpet Flooring :

Carpet Flooring Trends in Toronto

Carpets made of wool, synthetic fibers are used as flooring materials. These are available in different textures, colors, sizes and also different materials. The mats are easy to clean and can be removed for cleaning. Carpet floors are mostly moisture resistant.

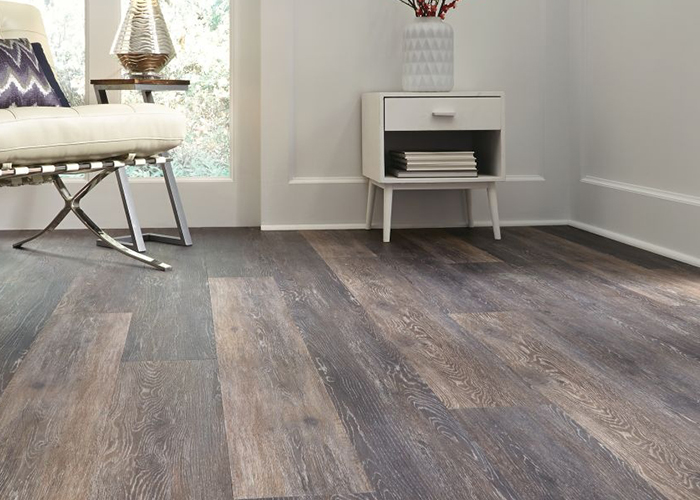
Vinyl Flooring :

Vinyl Flooring Trends in Toronto

Vinyl is available in different patterns and colors. The surface of Vinyl flooring is so smooth and imitates ceramic tiles floors. The advantage is that they are easy to clean and have more durability.

Stone Flooring :

Stone Flooring Trends in Toronto

Stone flooring is also a traditional flooring technique which has its beauty and natural look. The type of stone to use will depend on the climatic conditions of the place. There are various stones to choose from like the limestone; granite, marble etc. Their hard surfaces increase their longevity.

Cork Flooring :

Cork Flooring Trends in Toronto

This type of flooring is the best for play areas or commercial spaces. Cork flooring is costly flooring material but provides a comfortable space for walking and standing.

Choose Your Flooring Type Room by Room

Each room in your home needs a different floor type because every area has its requirements and usage. Find out which flooring material suits a particular place.

1. Bedrooms :

Bedrooms are exceptional for any house. So flooring should also be unique. Carpet is the traditional choice for most of the decorators. These are very comfortable in any bedroom. But in the latest fashion, hardwood and engineered wood are also becoming popular among the bedroom flooring. Laminate is also another better choice for this private room.

2. Living Rooms :

The living room is the area where you spend most of the time, and it receives most of the traffic in the house. Hardwood flooring is the best option for flooring in the living rooms. Take Laminate and Engineered wood as options for having a chic look in these welcoming places.

3. Kitchen :

Another room in your house that has more traffic and food spills. Tile, Vinyl and hardwood flooring would be the best, as the floors are very easy to clean. Vinyl and tiles also come in different styles and colors, and you have a wide range to choose from.

4. Dining Rooms :

You use dining rooms for having food, and your floor may witness accidental food spills. Here the floor should be in such a way that it could be resistant to spills and comfortable to wash or clean. Carpet is the option available but does not go for light colors as food spills are visible and do not look nice. Wood and laminate floorings also create a warm atmosphere in the dining halls.

5. Bathrooms :

Bathrooms are always filled with water and humidity. So floorings that can withstand moisture are to be chosen for this private room. Vinyl and Ceramic Tiles floorings can resist them, and these have been the alternatives for many years. But today improved laminates are also enduring excessive moisture conditions, so laminate flooring is also the best choice available.

6. Family rooms :

Family rooms are always filled with relatives or friends having a chit-chat and having lots of fun. The flooring also should be comfortable to handle the footsteps. Here also the carpet could be the better option. Use Hardwood and Engineered wood for everlasting appearance.

7. Basement Areas:

Basement area is mostly cold and filled with moisture. So the flooring should be well insulated. Carpet makes the floor softer and more comfortable. Vinyl, Hardwood, and Engineered wooden flooring are also other options available for the basement flooring.

If you are thinking for floors that have a varied appearance and structure, consider flooring types like Chips, Glass, Mosaic, Brick, Concrete, Linoleum, Acid Resistant, and Rubber etc.,

Conclusion

Flooring materials choices in Toronto are forever growing, and the broadest range of materials are available. Depending upon the budget, Styles, and colors you can pick your stuff for the floor. Contact Executive Touch Painters, a professional painting, and home renovation company in Toronto since 1989 for more assistance in choosing the right material, expert floor installations, Refinishing and Renovations or Call at (416) 410-0164 to book your Flooring Estimate for Free.

Categories
Floors

How to Fix Warped Hardwood Floor?

Hardwood flooring is most common in the homes of US and Canada. But homeowners face the problem of dampness in the house that leads to damage to the floor. Prolonged water flow can cause severe problems like warp, buckle and cup the hardwood flooring. The issues caused can lead to the expensive and time-taking restoration process. Not all the damages require repair works; some can be done by merely dehumidifying the floors. The key is to identify and rectify the water leakage problem as soon as possible.

Causes for Hardwood Floor to Warp or Buckle

Wood warp causes when it gets wet and swells and dries out and contracts. The warp does not happen in fully finished wood flooring because there is no chance for the moisture to get on the floor. The hardwood floorings are protected against humidity by installing vapor barriers. If the barriers are not installed correctly, then vapor might enter the wood and cause warping. Not even wetness, excessive dryness can also cause the wood to shrink and create gaps between the boards on the flooring.

What is Cupping and Wood Floor Cupping Causes?

Cupping is a milder form of damage caused to the wooden floor. In cupping the edges of the wooden plank get curled up, and the middle of the plank shrinks. This is mainly caused due to the moisture imbalance in the room. The cupped floor does not look good in the room, but the cupping is reversible. Cupped floors can be repaired by just restoring the normal humidity conditions in the place. You need to take regular steps to restore the exterior wooden items of your house.

How to Repair Your Buckled Hardwood Floor

1. Find the Water Source Causing the Problems

The primary cause of cupping and warping is water leakages that might be present in the room of the hardwood flooring. Look for the leakages or any other reasons like spilling of the water or standing water that never got cleaned up. All these reasons can be the cause of cupping or warping of the wood in the hardwood flooring.

2. Fix Minor Warping and Cupping in the Rooms :

For fixing the minor warping problems in the wood, you need to control the moisture conditions in the place. Excessive dryness or dampness can cause the wood to warp and cause serious problems. Set up a dehumidifier in the basement where there is dampness to pull out the moisture out off the planks.

3. Sanding the Planks:

If the warping of your wood floor is due to some drastic humidity changes or a simple water spill, then sand the solid hardwood up to 1/4 inches of its current thickness.

4. Replacement of the Planks :

If the warp of the wood is medium or large, then it is better to replace the plank with a new one. If not removed, the dampness will spread to the other planks and cause them damage too. Replace the plank with the same type of wood species, color, and size. Nail down the new plank with the same installation technique used for other planks. To avoid warps in the wooden planks choose a laminate or engineered wood.

Read on this article to know more about Refinishing or Replacing of your Hardwood Floor.

Conclusion

Warping and cupping are severe problems for hardwood floors. Damage to a single plank could be a grave risk to all the other planks. So it’s essential to see that there are no warps on the floor. If there are any, necessary steps have to be taken to repair them. The homeowners can fix minor cups, but severe and significant warps can be corrected with the help of a Professional Contractor. If you are unable to find the cause of your buckled floor, Contact us for a Professional Floor Inspection for Free! If you are looking for expert floor renovation, refinishing, replacement or installations in Toronto and all over Canada Call Executive Touch Painters at (416) 410-0164 for a Free Estimate Today.

Categories
Home Renovations

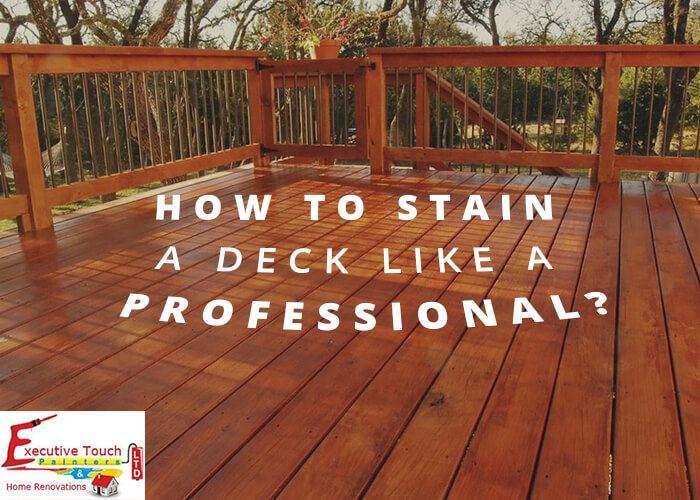
How to Stain a Deck like a Professional?

Decks are exposed to the harsh climatic conditions like heavy rains, winds, and sunlight. UV rays penetrate through the wood and damage the inner layers. So to protect the wood from damaging staining process is conducted. By staining the original beauty of the deck can be restored.

Follow These 7 Simple Steps for Staining a Deck in your House.

1. Examine the Current Condition of the Wood:

Before you start the process, check if the wood can absorb the stain or not. Conduct a simple water testing. Sprinkle water on the deck; if the wood absorbs the liquid, then the deck can be stained. If the deck does not absorb the water, then there is no need for staining at present.

2. Prepare the Deck :

After the testing process, now make sure that the deck is clean and dry. Stain applied to the wet surfaces does not go well, and cracks can form in the future. The surface of the deck should be free of dirt and debris. Clean and rinse the wood surface with water and let it dry for 2-3 days.

3. Choose the Right Stain for the Deck :

There is a full range of stains with different colors available. Choose the best from the available stains. Types of stains available for your decks

  • Wood Toned and Clear Stain
  • Semi-Transparent
  • Semi-Solid
  • Solid Stain

If you need clear and transparent view use Clear or Semi-Transparent Stains. If you need a rich and vibrant finish, then you can go for the Solid stain colors. In transparent and semi-transparent stains the grains and texture can be seen. In solid stains, the stain completely hides the wood grain while allowing very little of the wood texture to show through.

4. Have a Plan for Staining :

Always determine the starting and ending points of the staining process. Be sure that you can quickly enter and exit from the deck during the staining process. Be sure that you are not stuck in a corner while the other parts of the deck are drying.

5. Protect the walls :

Decks are attached to the exterior walls. So staining process can be complicated without touching the edges of the walls. To ensure that walls do not get stained, protect the walls with painters tape. Attach the tape to the places where the decks and walls meet.

6. Add Stain to the Tray :

Stir the stain in the container using a paint stirrer. Ensure that the stain is mixed well before the stain is applied to the deck. Pour the stain into the paint tray for starting the staining process.

7. Apply the Stain to the Deck using the Paint Pad :

Apply a solid coat of stain to the deck surface using the paint pad. If the paint pad does not cover the inside spaces, then use a paintbrush to complete the staining. Leave the stain to completely dry for 24 hours before placing your furniture on the deck.

Tips for Staining
  • Apply the stain when the temperatures are average and avoid the process in direct sunlight.
  • Do not go for staining if there is rain in the forecast.
  • Before applying the stain, test it on a small area and see if you are satisfied with the color or not.
  • If you are using different colors, ensure that they are mixed well before applying.
Conclusion

Decks are often subjected to lots of pressure and traffic from people. So it’s necessary that they are maintained correctly from time to time. Staining process should be done regularly for the exterior decks. For inspirations, ideas and Professional Painting & Home Improvement Works contact Executive Touch Painters in Toronto or Call at (416) 410-0164 Today.