Categories
Home Renovations

Metal Roof Coatings Toronto

Metal roofing has gained importance due to the sustainable nature. But in the summer season, the interior temperatures get increased due to the heat waves outside. The prolonged exposure of the metal roof to the harsh climatic conditions causes the roof to be damaged. At this situation, it is crucial to get a recommendation for the roof covering procedures for your home.

Your unprotected roof exposure to rain and sun causes the metal to expand or contract. This condition also makes the bolts to get loose and causing leakages and damages on the walls of the roof. The replacement of the roof is not a better idea every time, so it is better to go for a coating for the metal roofs.

The roof has to be prepared well before the coating is applied. High-pressure cleaning makes sure that all the dirt is removed from the surface. Rust inhibitor is applied to the places showing the signs of rust. Repair and tighten all the bolts of the surface. Make sure that the bolts, HVAC pipes, bulbs are in the correct position before the roof gets the coating. Good surface preparation makes sure that the coating bonds well to the surface.

Rubber Roof Coating System

Most of the industries go for this type of coating to protect from the climatic conditions. The rubber roofing also protects from the water leakages. The rubber coating system will seal and protect the surface for so many years with a little cost. The rubber coating is far better than going for a new roof.

Metal Roof Painting Contractors

In most of the situations, individual persons tend to start the coating of metal roofs of a house. The work process for covering the roof is complicated. You need to find out the correct elements required for covering the roof, and you should explore online websites to discover the necessary products or paints for carrying out the process. On the other hand, if you do not have prior experience, then you have to depend on the metal roof covering builders, and there is also no guarantee that you will succeed in getting the work done as it should be. A professional metal roof painting contractor will recognize what kind of materials are perfect for your roof, and even the covering of the roof also needs experience.

Conclusion

In case you have a metal roof, get in touch with our professionals at Executive Touch Painters to suggest and paint the perfect combination of coating that would be suitable to protect the roof from all kinds of harsh climatic conditions. Call us at 416-410-0164 or Contact us to get a Free Estimate now.

Categories
Home Renovations

How To Remove Paint From Wood?

You might have just discovered an antique piece of wood in your house, and you want to see what is beneath the old paint. You need to get rid of the past and rusty paint on the furniture. Many methods are available to remove the paint on the wooden surface.

What Kind of Wood can be Stripped?

It is not possible to strip all kinds of wood easily. There are some types of wood that you can strip, which are below.

  • Outdoor and Indoor Furniture
  • Doors and its Frames
  • Stair Rails and Banisters
  • Antique and Old Furniture
  • Window Frames and Wooden floor
  • Built-in Furniture

How to Remove Paint from a Wooden Surface?

There are mostly Three methods used for removing paint from the wood.

1. Sanding

Sanding off paint is the best option for small projects, and you can also use an industrial sander to get the work done. But when using an industrial sander, you should be careful and follow the precautions mentioned. You have to apply even pressure at all the surface to remove the paint and do not create any gouges. Power tools can be used to create even pressure on the surface.

2. Electronic Heat Gun

A heat gun can also be the best option and should be used very carefully. A heat gun is the fastest way to remove paint and if not handled correctly, can scorch the wood. Also, bear in mind that hot air gun can be used for removing paint only, do not use on the varnish coated surfaces. When varnish comes in contact with the hot gun, it becomes into a glue-like substance.

3. Chemical Stripping

The best way to eliminate paint from wood is by the use of chemicals. Chemicals combined with mechanical methods are best suitable for removing any color on the carved and surfaces where our hand cannot reach. You can use chemical removers for removing not only paints but also varnish. The finish in the case of chemical removers is far better than that of the sanding and hot gun removal methods. But precautionary measures have to be taken while using the chemicals for the removal of paint on wooden surfaces.

Paint Removal Process

You can successfully remove the paint from wood by following a simple series of steps to have a deck that looks beautiful.

First here is the list of materials you need to have

  • Protective Gloves and Goggles
  • Respirator if needed
  • Solvent-based paint stripper
  • Scraper, paintbrush, and Bucket
  • Sandpaper and Wire brush
  • Rags
Step 1 :

Remove all the hardware from the wood you are working on. If there are any irremovable parts, secure them with a protective tape. Before you start the process, put on the safety precautions like gloves and goggles. Pour the chosen solvent-based paint stripper into the bucket.

Step 2 :

Choose a small area at a time and apply the stripper with the help of a paintbrush. Ensure that the stripper is used liberally on all the surface of the paint. Leave the stripper for about 20 minutes. If there are multiple layers of paint, then you have to leave the stripper for about 1 hour.

Step 3 :

Now after you see that the paint is bubbling up, you can use the paint scraper to remove the peeled off paint. Applying too much pressure can damage the wood surface. If you have any doubt that there is more paint on the surface, then you can repeat the stripper application and remove the paint once again

Step 4 :

After removing the paint, it is time to concentrate on the moldings and depressions on the wooden surface. Apply the stripper once again and wait for 20 minutes. Now use a wire brush to remove the paint at the places hard to reach. Take care not to scrap too much as you can leave scratch marks.

Step 5 :

After you have completed all the process of scraping, it is the time for washing. Use a water-soaked clean rag to wash the surface and also use sandpaper for sanding the entire surface. Wash the dust and debris on the surface to get a clean wooden surface without paint.

How to Remove Paint from wood without chemicals?

Chemicals are the most opted option for paint removal. But some wood reacts with the chemicals and get damaged. So you can use some non-chemical removers for the process. The strippers often referred to as “Safe strippers” are used for paint removal also. These are generally more expensive and slow working. The process is the same as the chemical paint removal.

How to Remove Paint From Wood Without sanding?

If you are not interested in using sandpaper, then you can go for a chemical removal process directly. Just follow the process and leave the step of sanding.

Safety Recommendations While Removing Paint From The Wood

While using chemicals strippers, you get fumes due to the reaction of chemicals and paint. So you need to take safety precautions while using and doing the process of paint removal from wood with chemicals.

  • Wear Old Clothes
  • Conduct the process outdoors, to avoid the fumes to spread in the house
  • Use gloves and facemask to protect from fumes
  • To prevent damages to the floor, cover the place with papers and old cloth

Conclusion

You can follow the same process to remove paint from wooden floors, cabinets, decks, and trims too. But you should be very careful while doing paint removal jobs from the wood surfaces. Precautionary measures have to be taken to protect from the fumes emitting from the strippers. Experts will have the right tools and experience to strip off the paint without damaging the finish. Contact our Professionals at Executive Touch Painters in Toronto to take the risk. We do Painting, Home Renovation, and Trim Works. Call us at (416) 410-0164 to get a Free Estimate.

Categories
Home Renovations

How to Refinish Kitchen Cabinets?

The cabinets play an essential role to bring new life into your kitchen, Changing the cabinetry from time to time is necessary. However, spending on new cabinets is not required every time. Old cabinets can be refinished and put back again as new ones.

Refinishing Old Kitchen Cabinets

The old cabinets can be removed and placed back after the refinishing work is completed. Follow these simple steps to get a new look for the old cabinets in the kitchen.

1. Mark Every Door and Drawer

To avoid the confusion of fixing the doors of the cabinets, you can label the doors with numbers before removing.

2. Remove the Doors and Drawers

To refinish or repaint the cabinets, the doors and drawers are to be removed from their places without damaging them. The screws and other loose pieces used for the doors are stored in a container.

3. Clean

After all the cabinet doors are removed, take a clean sponge and wipe down the area. Remove all the unwanted grease and other marks present on the doors and cabinets.

4. Fill the Gaps

Any gaps and holes present should be closed with a filler. The closed gaps ensure that the cabinets look new after the installation.

5. Sand Down the Cabinets and Doors

Once the filler has dried up, clean the surfaces with sandpaper to get a smooth finish. The sanding also helps to remove unwanted debris and let your cabinets look super finished. Sanding leaves a layer of dust on the surfaces. After the sanding is completed, take a clean cloth and clean the surfaces.

6. Prime the Surfaces

Depending on the paint you are using, choose the primer to be applied. The primer acts as a adhere to the surface and the paint. After the primer is applied, allow it to dry before painting the exterior.

7. Painting the Surfaces

After the primer is dried, you can apply the paint on the surface of the cabinet doors. To get a professional look go for multiple coatings. Take care while painting and ensure that the paint is applied evenly.

8. Sanding Between the Paint Coats

To get a smooth finish, the sanding process can be done after a coat of painting is completed. The cleaning process removes any raised parts or blemishes present after a layer of painting is completed.

9. Reinstall the Cabinets and Doors in the Kitchen

Once the paint on the surfaces is thoroughly dried, you can install the doors and drawers on the cabinets. Take time to reattach the cabinets carefully according to the labels present on the surfaces.

Best Paint for Refinishing Kitchen Cabinets

Colors for the cabinets must be complemented with the kitchen walls and ceiling. As the cabinets take much of beating and traffic, the paint must be a good one to take all the pressure. So what to choose? Oil or Latex paint. When compared with each other, latex paints have more benefits than oil-based paints. Latex paints dry out quickly and are more user-friendly. If you are using latex paint, make sure that it is an acrylic formulation which provides more durability than others.

How To Refinish the Kitchen Cabinets without Stripping?

To repaint the kitchen cabinets all the doors and hardware are to be removed. But there is another way to repaint without even removing the doors and hardware. A simple faux painting called glazing or faux finishing techniques can be applied to complete the repainting without removing the hardware or doors.

Glazing can be explained as simple color washing. The desired color is mixed with a substance called glaze, which is milky white and also dries very quickly. The glaze and the paint are to be combined in equal parts and applied to the doors with the brush. After applying the surface is cleaned with a clean rag. If you want the finish to be brighter, add more paint than the glaze. If you want the finish to be lighter add less paint to the glaze.

How Much Does It Cost to Refinish Kitchen Cabinets?

Not all the cabinet refinishing projects are the same. Some are big and risky, and some may be small.

The cost of the project depends on the following factors:

1. Number of Cabinets

The number of cabinets has a crucial role to play in deciding the cost of the project. The higher the number of cabinets, the more the price will be.

2. Choice of Refinish

There are many options available in the refinishing, and each has its price. Some designers keep the color the same, and some change the color depending on the request of the house owner.

3. Design of the Cabinets

Some cabinets are smooth in touch and comfortable to refinish. Some cabinets have detailed carving and trims. These carvings are to be painted very carefully and take more time and money.

4. DIY or Hire a Pro

The cost depends on who is doing the work. If the homeowner completes the job all by himself, then the cost would be of the paints only. If a professional is hired then the cost increases. But in a DIY project, you have to face the risk of not getting the work done correctly, and you may lose extra dollars than hiring an expert. Hire an expert to avoid kitchen renovation mistakes that cost you more than actual work.

Conclusion

Refinishing kitchen cabinets is an easy way to bring a new look and feel to the home. But doing it on your own will be easy when you are equipped with the right tools, added with some previous experience, spending your valuable time. A little mess in the process can lead you to lose more money than the cost to hire a professional. So, it is a wise decision to hire an expert. Executive Touch Painters has 20+ years of experience in doing Kitchen Cabinet refinishes in Toronto. Contact or Call us at  (416)-410-0164 to get a Free Estimate Now.

Categories
Home Renovations

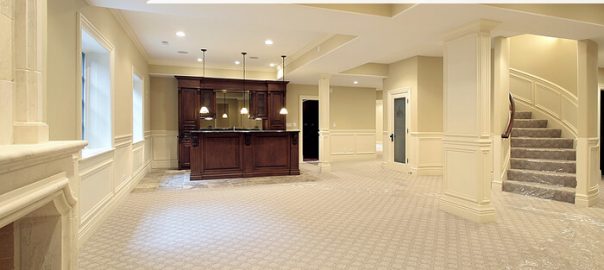
How To Finish a Basement?

Finishing basement is the work that is on the minds of many homeowners, but they do not have the interest or time to do all the work. So the cellars are left as they are and so the area becomes damp and dirty. It is time to finish the basement and give a completely different look for the walls, flooring, and ceiling of the basement.

Steps for Finishing a Basement Wall, Floor, and Ceiling:

As you draw a plan and layout for your basement, stick on to the basic idea of creating a welcoming place for your guests and your family members. Decorated walls, pleasing colors, beautiful flooring, and beautiful ceiling can be made a part of the basement. You have to know the constraints before starting the work. Special care and steps are to be followed to fix the walls, flooring and also decorating the ceiling with appropriate equipment. Space is often limited in the cellars; you have the choice of dividing the rooms according to your will.

How to Finish a Basement Wall?

When the basement walls have a finished look, then the room will also look pleasing and warmth. Steps to be taken to complete a basement wall are below:

STEP 1: Remove the Moisture from the Walls and Basement:

If your area is hit by storms frequently, then is the most chance that the basement is filled with dirt and water most of the time. It is better if you clean the moisture on the walls or all your work will be ruined.

Some quick ways to dry moisture from the walls:

  • Redirect the downspouts away from the basement foundation.
  • Decrease the slope of the lawn to drain all the water away.
  • Apply the waterproofing coating on the interior walls.
  • Add a drain pipe to remove all the stormwater.

STEP 2: Install Insulation and Drywall:

Special materials like Batts, Rigid foam and spray in place foam can be used for insulation of drywall. After the insulation of the wall is completed, it is time to install the drywall. The drywall can be hung vertically or horizontally, and in most of the cases, horizontal is the best way.

STEP 3: Keep in View of the Windows and Outlets:

For windows, the approximate shape is cut from the drywall after the installation is completed. The same process is to be followed for outlets and other electrical points on the walls.

How to Finish a Basement Floor?

After the walls are completed, now it is time to finish the basement flooring. For the basement floor, waterproof materials are to be used to avoid leakages and cracks.

The steps to be followed in finishing basement flooring:

STEP 1: Choose Floor Material:

You must think before choosing a flooring material because moisture and dampness will let you lose more dollars. So, it is good to contact a basement renovation expert to pick you the best flooring material based on the walls and the floor requirement.

The most used floor materials are

  • Laminate
  • Wood
  • Carpet
  • Vinyl Tiles
  • Ceramic Tiles
  • Rubber Tiles

STEP 2: Determine the Way to Install the Material on the Floor:

If you are using a laminate for the flooring, then you can directly install on the concrete floor. Some other materials require installing a barrier to stop moisture accumulating in between.

How to Finish a Basement Ceiling?

There are mainly two ways to finish a basement ceiling.

STEP 1: Drop Ceiling:

This is the cheap and most used for basement ceiling finishing. In the drop ceiling, the installation can be done with minimal tools, and the process can be done just by following the instructions given on the materials purchased for the ceiling. Mostly regular ceiling tiles are used for the finishing, but nowadays new designs are also introduced to make the ceilings more attractive.

STEP 2: Drywall Ceiling:

Hanging drywall on the basement ceiling is the same procedure as hanging the drywall on the walls of any room in the house. You need to have a drywall jack, and other friends help to secure the drywall and screw them in their place.

How Much Does it Cost to Finish a Basement?

The cost to finish your basement depends on the renovations that you are planning. The cost is taken per square foot and varies on the labor and material you are using for the finishing.

Factors Affecting the Cost of Finishing

  • The charge of the labor in your area
  • Professional Cost for Electrical, Plumbing, and Painting works.

Conclusion

Finishing a basement on your own is a good idea. Having the cellar renovated can add extra space to your home, and you can spend a good time with your family. There are many ideas that you can implement in your basement. You need a professional basement renovation contractor to apply your style. Executive Touch Painters offers expert Home Renovation services in Toronto since 1989. Contact us for more details, ideas or a Free Estimate. You can also ring us at (416)-410-0164.

Categories
Home Renovations

7 Great Basement Renovation Ideas on a Budget

Thinking of a basement, most of them use it as a storage place and also the most neglected part of the home. Your basement can also be renovated to make a beautiful place to hang out with friends and family members. The basement renovation ideas are endless, and you can try different looks for this special area.

Consider Some Of These Basement Renovation Ideas.

1. Home Theatre or Cinema:


Home theatres and cinema are very famous and provide entertainment for the whole family. You can enjoy movies and live games on screens. You can also create a cinematic atmosphere by having lights and theatre like chairs. You can escape from the routines of daily life by relaxing in the cellar.

2. Bar in the Cellar:


You and your friends can enjoy the atmosphere in your cellar, by designing a bar in the basement of the house. Dinner parties and other parties can be conducted in your basement. Space can be unique for girl’s having parties and also perfect for having a romantic evening dinner.

3. Play Room for the Kids:


Children always scatter the toys and books in their rooms. So make a place in the cellar for them to play. Shine or rain, children can always play in the basement. Make shelves for the toys to be kept.

4. Games Room for Adults :


Basement with a pool table or dartboard can provide entertainment for the adults too. Adults can also have fun with their friends and neighbors by playing games in the cellar. You can have a great time with your friends, neighbors and family members too.

5. Home Gym:


To have more space in the interiors, you can have your gym installed in the cellar. An active and dedicating workout corner can be created in the basement. You can invest simple work out equipment like an exercise ball, treadmill and a simple yoga mat. Complement the gym room by keeping a big mirror, TV screen for seeing fitness videos and other things like towel, etc.

6. Laundry Room:


The other idea is to create a laundry room along with a washing machine in the cellar. You can also have a place for washing your pets. By having a place for cleaning your pets in the basement, you can prevent the splashing and damaging of floors in your bathrooms or main washroom. You can also keep all the grooming accessories of your pet in the cellar only. It is a bit time taking to change the washing machine into the basement, new tiles and flooring have to be made. But after establishing the washing area, you can reduce the noises coming from the old washrooms.

7. Bonus Bedroom:


The space in the cellar can be used to create a bonus bedroom for the guests. Guests coming to your house can be provided with a first bedroom and bed in the basement with down-filled comforters and luxurious pillows. ( Read this article to know about how to frame a basement wall ).

Conclusion

The basement is a bonus area in your home and little innovation can transform it into a great place to rest, play, entertain, exercise and do more. Also By renovating your basement the value of your property also increases. Pick the best one from the above that matches your requirement and simply give us a call now at (416) 410-0164 to get our professional build your dream room. If you are looking for more basement renovation ideas, or for a Free Estimate, Contact Executive Touch Painters in Toronto.

Categories
Home Renovations

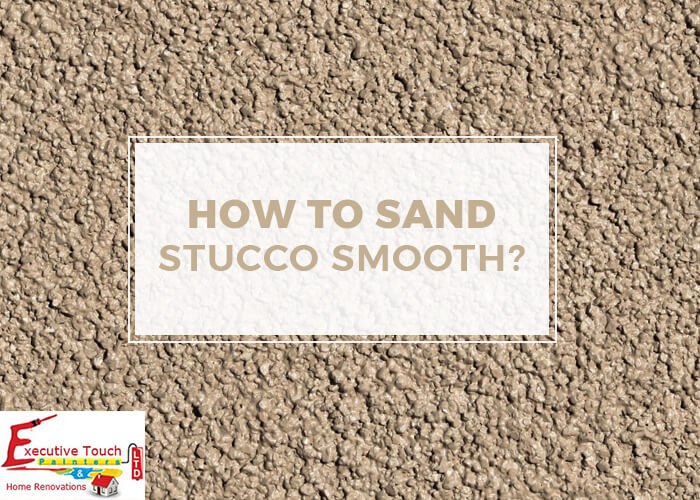
How To Sand Stucco Smooth?

Smooth Stucco Vs. Rough Stucco

Rough stucco was the most used for interior and exterior surface till the late 80’s. But today rough stucco is not a preference to most of the homeowners. Rough stucco is outdated due it’s rough look and touch. So many are opting for the soft stucco. If your home already has rough stucco, then know how to sand stucco smooth with simple steps.

Materials Required

  • High Grit Sanding Paper
  • Primer
  • Smoothing Filler
  • Light Grain Sanding Paper
  • Smoothing Trowel

Steps for Converting Rough Stucco into Smooth Stucco

1. Smooth the Surface:

Using a high grit sanding paper, sand down the rough stucco to as smooth as possible. The smoothing process is to be completed before applying the other products.

2. Wash off the Surface:

Wash off the surface of the stucco wall using a hosepipe. Make sure you remove the entire dirt. Allow the surface to dry.

3. Apply the Primer:

After the surface is dried completely, it’s time to apply the primer. Use a roller to apply the primer on the surface of the stucco wall. Apply a thick coat of the primer to fill up cracks and uneven spots on the surface of the wall. Let the primer dry overnight.

4. Apply the Smoothing Filler :

Now it’s time to apply the smoothing filler to the stucco wall filled with the primer. The application is made with smoothing trowel. Use stokes to create an even and flat appearance. After the first coat is dried up, use the second coating to fill up the gaps and smooth out the inconsistent areas.

5. Sand the Wall:

After smoothing and drying process, Sand the wall using light grain sandpaper. The sanding process is done to get a smooth and polished look on the wall.

6. Finishing:

After all the sanding process is completed, remove the dust and give one final finish to the wall using the smoothing trowel.

Does Smooth Stucco Finish Crack?

Just like the concrete cracks, the stucco also tends to crack. The cracks happen mainly due to the stress on the surface. The stress can be internal or external. The internal stress is caused due to the poor drying process of the stucco and external stress is due to the external forces applied on the surface of the wall.

How can we Reduce the Cracks?

Reduce the cracks on the stucco by allowing it to dry for some time. Use the fiberglass mesh finish coating before the installation.

Can the Cracks be Repaired?

Professionals can repair the cracks on your smooth stucco wall. If you want to do it yourself check our previous article on how to repair stucco.

Conclusion

Stucco leaves a good impression and smooth texture to the interiors and exteriors of your house. If you find any cracks on the surface of the stucco wall or if you need a professional to sand your rough covering. Contact our experts at Executive Touch Painters in Toronto. Call us at (416)-410-0164 to get a Free Estimate Now!

Categories
Home Renovations

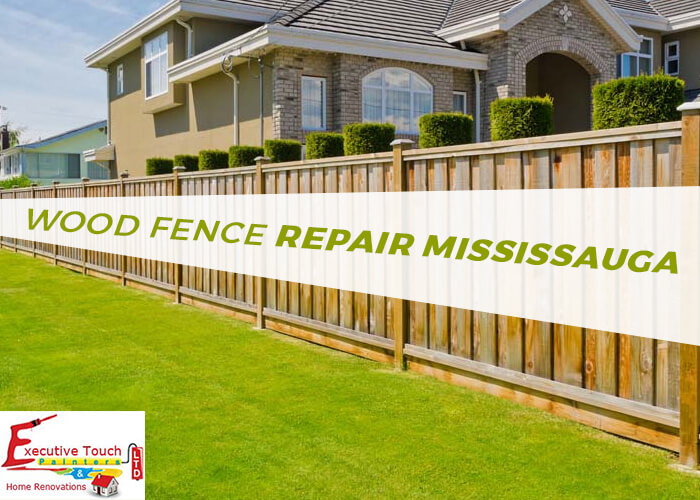
Wood Fence Repair Mississauga

There is a saying that good fences make good neighbors. Install a fence to your house to increase its value. Many materials can be used for fencing. These materials have made the fence installation inexpensive and also readily available. The fences define the demographic border of your home or office premises. The introduction of other materials like vinyl has provided an alternative to the wooden fences. For the decoration of barriers, materials like wrought or ornamental iron are used to remove the dull look of the fence.

If you live in a house that has already a fence, then you should ensure that the fence is well maintained. It is essential that you perform periodic repairs on the fence so that the fence stays long for many years. There are specific measures to be taken for the wood fence maintenance in Mississauga.

Choosing the Best Material for Fence :

There are many materials with which the fence for your home can be designed. You should consider the climate of your area before selecting the material for your fence. If your area is prone to harsh climates like winds or tornados or hurricanes, then your material must be a position to withstand the climatic conditions. It is essential that the material also withstands the long winter seasons.

Here are Some of the Most Well-Known Materials used for Fences

Wood: With numerous varieties of wood available, you can use wood as a material for the fence. Little interest and research can do wonders on the wood of your fencing.

Metal: Metal fencing also comes in a different selection of materials. Varieties of metal fencing include chain links and wrought iron decorations. Wrought iron brings a look of classic fashion and elegance to your fence.

Why Choose Wood Instead of Other Materials?

Fencing protects your yard from various things and also defines the border of your property. So the fence and the material used should be strong and durable. Wood is the standard material choice for fencing. Pressure treated wood is best for your house as it can withstand all climatic conditions.

Best Wood for Fences in Mississauga

Pine, Fir or Spruce :

Pine, Fir, and Spruce are the most used wood for fencing due to the best durability and affordability. Spruce is generally used for stockade, prefabricated or picket style fences.

Redwood :

The most expensive material that can be used for fences, but uneconomical when used for long fences. Higher grade redwood is the most durable and resistant to insects and rot.

Cedar and Cypress :

Cedar contains natural oils, and Cypress has natural chemicals present in them. This property of Cedar and Cypress makes them most resistant to rot and insects. Due to the resistant property, the fences made of cedar and cypress have more lifespan than the other wooden fences.

New Fence Installation :

A new fence adds safety, privacy, and style to the exterior of your home. The fencing to your home must be done carefully with the use of durable and stylish materials. Characteristics like lattice panels will give you the appropriate amount of privacy and style so you can enjoy your beautiful yard in peace.

Factors To Be Considered Before Laying a Fence :

The function of the fence: A well-designed fence protects your yard from harsh winds and acts as security for your home. The fence also prevents your pets from escaping.

Style of the Fence: The design of the fence should compliment the architecture and landscape of your house.

Privacy: If you are seeing for more privacy in your yard, then use fencing materials like wood or vinyl.

Know the Exact Boundaries: You need to know the exact boundaries of your property to install a fence in the area.

Termites and Fire issues: In an area that is more prone to termites and fire accidents, ensure that your fence is termite and fire resistant.

Types of Fencing :

Timber paling: These types of fencing are versatile and easy to work and install.

Screen Fencing and Privacy Screens: These type offenses are becoming popular these days and give an excellent look to the yard.

Steel Fencing: These fences are termite resistant, so can be used where there is a scope of having more termites.

Classic Picket Fencing: These are eco-friendly fences made of timber and can be very special to your home.

Conclusion

A well-maintained fence adds unique beauty and protection to your home. The maintenance pattern depends on the type and material used for the fencing. If you are looking to install a fence or thinking of repairing it? Then contact Executive Touch Painters for wood fence repair in Mississauga or Call us at (416)-410-0164 to get a Free Estimate Now.

Categories
Home Renovations

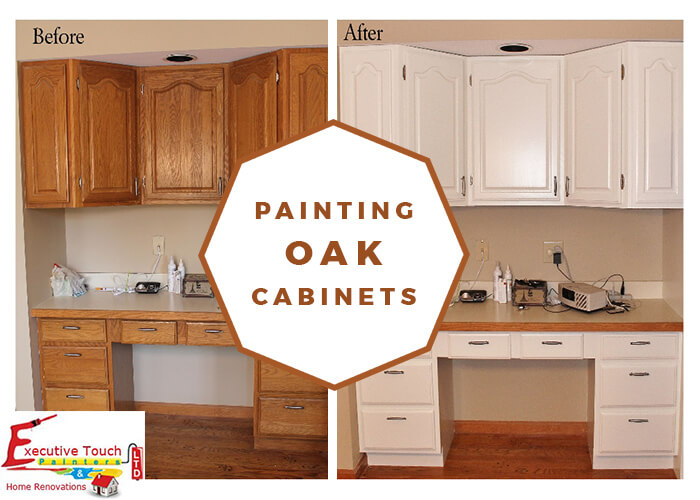
Painting Oak Cabinets

Painting an oak cabinet is not as simple as painting other types of wood. You can change the look of the oak cabinets, and a whole kitchen renovation may not be needed. A fresh coat of right paint at the right time would bring a new life to your kitchen once again. Oak is that type of wood whose grains are visible even after painting. You cannot hide all the grain of oak cabinet, but with some careful steps followed you could cover the visible grain.

Steps to be Followed for Oak Cabinet Painting

Preparation of the Oak Cabinets for Painting :
  • With the help of the screwdriver, carefully remove all the cabinet doors. Make markings to identify for which cabinet is fitted with which door.
  • To remove all the impurities and dirt, clean the cabinet doors with trisodium phosphate. This chemical is found in all the hardware stores.
  • Allow the wood to dry from the chemicals applied for cleaning.
Cleaning the Oak Cabinets :
  • Now it’s time to clean the Oak Cabinets.

Using a sandpaper clean the surfaces of the cabinets. After completing the sanding, clean off the dirt using a soft cloth.

  • The cabinet should be clean before primer is added to the surface.
Applying the Primer :
  • Prime the surface of the cabinet with the selected primer.
  • Apply one coat of Primer and allow it to dry.
  • Lightly apply the sandpaper to remove the grains and go for a second coating of Primer.

If a Professional painter advises you to apply thick primer for proper filling of the oak surface, then use a thick primer for the surface.

  • Do the same process for the doors of the cabinet.
Applying the Paint for the Doors and Cabinet :
  • Apply a coat of latex paint for the cabinet doors and drawers of the cabinet.
  • You can use roller or sprayer for applying the paint for the cabinets and doors.
  • After the first coating is completed, allow the paint to dry for at least one day.
  • You can apply further coats of paint if necessary, but a second coating is a must.
  • Let the coat to dry for at least one week before the doors are installed on to the cabinets.

How to Hide or Minimize the Visible Grain on Oak Cabinets

Spackling is the best process to eliminate or minimize the grain of the cabinets.

  • Using a knife apply a thin layer of sparkle to the surface of the cabinets.
  • After a few minutes of drying, using the sandpaper, sand the surface of the cabinet to leave a smooth finish to the cabinet surface.
  • After the sanding is completed, wipe away the dust using a smooth cloth.
  • After removing the dirt, only spackle will be left on the little crevices of the wood grain.
  • This process makes the surface smoother allowing the primer and paints application easier.

Conclusion

Painting oak cabinets seem simple at first, but to hide all the visible grains, your kitchen cabinets need professional hands. We at Executive Touch Painters in Toronto offer expert kitchen renovation services in which cabinet painting tops our list. Contact or Call us at (416)-410-0164 to get a Free Estimate to paint your oak cabinets today.

Categories
Home Renovations

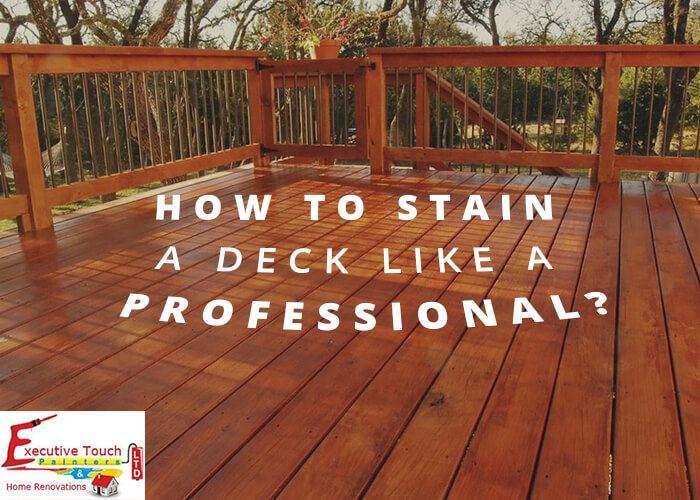
How to Stain a Deck like a Professional?

Decks are exposed to the harsh climatic conditions like heavy rains, winds, and sunlight. UV rays penetrate through the wood and damage the inner layers. So to protect the wood from damaging staining process is conducted. By staining the original beauty of the deck can be restored.

Follow These 7 Simple Steps for Staining a Deck in your House.

1. Examine the Current Condition of the Wood:

Before you start the process, check if the wood can absorb the stain or not. Conduct a simple water testing. Sprinkle water on the deck; if the wood absorbs the liquid, then the deck can be stained. If the deck does not absorb the water, then there is no need for staining at present.

2. Prepare the Deck :

After the testing process, now make sure that the deck is clean and dry. Stain applied to the wet surfaces does not go well, and cracks can form in the future. The surface of the deck should be free of dirt and debris. Clean and rinse the wood surface with water and let it dry for 2-3 days.

3. Choose the Right Stain for the Deck :

There is a full range of stains with different colors available. Choose the best from the available stains. Types of stains available for your decks

  • Wood Toned and Clear Stain
  • Semi-Transparent
  • Semi-Solid
  • Solid Stain

If you need clear and transparent view use Clear or Semi-Transparent Stains. If you need a rich and vibrant finish, then you can go for the Solid stain colors. In transparent and semi-transparent stains the grains and texture can be seen. In solid stains, the stain completely hides the wood grain while allowing very little of the wood texture to show through.

4. Have a Plan for Staining :

Always determine the starting and ending points of the staining process. Be sure that you can quickly enter and exit from the deck during the staining process. Be sure that you are not stuck in a corner while the other parts of the deck are drying.

5. Protect the walls :

Decks are attached to the exterior walls. So staining process can be complicated without touching the edges of the walls. To ensure that walls do not get stained, protect the walls with painters tape. Attach the tape to the places where the decks and walls meet.

6. Add Stain to the Tray :

Stir the stain in the container using a paint stirrer. Ensure that the stain is mixed well before the stain is applied to the deck. Pour the stain into the paint tray for starting the staining process.

7. Apply the Stain to the Deck using the Paint Pad :

Apply a solid coat of stain to the deck surface using the paint pad. If the paint pad does not cover the inside spaces, then use a paintbrush to complete the staining. Leave the stain to completely dry for 24 hours before placing your furniture on the deck.

Tips for Staining
  • Apply the stain when the temperatures are average and avoid the process in direct sunlight.
  • Do not go for staining if there is rain in the forecast.
  • Before applying the stain, test it on a small area and see if you are satisfied with the color or not.
  • If you are using different colors, ensure that they are mixed well before applying.
Conclusion

Decks are often subjected to lots of pressure and traffic from people. So it’s necessary that they are maintained correctly from time to time. Staining process should be done regularly for the exterior decks. For inspirations, ideas and Professional Painting & Home Improvement Works contact Executive Touch Painters in Toronto or Call at (416) 410-0164 Today.